2010 Repair

After some time off getting parts and courage, I am back in the saddle on the dozer repair.
I received the parts from Lavoy and I bought 8 new fiber disks for the steering clutches. If you recall, the one clutch worked and the other didn't. I assembled the two cluches at the same time. I cleaned up the steel plates and alternated new and used fiber disks on each side. Both clutches have 4 new disks and 4 old ones. At least they are matched.
I finally removed the bottom hydraulic filter assembly and tested each steel tubing for blockage. Everything was open. I did note the small 1/8" copper pressure line to the dash gauge was loose. I think that was the source of my hyd oil leak.
Thank God for the pressure washer. It takes off grease, gunk and even paint. I bought a gallon of primer and School Bus Yellow paint and I am ready to start asembling the unit back together. I hope to show pictures as I go.
I did notice the right steering handle/casting assembly has a problem. The clutch shaft has a brake casting inside that needs to be free and loose about the shaft. The left side is good, but the right side is frozen up. I am in the process of trying to free it up with time and penetrating fluid. I might have to dissassemble it in the end to get it free.
I still run an old TR-70 New Holland rotorary combine. I started it up over the weekend and the ground hog living in the threshing unit was no match for the spinning rotors. The score is Combine 1 : Ground Hog zero. I will now have meat in my soybeans for the first minute anyway.
Do you know if you look up the word "Target" in the dictionary, there is a picture of a ground hog next to it?
Mark
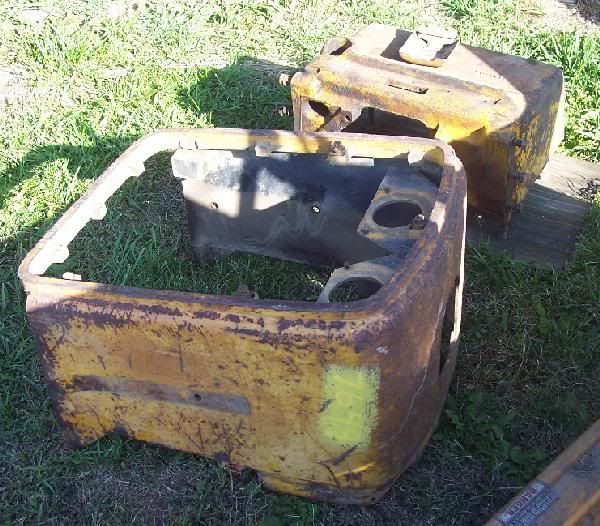
JD 2010 Crawler with Loader
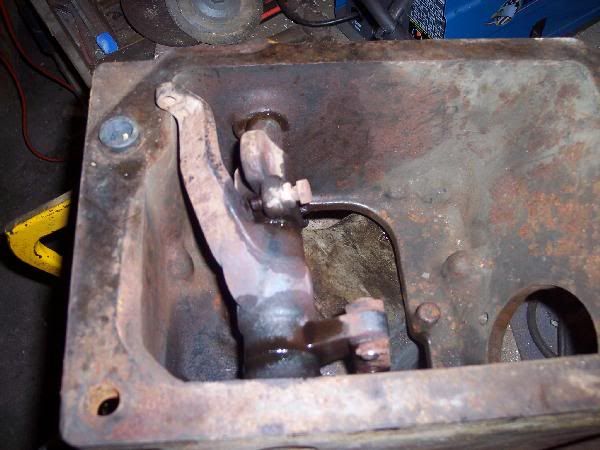
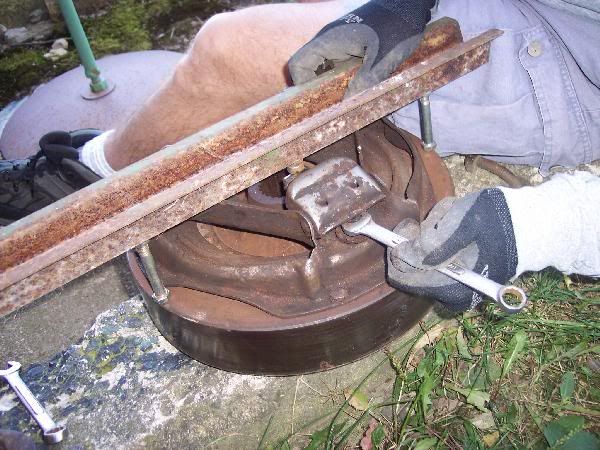
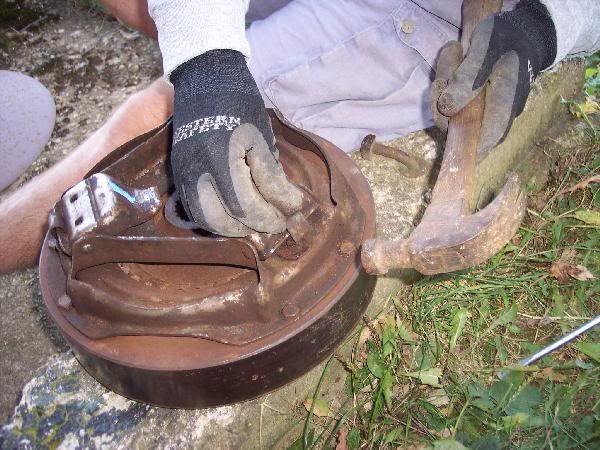
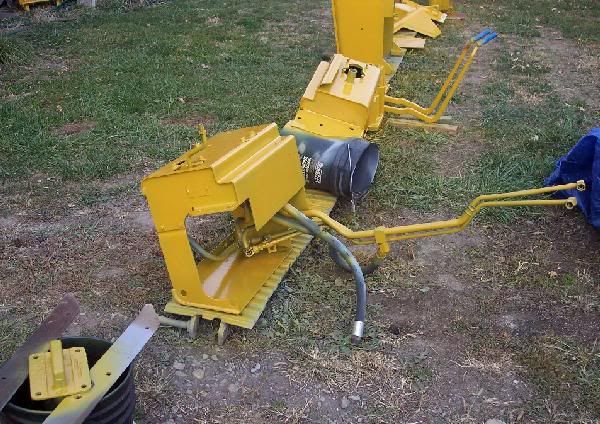
I mentioned before I found a problem with the right side steering lever and brake adjuster. The brake arm needs to rotate freely about the steering shaft. Mine was rusted tight. In the picture, the top part with the setscrew is the clutch controller and is keyed to the steering shaft. The lower arm is the brake mechanism that needs to be free moving. I heated the brake arm with a torch an added penetrating fluid and oil until it cooled. I got the brake arm to move and it finally freed up.
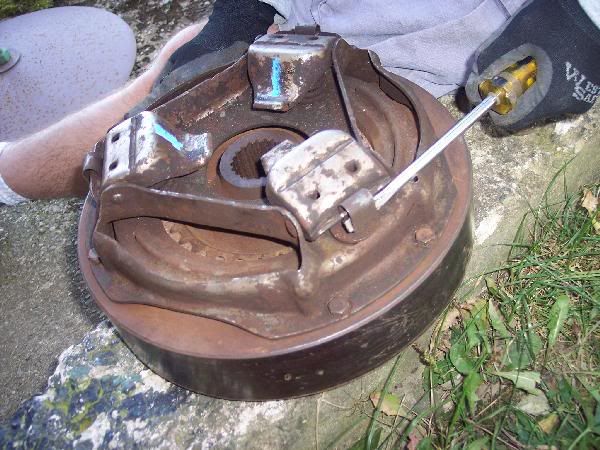
I put the clutch plates together as explained in a previous post. I torqued the six outside cap screws to about 40 ft/lb. I set the clutches each on a shop press and pushed against the old throw-out bearing and worked the clutch 10-15 times. The pressure plate lifted nice with a gap of about 1/8 inch. The three clutch pads need to be adjusted for uniform movement and same heights. A screwdriver worked well to remove the spring clip.
Unloosen the locking nut and adjust the clutch pad. The blue chalk mark on the far clutch pad shows it is done. Each one was marked when adjusted.
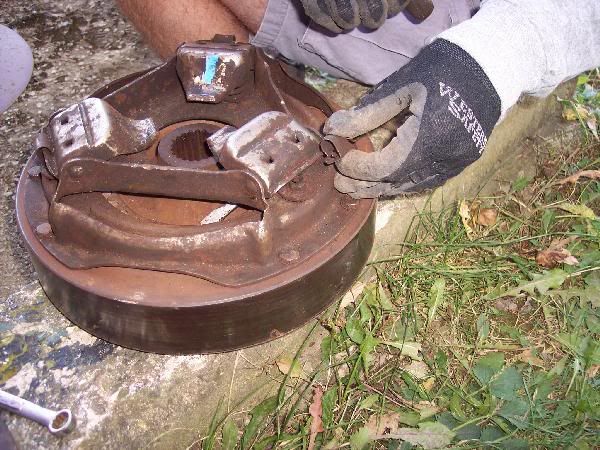
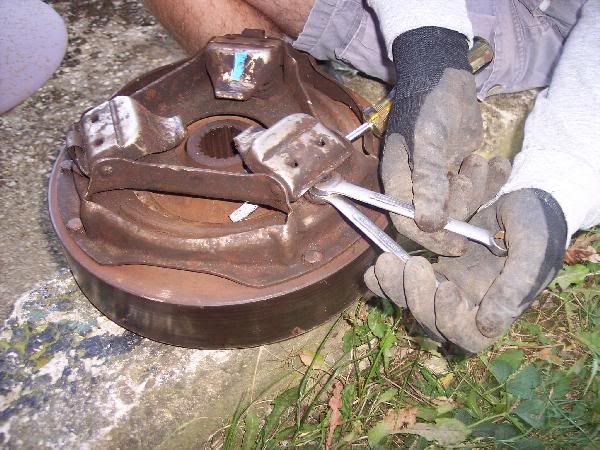
I know, I am cheap. I made my own clutch gauge out of a steel road sign post and bolts. I had one clutch that worked and was newer than the other. I also noted there was little wear on the inside plates. Before I took the good clutch apart, I made up the gauge set the way the working clutch was set. Two things are important; the clutch pads need to have enough travel to open the clutch and the three pads need to be set at the same height so the throwout bearing runs square. Note how the gauge sets flat on the outside clutch housing and the pad just touches the center pin. Adjust all three the same and it is done.
Tighten the locking nut and tap the spring clip back on with a hammer. Visually check to make sure it is on correct. The clutch is ready to install in the dozer.

I bought the new water pump bearing and seal. I removed the old seal and cleaned everything with emery cloth. I added a touch of permatex to the seal outside ring and tapped it in place using a scrap pipe the correct diameter to not hit the seal internal parts. I tapped in the new bearing shaft from the fan end until the spring clip groove was visible. I inserted the spring clip. I added a dab of oil film on the seal wear part and the impeller race.
I tapped the impeller on the end of the shaft with a brass knocker until the bearing shaft was flush with the top of the impeller. The impeller was recessed in from the flat mount (gasket) and still had about 1/8 inch clearance to the pump cast housing. It ran free without touching anything. If someone knows how far the impeller should be from the pump casting, let me know.

Here is the finished water pump showing the spring bearing clip. I left the plastic shaft protector on until I install the pulley. I'll paint it now.
JD 2010 Crawler with Loader
I am back on the dozer project starting the assemble mode.
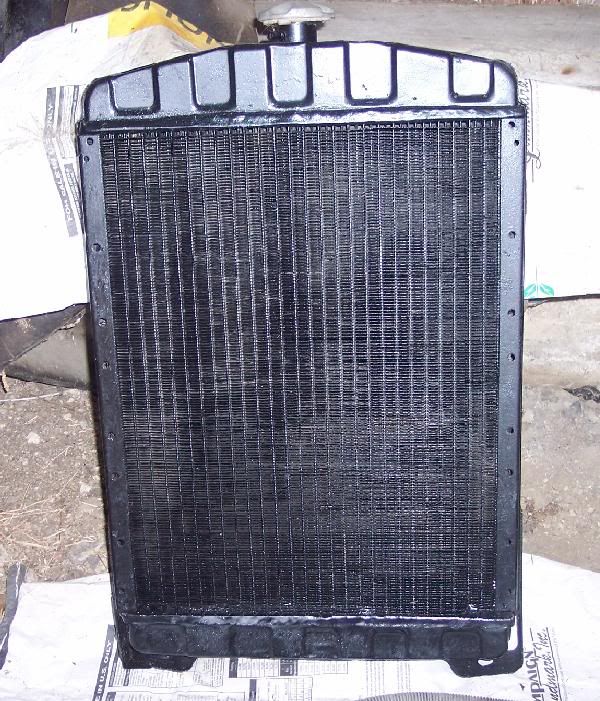
This is the radiator all squeaky clean inside and painted on the outside.
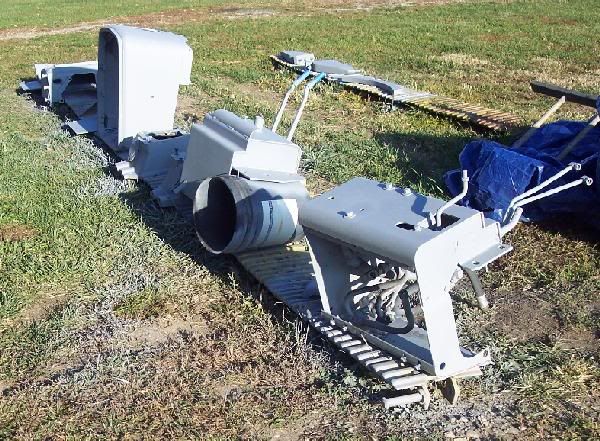
Here you can see the fan, water pump backing, air filter oil bowl, oil cooler and misc parts.
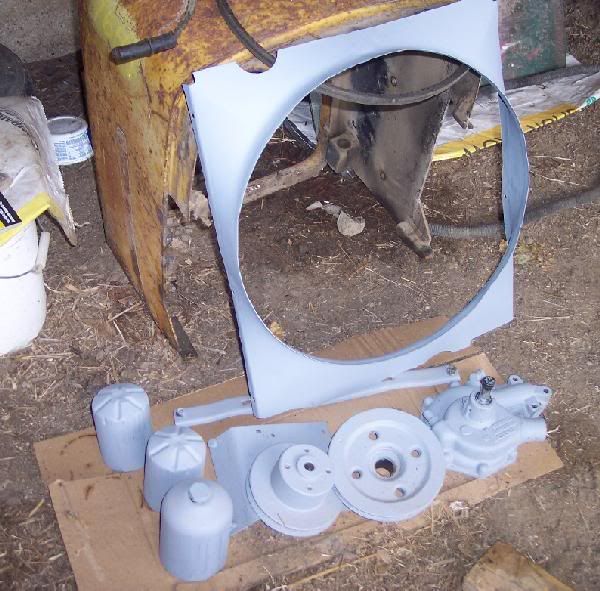
This picture includes the fan shroud, crank pulley, water pump + pulley, and oil/fuel filter canisters.
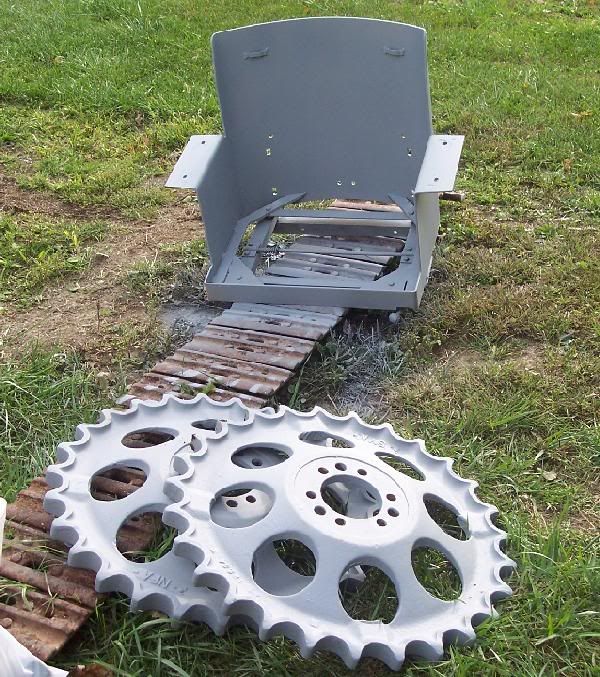
The seat looks good but missing some padding. That is OK though, the seat bottom and back is not much to talk about. Also see the rear drive sprockets.

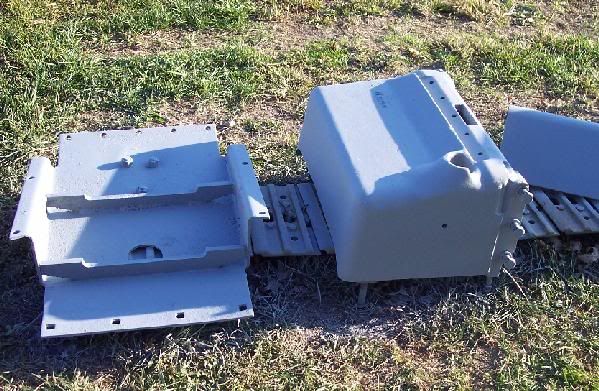
Here I have two loader brackets, the bottom hyd oil filter, the rear hub caps and the underside of the hood. Note how I left the muffler and exhaust manifold intact instead of destroying them. I just put plastic bags over them.
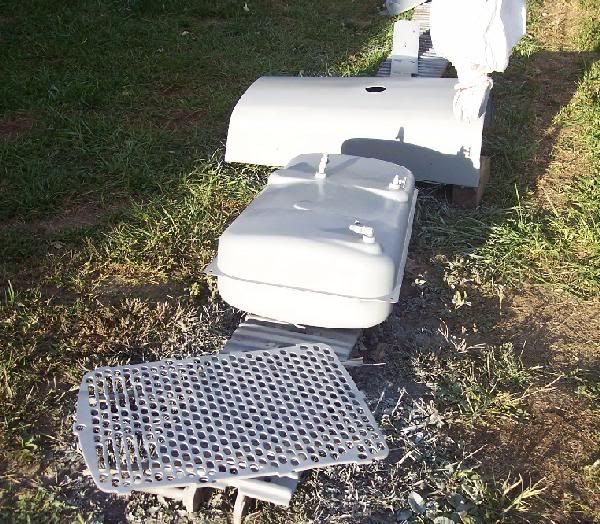
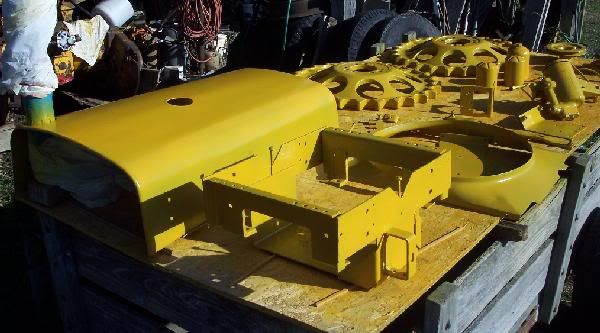
The grill, fuel tank and top of hood are all complete and primed.
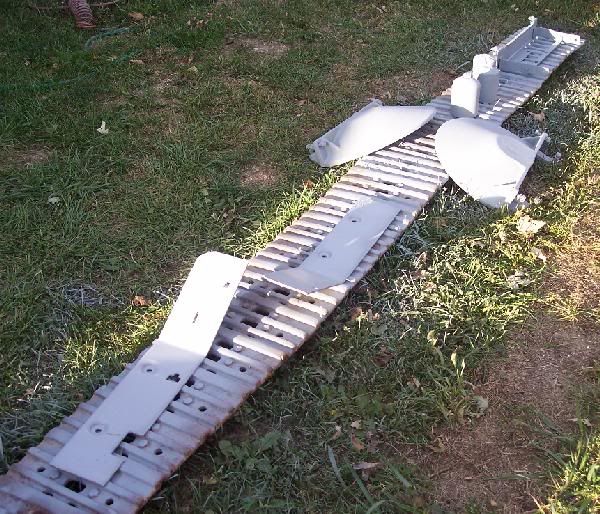
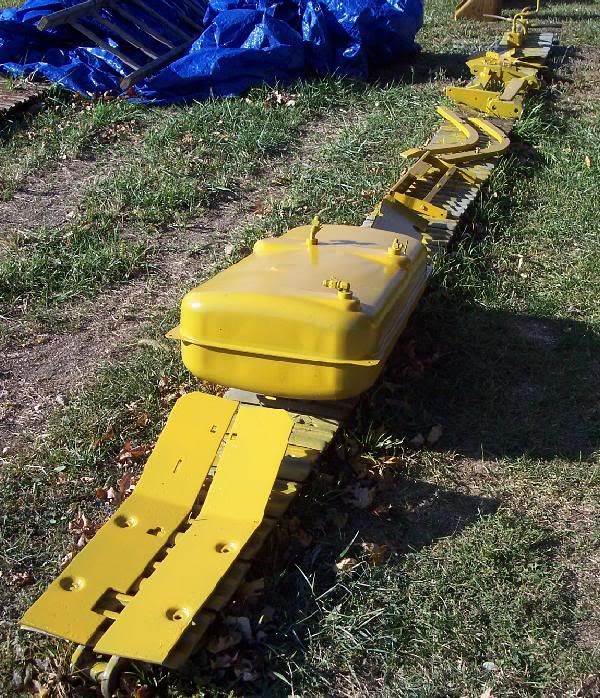
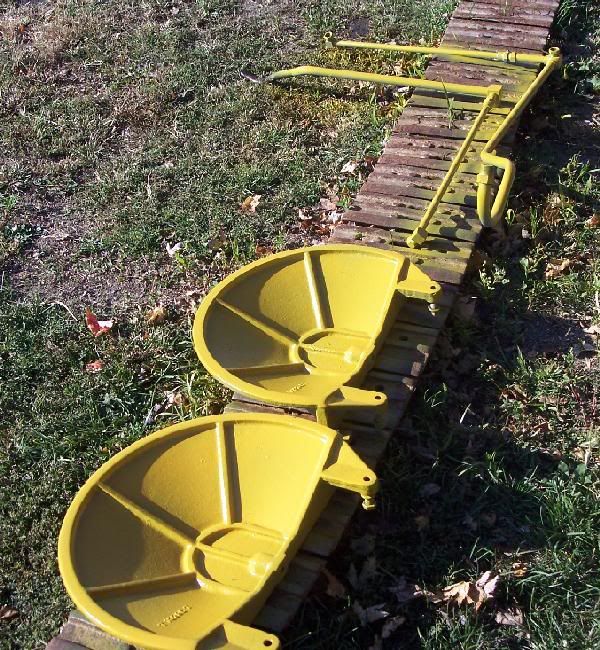
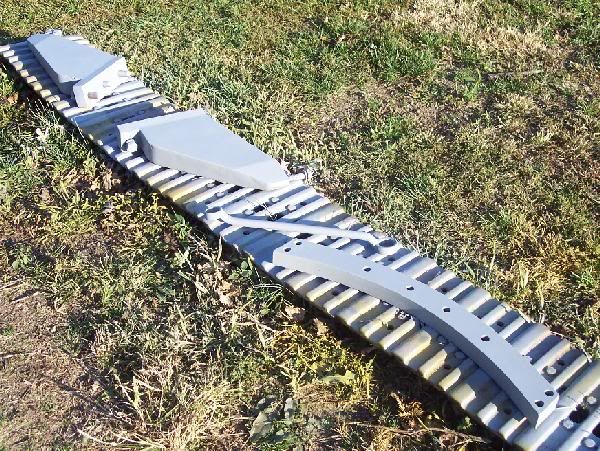
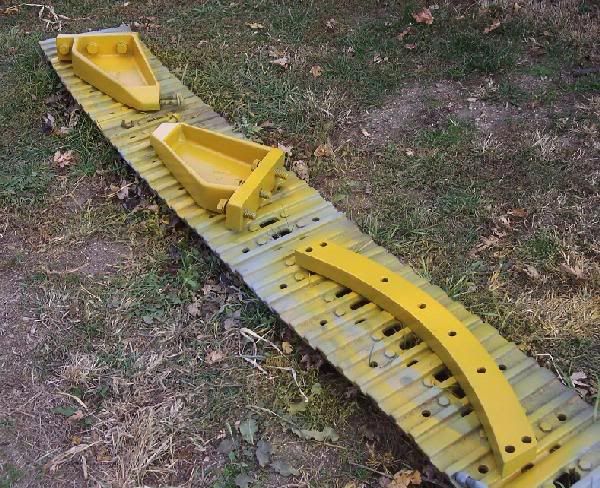
Here are the foot rests and misc parts viewed before. Flat tracks make a good workbench for spraying. I can not wait to see the same parts bright School Bus Yellow.
This is the radiator all squeaky clean inside and painted on the outside.
Here you can see the fan, water pump backing, air filter oil bowl, oil cooler and misc parts.
This picture includes the fan shroud, crank pulley, water pump + pulley, and oil/fuel filter canisters.
The seat looks good but missing some padding. That is OK though, the seat bottom and back is not much to talk about. Also see the rear drive sprockets.
Here I have two loader brackets, the bottom hyd oil filter, the rear hub caps and the underside of the hood. Note how I left the muffler and exhaust manifold intact instead of destroying them. I just put plastic bags over them.
The grill, fuel tank and top of hood are all complete and primed.
Here are the foot rests and misc parts viewed before. Flat tracks make a good workbench for spraying. I can not wait to see the same parts bright School Bus Yellow.
JD 2010 Crawler with Loader

I am back spraying yellow this time. I had to take some time off to harvest my organic soybeans and plant wheat. The beans yielded OK considering the weeds I had to content with. It just does not help matters when you get several weeks of rain right after planting. Sometimes it is hard to see the rows for all the weeds.
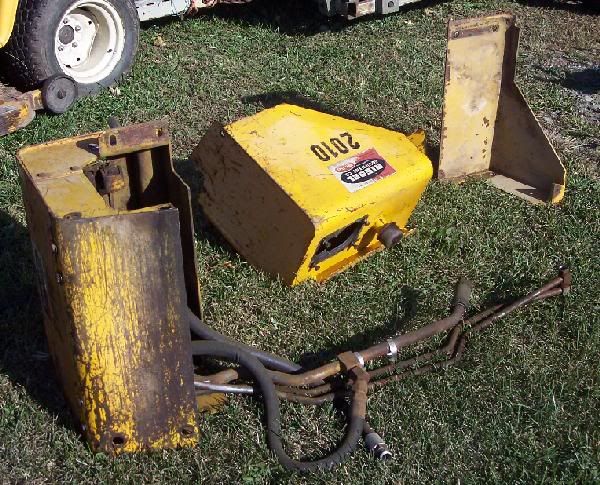
Here we have several items I think I will have to sand-blast. They are the front radiator shell and chin. The loader reservoir and hyd controls. There is a nasty label from the original equipment seller that I would like to remove. It is stuck on GOOD.
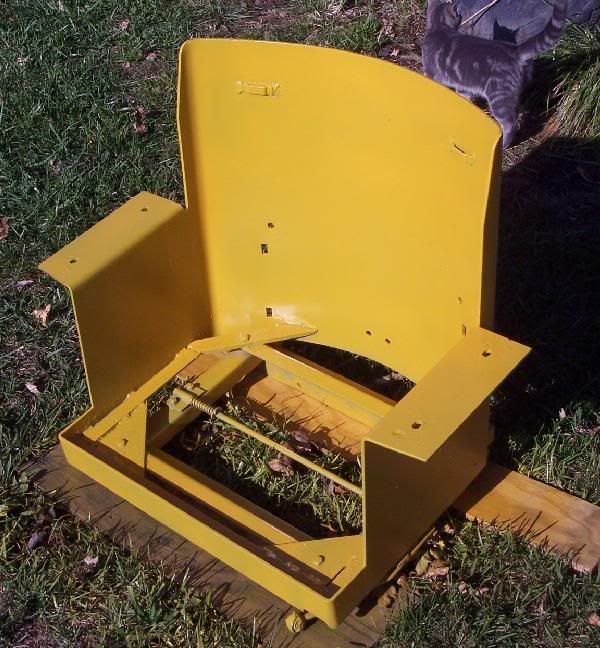
Nice yellow seat ready for some stuffins. Instead of using the original coil springs, I think I will just use thick foam-rubber instead. Start with a plywood base and build up from there. For Father's Day, my daughter and son-in-law gave me a few yards of tan material to cover the seat padding. It is getting closer to ya'll seeing my apholstery skills. I don't think the cat appreciates my color choice.
More yellow parts. Front-to-back; foot rests, fuel tank, guards, misc brackets, and the hyd oil cooler.
Hub caps and loader steel hyd lines.
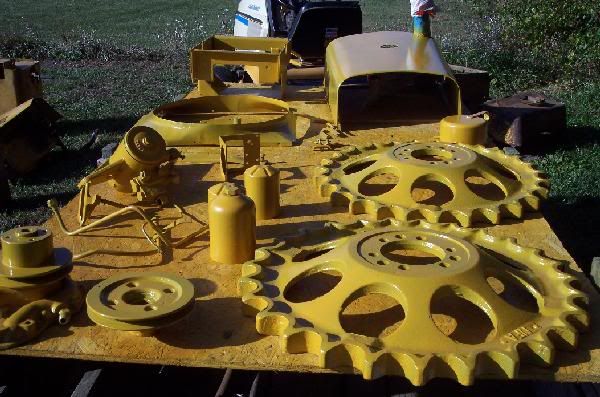
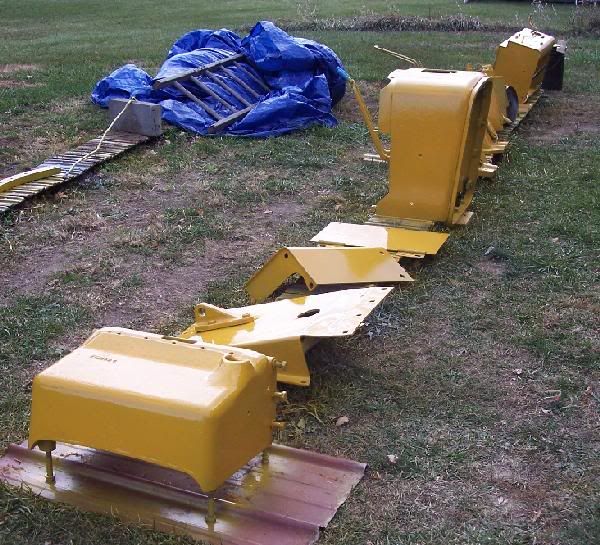
All kinds of good stuff. Rear sprockets, water pump, filter canisters, fan couling, seat base/battery box, and the hood.
There is something about fresh paint that draws bugs. It seems right after shooting the part, the bugs come in droves to stick to it.
Mark
Here we have several items I think I will have to sand-blast. They are the front radiator shell and chin. The loader reservoir and hyd controls. There is a nasty label from the original equipment seller that I would like to remove. It is stuck on GOOD.
Nice yellow seat ready for some stuffins. Instead of using the original coil springs, I think I will just use thick foam-rubber instead. Start with a plywood base and build up from there. For Father's Day, my daughter and son-in-law gave me a few yards of tan material to cover the seat padding. It is getting closer to ya'll seeing my apholstery skills. I don't think the cat appreciates my color choice.
More yellow parts. Front-to-back; foot rests, fuel tank, guards, misc brackets, and the hyd oil cooler.
Hub caps and loader steel hyd lines.
All kinds of good stuff. Rear sprockets, water pump, filter canisters, fan couling, seat base/battery box, and the hood.
There is something about fresh paint that draws bugs. It seems right after shooting the part, the bugs come in droves to stick to it.
Mark
JD 2010 Crawler with Loader
More stuff got primer gray put on. I better get this project along because colder weather is around the corner and it is not fun working on a dozer with a foot of snow covering it. Remember, I have an open shed to work in.
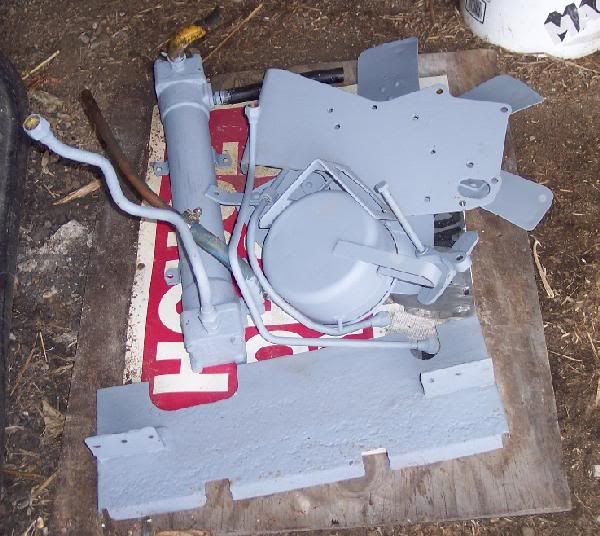
Here are the loader reservoir and controls. The radiator shell and the steering clutch handles half hidden.
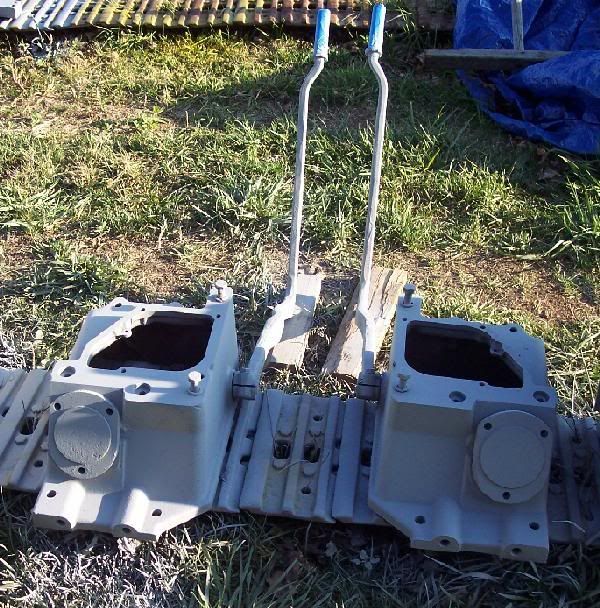
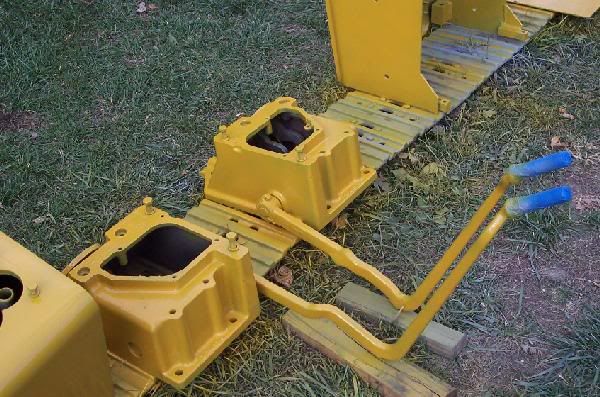
Here they are. The steering clutch handles in all their gray glory. The blue tips are wrapped with painting tape.
Front chin and front belly plate.
Draw bar peices and the handy dandy eBay wrench I had to buy just for the rear hard-to-reach dozer bolts.
Here comes the yellow, The front chin, belly plate, side panels and radiator shell.
Loader parts.
Steering clutch handles.
And the rear draw bar assembly.
I have about 1/3 gallon left of the first can of yellow paint. I better stock up on the next gallon.
I think my generator and starter are done. My mistake, I told the guy I was not in a hurry for them. Now, three months later, they shoud be done. He said the starter needed bushings in them. I also ordered a 3/4 inch steel ferrule hyd fitting with a crip-on end for hose. This will repair the broken loader line to the tilt cylinders.
Mark
Here are the loader reservoir and controls. The radiator shell and the steering clutch handles half hidden.
Here they are. The steering clutch handles in all their gray glory. The blue tips are wrapped with painting tape.
Front chin and front belly plate.
Draw bar peices and the handy dandy eBay wrench I had to buy just for the rear hard-to-reach dozer bolts.
Here comes the yellow, The front chin, belly plate, side panels and radiator shell.
Loader parts.
Steering clutch handles.
And the rear draw bar assembly.
I have about 1/3 gallon left of the first can of yellow paint. I better stock up on the next gallon.
I think my generator and starter are done. My mistake, I told the guy I was not in a hurry for them. Now, three months later, they shoud be done. He said the starter needed bushings in them. I also ordered a 3/4 inch steel ferrule hyd fitting with a crip-on end for hose. This will repair the broken loader line to the tilt cylinders.
Mark
JD 2010 Crawler with Loader
Unless your steering levers have no slop in the housings, this would be a good time to replace the bushings. They are cheap and will add a good deal of control in steering and in adjusting your clutches.
JD440-ICD loader; JD440-IC bulldozer; JD440-ICD backhoe; JD440-I backhoe; JD440-I tractor; + five recumbent JD440-ICs
-
Stan Disbrow

- 350 crawler

- Posts: 2898
- Joined: Fri Jul 15, 2005 3:13 pm
- Location: Raleigh, NC
Hi,
I *love* the tracks as a paint bench!
It's a great idea. It holds stuff off the ground and you can put as much paint on the pads as you like. It won't stay there for long no matter how much is used!
later!
Stan
I *love* the tracks as a paint bench!
It's a great idea. It holds stuff off the ground and you can put as much paint on the pads as you like. It won't stay there for long no matter how much is used!
later!
Stan
There's No Such Thing As A Cheap Crawler!
Useta Have: '58 JD 420c 5-roller w/62 inside blade
Useta Have: '78 JD350C w/6310 outside blade
Useta Have: '68 JD350, '51 Terratrac GT-25
Have: 1950 M, 2005 x495, 2008 5103 (now known as 5045D)
Useta Have: '58 JD 420c 5-roller w/62 inside blade
Useta Have: '78 JD350C w/6310 outside blade
Useta Have: '68 JD350, '51 Terratrac GT-25
Have: 1950 M, 2005 x495, 2008 5103 (now known as 5045D)
I think ther control arms have little slop in them. I will check tonight. Good advice, though, since they are about as handy to get to as they will ever get.
The tracks do come in handy as a paint bench. I am not sure what color to paint them at the end, but right now they are mottled gray, yellow, iron oxide, and clean steel. The main problem is the grass sticks through and I have to tear blades off to keep from sticking to the paint. I am still getting a good dose of bugs stuck too. That is OK, I am sacificing some time on this project, they are sacrificing their lives.
Mark
JD 2010 Crawler with Loader
-
JD440ICD2006
- 350 crawler
- Posts: 1113
- Joined: Tue Aug 22, 2006 3:57 pm
- Location: South Carolina
Looking good, really enjoy the picture updates and progress reports.
The grass and bugs will be gone soon, but then you may not want to be outside painting either.
The grass and bugs will be gone soon, but then you may not want to be outside painting either.
1959 JD 440ICD w/64 Power Angle Tilt Blade
1959 JD 440ICD w/63 Manual Angle Blade
1959 JD 440IC w/602 Manual Angle Blade
1959 JD 730D W SE (many options)
1950 JD M S w/M-20 Mower
1952 JD M W
1955 FORD 640 (burns the most fuel)
1959 JD 440ICD w/63 Manual Angle Blade
1959 JD 440IC w/602 Manual Angle Blade
1959 JD 730D W SE (many options)
1950 JD M S w/M-20 Mower
1952 JD M W
1955 FORD 640 (burns the most fuel)
HELP! I need some suggestion on how to drop the right clutch in the housing. Let me share some of the pictures first.
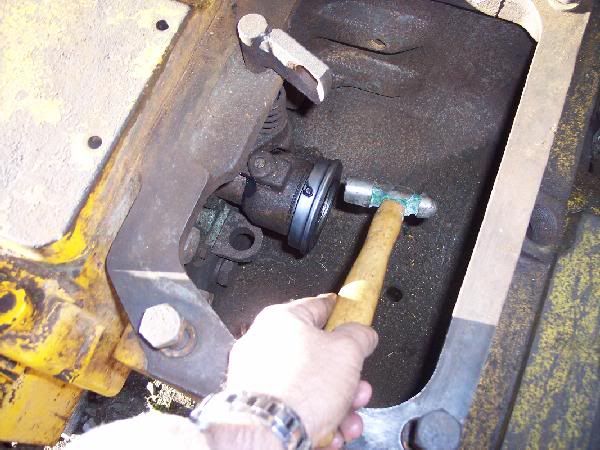
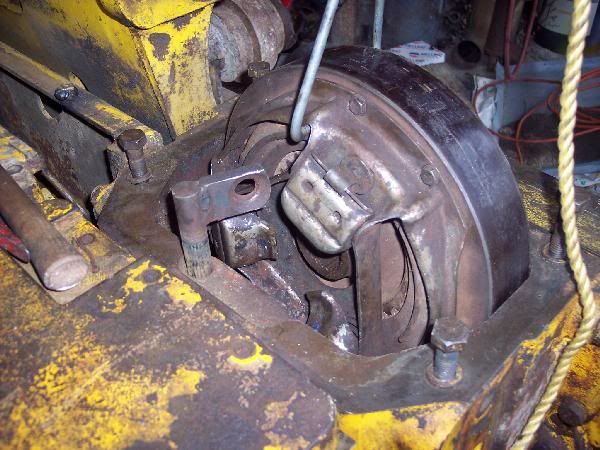
This is a picture of installing the new throw-out bearings. The new bearings have grease zirks on them, so I juiced them up for the new ride. I also worked the clutch arm back n forth and put a nice layer of grease on the slide collar. The bearing taped in real easy on the collar.
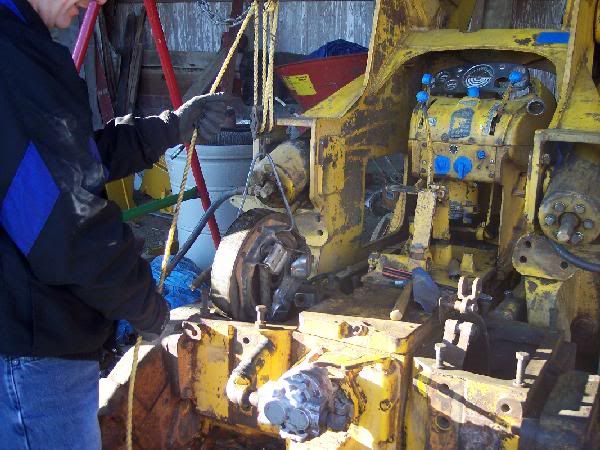
I used the kids swingset for the rope pulley and lowered the clutch in the housing. I am not sure what we did, but it dropped in real easy. The other side is a challenge.
After the clutch was in the hole, we fed the brake lining under. I cleaned up the splines of the driveshaft with a wire brush and brushed some motor oil on them. They slide in the bull gear rear easy.
The right side has been real diffucult. The clutch arm needs to pop over the clutch assembly, but is just so tight. I could convince it with a sledge hammer, but I do not want to break anything. Any suggestions? Does the three clutch pads need to be in any special orientation? Do I pull the clutch control arm? I am afraid the sping inside would pop and I would be on more deep dodo in the end. HELP!!!
You can see I have been sanding and taping parts off in preparation for more spray paint.
This is a picture of installing the new throw-out bearings. The new bearings have grease zirks on them, so I juiced them up for the new ride. I also worked the clutch arm back n forth and put a nice layer of grease on the slide collar. The bearing taped in real easy on the collar.
I used the kids swingset for the rope pulley and lowered the clutch in the housing. I am not sure what we did, but it dropped in real easy. The other side is a challenge.
After the clutch was in the hole, we fed the brake lining under. I cleaned up the splines of the driveshaft with a wire brush and brushed some motor oil on them. They slide in the bull gear rear easy.
The right side has been real diffucult. The clutch arm needs to pop over the clutch assembly, but is just so tight. I could convince it with a sledge hammer, but I do not want to break anything. Any suggestions? Does the three clutch pads need to be in any special orientation? Do I pull the clutch control arm? I am afraid the sping inside would pop and I would be on more deep dodo in the end. HELP!!!
You can see I have been sanding and taping parts off in preparation for more spray paint.
JD 2010 Crawler with Loader
I asked the question on the forum for HELP to install the steering clutch. No one stepped up with any suggestions, so either I am the only person with this problem, or I baffled everyone out there. That is OK, I took matters into my own hands.
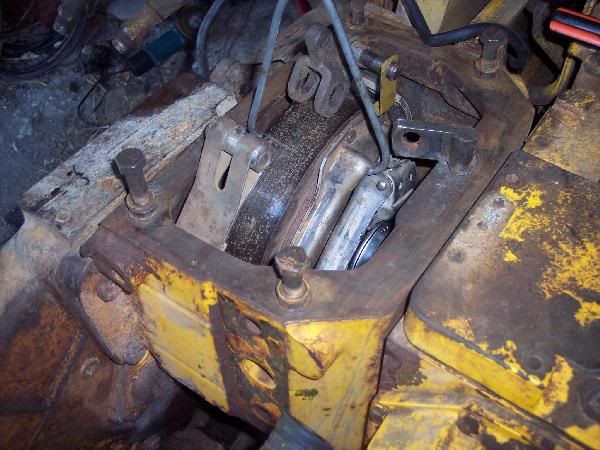
Here was the problem. I tried to drop the clutch in the hole, but between the throw-out bearing and the clutch control rod, there was not enough room to slip by. Note how the clutch bracket is wedged against the control rod.
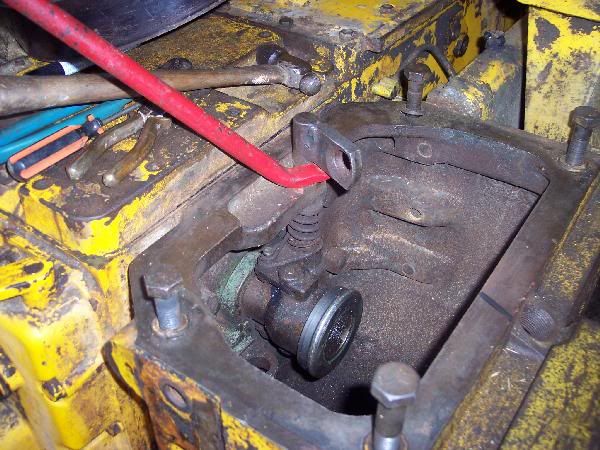
There are two cotterpins to remove. One right under the casting and another between the spring and throw-out fork. Pull them and pop the spring off the peg and the control rod pulled up out of the spline with a pry-bar. Before I did this though, I marked the orientation of the control rod wing so I would install it back in the same place (see the felt-pen mark on the other side of the casting). Smart, ain't I?
Once the control rod was lifted about two inches, it allowed the clutch bracket to pass and drop in the hole. I tapped the control rod back down and inserted the cotterpins. Flipped the spring hook over the fork post, then fed the brake band around the clutch.
I inserted the driveshaft into the bull gear and it locked into the drive mechanism just peachy. Rotating the one clutch drum also turned the other steering clutch the same. They were locked together.
I opened the finals drain plugs and drained the old 80 wt oil out of them. It looked brown like mud. The one side had about 2 quarts of something and the other had about 1/2 that. The book states the gear boxes take 2 quarts of 80 wt. While I had the side bearing caps off, it was easy to pour the 80 wt oil in the open hole. I opened the upper level plug and made sure the level of lubricant was up to the hole. It was.
Here was the problem. I tried to drop the clutch in the hole, but between the throw-out bearing and the clutch control rod, there was not enough room to slip by. Note how the clutch bracket is wedged against the control rod.
There are two cotterpins to remove. One right under the casting and another between the spring and throw-out fork. Pull them and pop the spring off the peg and the control rod pulled up out of the spline with a pry-bar. Before I did this though, I marked the orientation of the control rod wing so I would install it back in the same place (see the felt-pen mark on the other side of the casting). Smart, ain't I?
Once the control rod was lifted about two inches, it allowed the clutch bracket to pass and drop in the hole. I tapped the control rod back down and inserted the cotterpins. Flipped the spring hook over the fork post, then fed the brake band around the clutch.
I inserted the driveshaft into the bull gear and it locked into the drive mechanism just peachy. Rotating the one clutch drum also turned the other steering clutch the same. They were locked together.
I opened the finals drain plugs and drained the old 80 wt oil out of them. It looked brown like mud. The one side had about 2 quarts of something and the other had about 1/2 that. The book states the gear boxes take 2 quarts of 80 wt. While I had the side bearing caps off, it was easy to pour the 80 wt oil in the open hole. I opened the upper level plug and made sure the level of lubricant was up to the hole. It was.
JD 2010 Crawler with Loader
It has been below freezing for most of the month of December (unseasonal) and just too cold to work on the dozer in an open barn. Then we got a bit of warmer weather in the 40's and 50's, so I decided to work on the dozer repair project more.
It has baffled me why the axles of the dozer have not just slipped together into the bull gear assembly like it came apart. Normally taking apart is harder then putting back together. The clutches have been rebuilt, but then it seemd the pilot nipple of the drive shaft did not fit into the shaft powering the finals within the clutch. Then I had one of those "I Got It" experiences that came in a dream. Or maybe it was a brain fart. Whatever the case, I figured out the problem.
I remembered when you install a manual transmission in a car or truck, you have to make sure the clutch plate is centered on the pilot hole in the flywheel, otherwise the tranny will not slip into position.
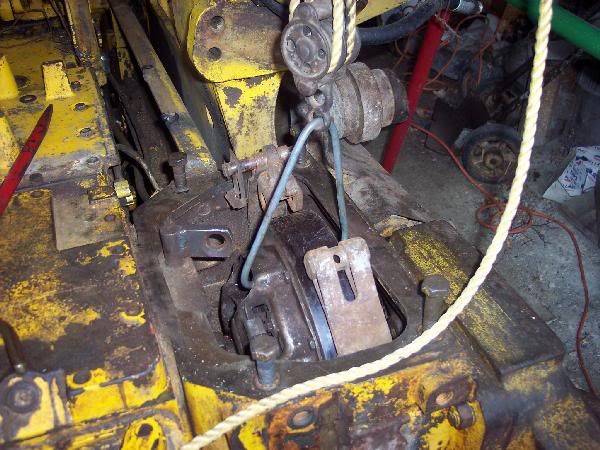
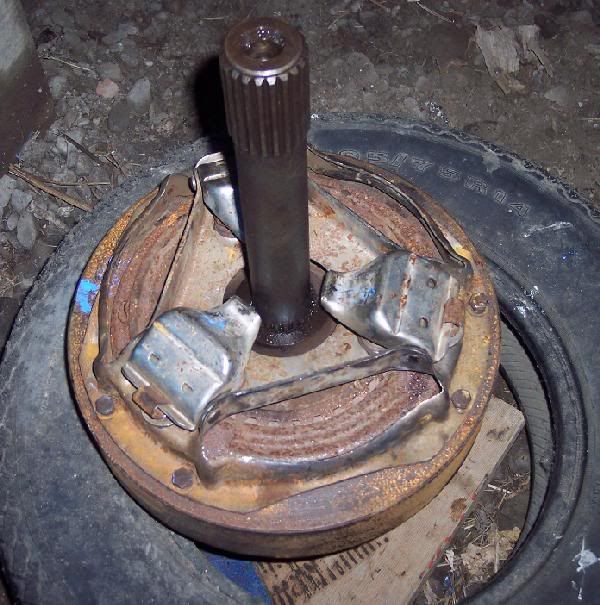
I pulled the steering clutches again and positioned them upright on the final drive shaft inside a tire for balance.
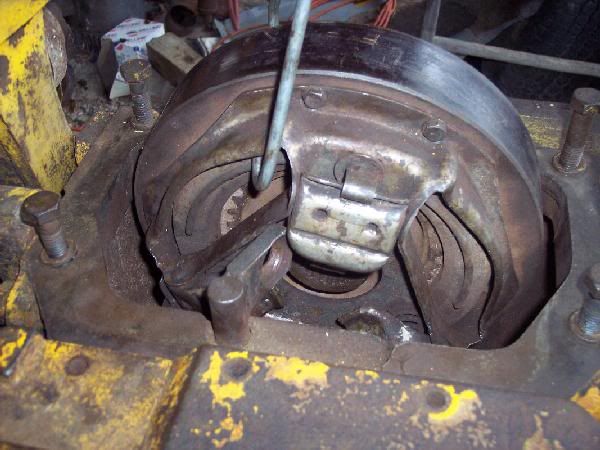
This is a picture of the clutch with the final shaft inserted. See the center pilot bearing of the final drive axle. Before I inserted the final drive, I made sure the two shafts fit together with the nipple end inside the bearing nice an easy. A little grease helped it.
Now I loosened the six outer capscrews holding the pressure plate assembly so the stacked disks can move sideways. I inserted the drive shaft and wiggled it back n forth in all directions until the pilot nipple slipped in the bearing. After the nipple slipped in, I pulled the axle and inserted several times and wiggled more until I was certain they were alligned as well as could be.
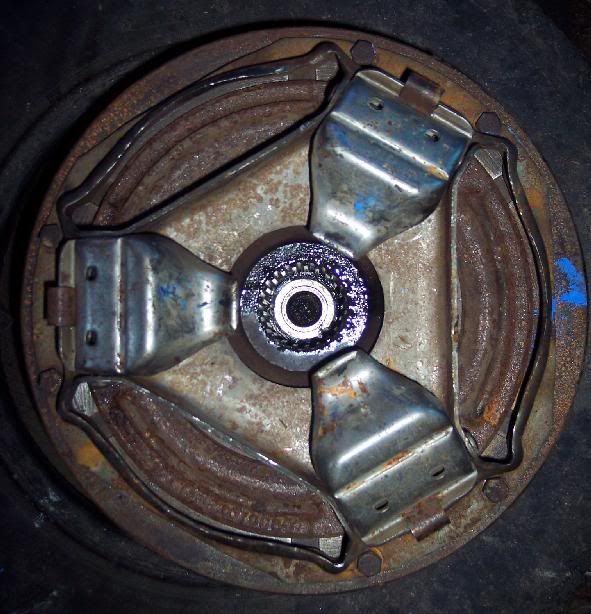
This picture shows the drive axle inserted in the clutch assembly. Note how the bottom spline slid completely in the center clutch star casting. I tightened the six outer capscrews a little at a time until tight. I made sure the shafts meshed easy at the end too. I even pulled the drive axle, rotated 90 degrees and inserted to make sure the orientation was not a factor. I did it again after a few more rotations and the pilots meshed nice and easy. BINGO, the clutch was centerized.
I reinstalled the steering clutches and all the shafts inserted like clockwork. The one clutch had a steel band in the middle. The other clutch did not. Instead it had the locking ring with the allen setscrew within the pilot nipple. This locked the center clutch star assembly inplace and not letting it walk out of the clutch disks. I even rotated the bull gear with a bar and it moved easy all the way to the track sprocket hub.
Now I can sleep easy.
It has baffled me why the axles of the dozer have not just slipped together into the bull gear assembly like it came apart. Normally taking apart is harder then putting back together. The clutches have been rebuilt, but then it seemd the pilot nipple of the drive shaft did not fit into the shaft powering the finals within the clutch. Then I had one of those "I Got It" experiences that came in a dream. Or maybe it was a brain fart. Whatever the case, I figured out the problem.
I remembered when you install a manual transmission in a car or truck, you have to make sure the clutch plate is centered on the pilot hole in the flywheel, otherwise the tranny will not slip into position.
I pulled the steering clutches again and positioned them upright on the final drive shaft inside a tire for balance.
This is a picture of the clutch with the final shaft inserted. See the center pilot bearing of the final drive axle. Before I inserted the final drive, I made sure the two shafts fit together with the nipple end inside the bearing nice an easy. A little grease helped it.
Now I loosened the six outer capscrews holding the pressure plate assembly so the stacked disks can move sideways. I inserted the drive shaft and wiggled it back n forth in all directions until the pilot nipple slipped in the bearing. After the nipple slipped in, I pulled the axle and inserted several times and wiggled more until I was certain they were alligned as well as could be.
This picture shows the drive axle inserted in the clutch assembly. Note how the bottom spline slid completely in the center clutch star casting. I tightened the six outer capscrews a little at a time until tight. I made sure the shafts meshed easy at the end too. I even pulled the drive axle, rotated 90 degrees and inserted to make sure the orientation was not a factor. I did it again after a few more rotations and the pilots meshed nice and easy. BINGO, the clutch was centerized.
I reinstalled the steering clutches and all the shafts inserted like clockwork. The one clutch had a steel band in the middle. The other clutch did not. Instead it had the locking ring with the allen setscrew within the pilot nipple. This locked the center clutch star assembly inplace and not letting it walk out of the clutch disks. I even rotated the bull gear with a bar and it moved easy all the way to the track sprocket hub.
Now I can sleep easy.
JD 2010 Crawler with Loader
Who is online
Users browsing this forum: Google [Bot] and 132 guests