Show us pictures of your JD crawler and attachments.
-
gus
- 2010 crawler

- Posts: 699
- Joined: Mon Jul 16, 2007 11:55 am
- Location: North West
-
Contact:
Post
by gus » Sun Dec 11, 2011 3:11 pm
-
gus
- 2010 crawler
- Posts: 699
- Joined: Mon Jul 16, 2007 11:55 am
- Location: North West
-
Contact:
Post
by gus » Sun Dec 11, 2011 7:44 pm
ralph newman wrote:i don,t see the brake return spring? ralph newman
Nope, it's not there yet. Most of the pins aren't cottered yet either. I'm waiting for the new snap rings.

That's also why the brake bands aren't in and connected.

-
whiteclipse16
- 2010 crawler
- Posts: 622
- Joined: Tue Mar 30, 2010 8:02 am
- Location: Steubenville, OH
Post
by whiteclipse16 » Mon Dec 12, 2011 7:27 am
Tons of awesome pictures Gus.
I ran into the same thing with the quills in your part 2 thread.
I can't wait to get more paint on mine, but that probably won't happen until the weather gets better in the spring.
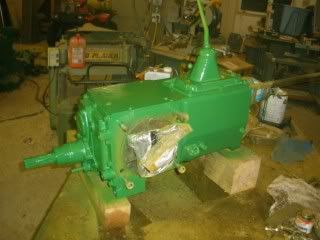
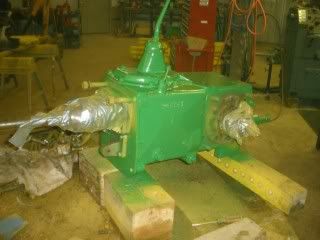
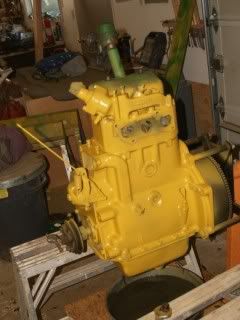
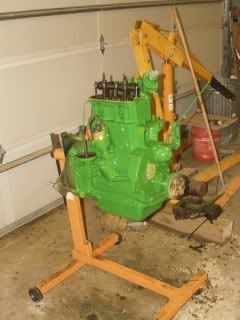
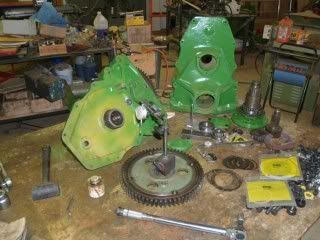
What is the yellow inside the steering clutch housings? Is that just primer or something else.
Ben
Great Grandpa's 1960 440ICD 602 blade
Between SN's: 455,633 - 456,801
Currently Rebuilding/Restoring
-
gus
- 2010 crawler
- Posts: 699
- Joined: Mon Jul 16, 2007 11:55 am
- Location: North West
-
Contact:
Post
by gus » Mon Dec 12, 2011 12:05 pm
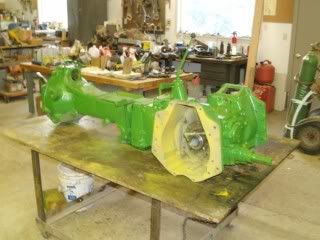
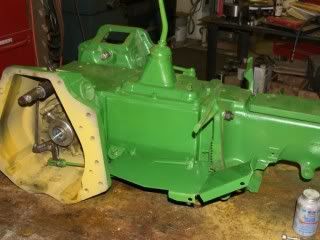
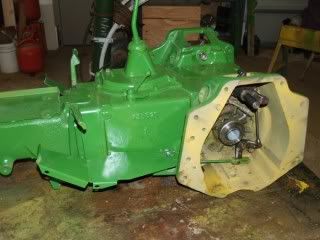
What is the yellow inside the steering clutch housings? Is that just primer or something else.[/quote]
Just primer, I didn't bother painting in there. There wasn't much for rust on the dry side and the blasting took off any rust on the wet side. I figured a light primer coat would keep it clean enough since both sides would be dry. I will not put it in water like the last owner...probably won't use it to clear heavy brush like he did either. That's how he broke the case.
-
440 iron popper
- 1010 crawler

- Posts: 273
- Joined: Sun Sep 26, 2010 7:48 pm
- Location: Québec, Canada
Post
by 440 iron popper » Mon Dec 12, 2011 4:41 pm
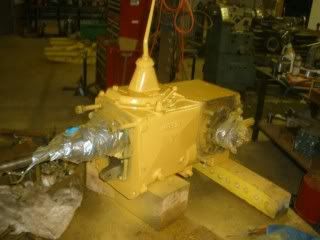
I saw that big weld on the transmission... Were you able to save the case or you did hunt for a ''new'' one?
440IC 1958 #443712, 602 blade, Gearmatic winch project in the back
440IC, serial tag gone, Blade with tilt
-------------------------------------------------------
-
gus
- 2010 crawler
- Posts: 699
- Joined: Mon Jul 16, 2007 11:55 am
- Location: North West
-
Contact:
Post
by gus » Mon Dec 12, 2011 6:19 pm
440 iron popper wrote:I saw that big weld on the transmission... Were you able to save the case or you did hunt for a ''new'' one?
New case, I wouldn't even consider using something like that. It was broken completely around. Even if it could be welded, what's the chances of it being true enough to hold bearings?
-
gus
- 2010 crawler
- Posts: 699
- Joined: Mon Jul 16, 2007 11:55 am
- Location: North West
-
Contact:
Post
by gus » Mon Dec 12, 2011 6:26 pm
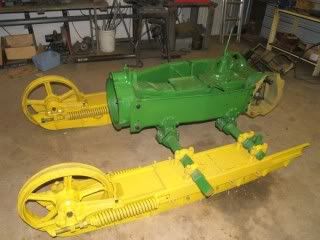
Front idler work. Replaced bearings and shaft. I scrounged up 4 good seals too!!

Actually, I found 2 very good rollers and robbed all the parts to fix the idlers.
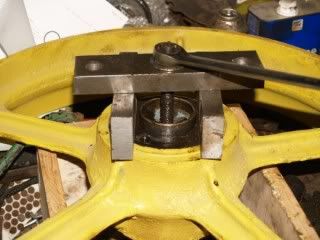
Pulling old bearings, reversed this to put replacements back in. I just used a threaded rod and a custom plug on the other end.
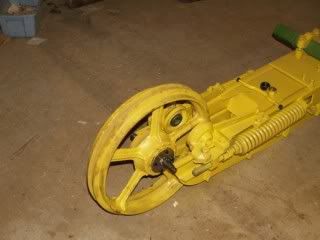
Front idlers ready to go in and second photo is with them on.

-
gus
- 2010 crawler
- Posts: 699
- Joined: Mon Jul 16, 2007 11:55 am
- Location: North West
-
Contact:
Post
by gus » Tue Dec 13, 2011 7:35 pm
-
FL450B
- 430 crawler

- Posts: 55
- Joined: Thu Oct 30, 2008 7:38 am
- Location: ALEXANDRIA N.H
Post
by FL450B » Tue Dec 13, 2011 9:22 pm
nice job gus looking great thanks for the pictures
-
gus
- 2010 crawler
- Posts: 699
- Joined: Mon Jul 16, 2007 11:55 am
- Location: North West
-
Contact:
Post
by gus » Mon Dec 19, 2011 11:24 am
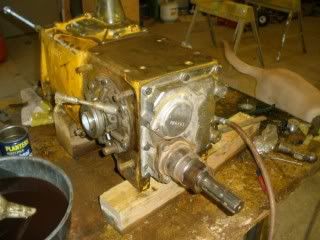
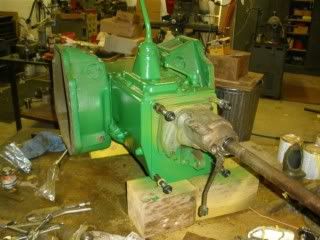
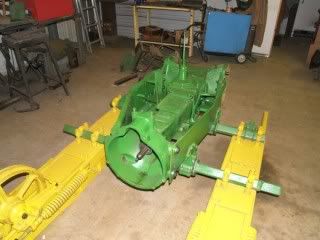
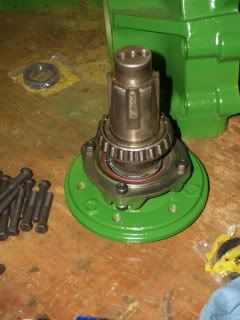
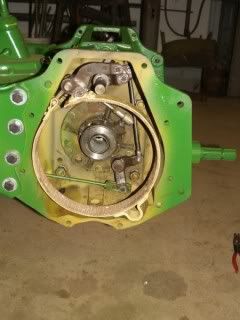
Nearing the end of "the big iron" parts to go on. I hung some iron yesterday and I'm getting ready to assemble the last big parts.

Getting ready for the next parts....
Bearing is not pressed on yet but the seal is on. Note temporary nuts on the bolts...to prevent some thing getting out of place

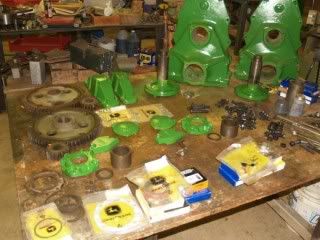
All the parts...
-
Paul Buhler
- 350 crawler

- Posts: 991
- Joined: Wed May 21, 2008 6:25 pm
- Location: Killington, VT
Post
by Paul Buhler » Mon Dec 19, 2011 2:28 pm
Beautiful work. When you say "recently rebuilt" you are setting an exemplary standard. Thanks for sharing your project. Happy holidays - maybe Santa will get you some new decals.
Paul Buhler
Killington, VT
420c 5 roll with 62 blade, FOPS, and Gearmatic 8a winch
-
Lu47Dan
- 1010 crawler
- Posts: 401
- Joined: Mon Feb 11, 2008 3:17 pm
- Location: NWPa
Post
by Lu47Dan » Mon Dec 19, 2011 8:51 pm
Nice work, Gus.
I hope to start on mine again this year.
Dan.
1956 420C with GSC blade
Tools are to men as shoes are to women , you can never have too many !!
Used diesel engines are an adventure any way you look at them !!
-
roadbuilder
- 440 crawler

- Posts: 100
- Joined: Mon Mar 09, 2009 5:25 pm
- Location: Allegany, Oregon
Post
by roadbuilder » Tue Dec 27, 2011 11:54 am
Very nice work Gus!
If it's worth doin', it's worth doin' right.
-
gus
- 2010 crawler
- Posts: 699
- Joined: Mon Jul 16, 2007 11:55 am
- Location: North West
-
Contact:
Post
by gus » Thu Dec 29, 2011 8:36 pm
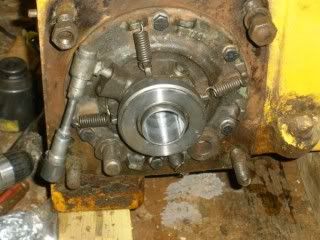
This is what i used to set depth on the axle bearings. I used a heavy wall tube that fit over the axle and right on the bearing. It was to long, which is what I wanted, and then I made a stop block (short aluminum part) to take up the space and give me the exact setting. The long block was on top and the press went down on it. shown with one bearing in place.

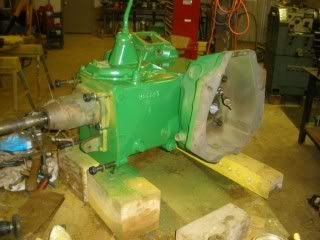
This is one final with the gears in and preloaded.
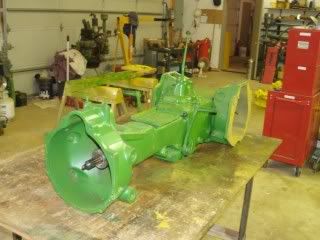
Both finals together and the new clutches installed.
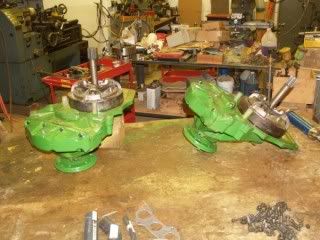
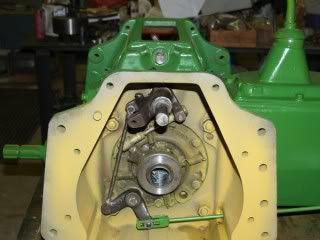
The clutch housing buttoned up and ready for a final to go on.....tomorrow...
-
jdlou
- 40C crawler

- Posts: 21
- Joined: Sat Oct 09, 2010 1:31 pm
- Location: Imperial, MO
Post
by jdlou » Fri Dec 30, 2011 5:43 pm
Thanks Gus for all the pictures and walkthru!!!!

jdlou(:
Who is online
Users browsing this forum: No registered users and 16 guests