1010CA Rebuild Project Part XI

Show us pictures of your JD crawler and attachments.
Post Reply
User avatar
wwattson
1010 crawler
1010 crawler
Posts: 499
Joined: Mon Aug 07, 2006 9:12 pm
Location: West Bend, WI

1010CA Rebuild Project Part XI

Post by wwattson » Sun Jun 10, 2007 9:34 pm

Things are starting to go back together pretty quickly now. I got held up for a few weeks on a couple of parts/planning issues but things are back on track. I was sort of working it from the back to the front but ran into a problem with the front being too light with just one of the finals mounted so I decided to go ahead and hang the engine even though I hadn't mounted either the radiator or hydraulic pump.

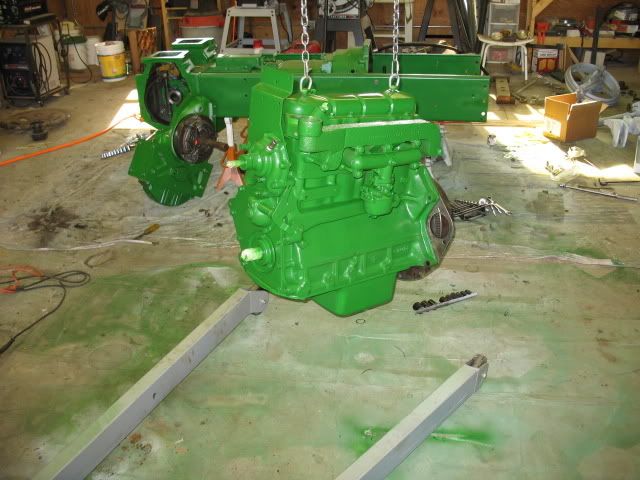
This first picture is the left side of the engine mostly assembled and ready to go on. Pretty compared to what it looked like coming off.

Image

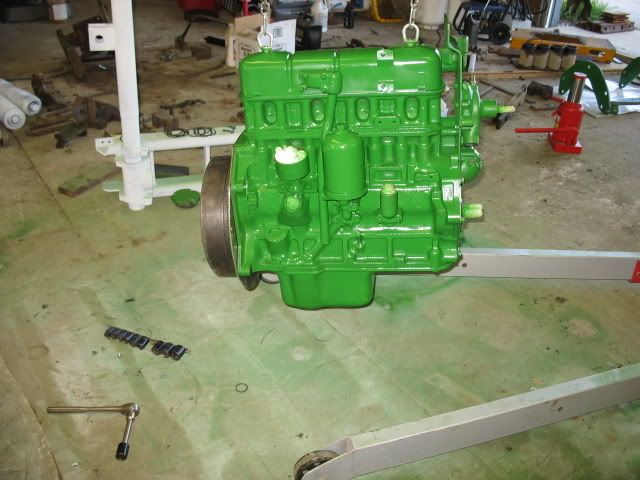
Here's the other side.

Image

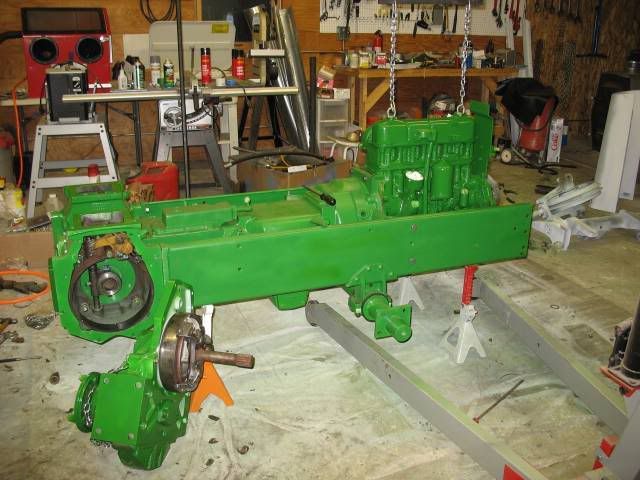
The crawler with the let side final drive installed. I had to stop at this point because any more weight on the back will tip the crawler off the front stands.

Image

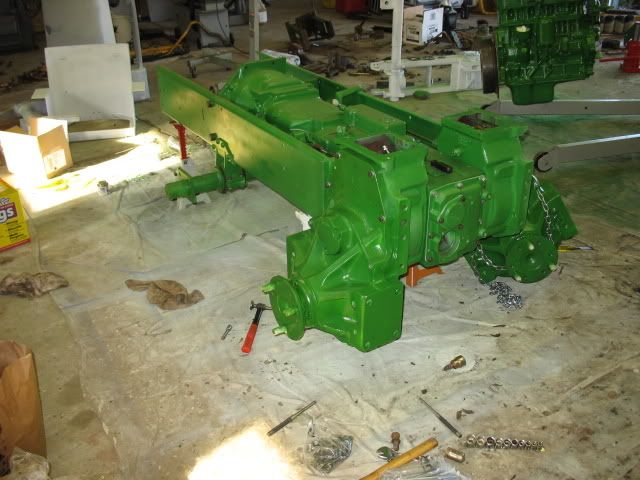
Here's the right side view right before I hung the engine.

Image

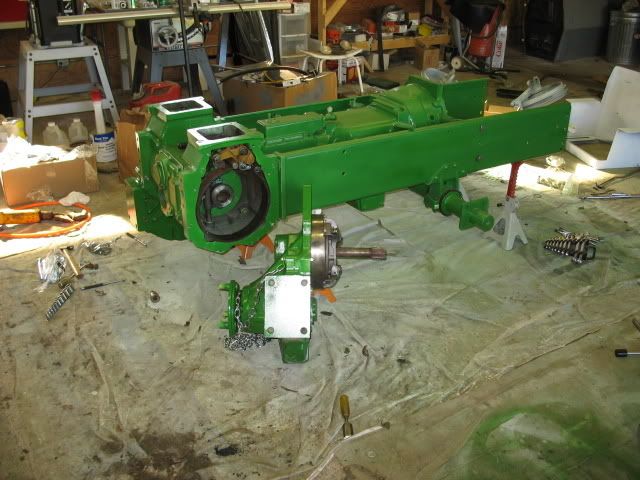
And finally with the engine mounted. Feels good to see it coming together.

Image

All in all it was a pretty productive weekend. I'm planning on filling all the fluids this week and hooking up a temporary fuel tank so I can start it up and verify that the engine back is working before I start to final assemble the rest. I've still got a bunch of work to do on the track frames but its starting to look like a crawler again so I'm feeling like the end is in sight.

All for now. Let me know if this is starting to grate on anyone.
Bill Wattson

dnormand25
420 crawler
420 crawler
Posts: 30
Joined: Sat Nov 18, 2006 7:21 am
Location: poplarville mississippi

Question about your frame and assebly procedure.

Post by dnormand25 » Mon Jun 11, 2007 6:32 pm

I notice you front crossbar and frame are assembled. In picture 2 i can see your rear cross bar and and track frames are also assembled. Are you able to remove the rear bar? This may seem like a dumb question, but my front bar was damaged an i had to remove it, but my rear bar is firmly in place and I'm trying like heck to avoid cutting the bar and making a new one. I figure you may know something i don't- not real hard to do! I'm actually hoping yours is stuck and i overlooked a very simple solution, but i suspect the side of the track on top is not visible and has not yet been pressed into place.

Asides from my problems. you project looks great. I have always looked forward to you pictorial series and I'm sure I'll refer back to them as my project advances. Keep up the great work!

David

User avatar
wwattson
1010 crawler
1010 crawler
Posts: 499
Joined: Mon Aug 07, 2006 9:12 pm
Location: West Bend, WI

Post by wwattson » Mon Jun 11, 2007 8:00 pm

You partly guessed it David. The rear crossbar is stuck in the right side track frame but I was able to get it apart on the left side so what you see in the background is the right frame and cross bar. I'm hoping to one day get it apart but to this point its been pretty much stuck.

In any case, I could get it back into position without getting it apart. I would just need to slide it under from the right side and lift it into position. If it absolutely won't come apart, thats the plan.
Bill Wattson

User avatar
bighamlin
430 crawler
430 crawler
Posts: 79
Joined: Thu Aug 04, 2005 8:01 pm
Location: Central Florida

Post by bighamlin » Tue Jun 12, 2007 8:59 pm

You do really nice work - I don't know of many Ag 1010's restored like you will have. Certainly something to be proud of - keep the pictures coming.

User avatar
Stretch
440 crawler
440 crawler
Posts: 200
Joined: Mon Feb 19, 2007 6:48 pm
Location: Albemarle, NC

Post by Stretch » Sun Jul 01, 2007 6:48 am

She really looks good. Can't wait to see the finished unit.
Stretch
2010C Dozer, 2010C Loader
If at first you don't succeed, get a bigger hammer.

User avatar
mailtrain
430 crawler
430 crawler
Posts: 61
Joined: Sun Jan 07, 2007 9:21 pm
Location: Northern New York

1010ca rebuild

Post by mailtrain » Sun Jul 01, 2007 9:10 pm

Looks good Bill. Have a 1010c Question if you can answer it. My brother replaced the right steering clutches. 8 fiber 9 steel, the steering handle comes back almost to the seat and just about works.There isn't much adjustment left. He is going to break it down again,any ideas what could be wrong.He did reuse the steels cleaned them up good. Thanks Dean

User avatar
wwattson
1010 crawler
1010 crawler
Posts: 499
Joined: Mon Aug 07, 2006 9:12 pm
Location: West Bend, WI

Post by wwattson » Sun Jul 01, 2007 9:28 pm

It should actually be 8 and 8. He's got one too many steel disks. I'm surprised that he could get the clutch adjustment to work with an extra disk in the stack. Do you know if he has the JD-7 gauge? If not, Lavoy has them.
Bill Wattson

User avatar
mailtrain
430 crawler
430 crawler
Posts: 61
Joined: Sun Jan 07, 2007 9:21 pm
Location: Northern New York

1010c

Post by mailtrain » Sun Jul 01, 2007 9:35 pm

Don't think he has the gauge, he said there were 8 and 9 when it came apart. serial number is 34269 if this helps.

User avatar
wwattson
1010 crawler
1010 crawler
Posts: 499
Joined: Mon Aug 07, 2006 9:12 pm
Location: West Bend, WI

Post by wwattson » Mon Jul 02, 2007 1:59 am

According to the parts book for serial numbers greater than 31000, there should be 8 fiber disks and 7 steel disks.

I'm not sure why there would have been 9 other than I found when I took mine apart there were any number of combinations totaling the wrong number. I think what happened over time is somebody couldn't get the clutch to adjust and didn't want to spend the money on a new set of disks so they threw in an extra or two.

On the topic of adjusting the clutch without a gauge; I don't think there is any good way to do that. You need the gauge to set the correct height of the release fingers. There is an old trick I remember about car clutches that if you had 1/8" of gap at the bolt flange with the pressure plate resting on the disk, it was good. I'm pretty sure you'd be off using this rule on a steering clutch.

Lavoy can sell him a JD-7 gauge and he should be good to go after he removes the extra disks provided that all the other disks measure to within spec for thickness.
Bill Wattson

User avatar
NNAATZ
1010 crawler
1010 crawler
Posts: 296
Joined: Fri Oct 13, 2006 7:16 am
Location: austin,mn

Post by NNAATZ » Mon Jul 02, 2007 7:52 am

thats coming together real nice ,never seen a green 1010 before, all the detail pays off in the end ,great job
nick

User avatar
wwattson
1010 crawler
1010 crawler
Posts: 499
Joined: Mon Aug 07, 2006 9:12 pm
Location: West Bend, WI

Post by wwattson » Mon Jul 02, 2007 8:45 am

Thanks Nick. I actually got some quality time in on it this last weekend but didn't get any updated pictures. I should be able to mount the freshly painted starter when I get home today and wire up the temporary starting system to light it off. I spent a bunch of time this weekend on little stuff like fabricating and replacing the two broken off battery hold down studs under the seat and drilling out and retapping broken off screws in the console.
Bill Wattson

Post Reply

Who is online

Users browsing this forum: No registered users and 88 guests