1010CA Rebuild Project, Part XIII

Show us pictures of your JD crawler and attachments.
Post Reply
User avatar
wwattson
1010 crawler
1010 crawler
Posts: 499
Joined: Mon Aug 07, 2006 9:12 pm
Location: West Bend, WI

1010CA Rebuild Project, Part XIII

Post by wwattson » Mon Aug 13, 2007 8:30 am

Been a while since I posted the progress but it's coming along. I've been working through a bunch of little issues that eat up a lot of time but still plugging away. The track rails are both repinned now so that's behind me. Thanks to Lavoy I've got the new seat cushions, work light, and grouser shoes so it's going to look really nice.

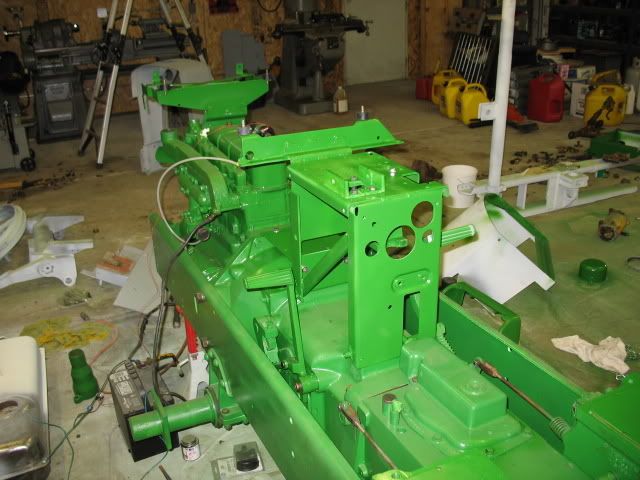
This first picture is the operator's console remounted. It's starting to look like a crawler again. I had to fish about a half dozen broken screws out of the thing before I reattached it. The control lever bracket casing was broken into three pieces which wouldn't have been so bad if someone hadn't tried to weld it before.

Image

This next picture shows the remounted hydraulic pump, fan, and radiator supports. I can't believe how nice these cleaned up for as bad as they looked when I started.

Image

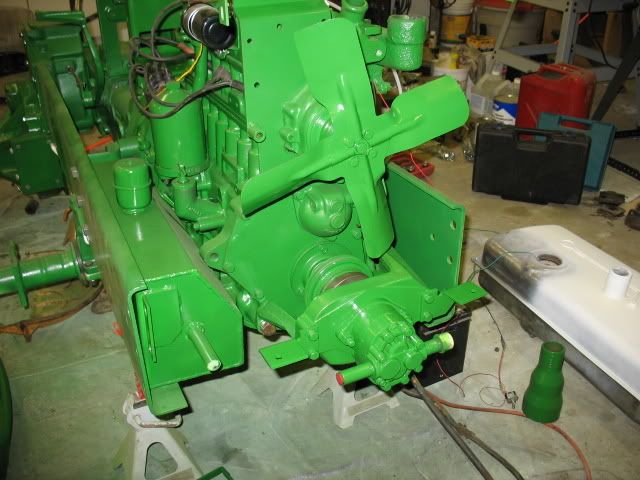
Here's the right side view. The temporary starting system is still hooked up but that will be coming off tonight so that I can give the whole thing a coat of paint.

Image

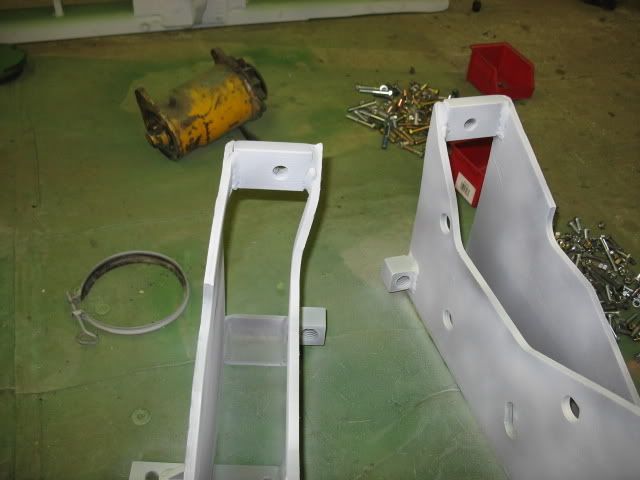
This is one of the last straightening problems I've got to figure out. The cylinder support on the left is going to be a job. The steel Deere used on these isn't that tough so I should be able to get it wiggled around with some heat and my really big hammer.

Image

And finally, one of those time consuming little jobs. What you see in this picture is the tops of the two pivot pins that hold the fixed end of the 3pt cylinders. The pins had to be cut or otherwise destroyed to remove them. I'm going to take a little bit of license with the restoration at this point and put a grease fitting in the end of the new pins so the joint can be greased (this will make them the re-lube style pins as seen on jdparts.com under flag pivot pins). I'll get some pictures of the finished products.

Image

All for now. I've got more sheet metal work to do before I can put the hood and grill frame back on. The wiring harness is repaired and rewrapped so it looks great. Might be down to just the undercarriage this week.
Bill Wattson

User avatar
hunter41mag
440 crawler
440 crawler
Posts: 126
Joined: Tue Apr 12, 2005 7:11 am
Location: Eastern Pennsylvania (NE of Allentown)

Post by hunter41mag » Wed Aug 15, 2007 2:22 pm

Bill,

Looking good! From your pics and comments on the repairs it will be stronger and better than new. Keep the pics and comments coming.
Don
Eastern PA
440IC (1960)

User avatar
Tim_in_IA
430 crawler
430 crawler
Posts: 87
Joined: Fri Oct 13, 2006 7:07 pm
Location: Eastern Iowa
Contact:

Post by Tim_in_IA » Thu Aug 16, 2007 7:40 am

Ok I have been meaning to get back to my crawler radiator and water pump install, but I also wanted to paint the engine at that time. Are you using high temp paint on the engine or what is required? The color choices at the local farm store were quite limited. They didn't even have the industrial yellow. I suppose I can go to John Deere and buy a can for 8 or 10 bucks and it would be worth it. Just thought I'd ask you since you clearly did a full paint that seemed to match well.
1958 440ic with blade

User avatar
wwattson
1010 crawler
1010 crawler
Posts: 499
Joined: Mon Aug 07, 2006 9:12 pm
Location: West Bend, WI

Post by wwattson » Thu Aug 16, 2007 6:33 pm

Tim,

It's a high grade tractor enamel so it should be fine for the engine. The exhaust manifold is a different story but it's painted with the same stuff. It's not going to take the heat but little does in the long run. Perhaps some of the other guys have some thoughts on exhaust manifold paints that are good color matches and can take the heat.
Bill Wattson

Post Reply

Who is online

Users browsing this forum: No registered users and 84 guests