Adventures in rebuilding the 1956 420-C .

Show us pictures of your JD crawler and attachments.
User avatar
Lu47Dan
1010 crawler
1010 crawler
Posts: 401
Joined: Mon Feb 11, 2008 3:17 pm
Location: NWPa

Adventures in rebuilding the 1956 420-C .

Post by Lu47Dan » Fri Aug 22, 2008 8:47 pm

This thread was started to combine two threads from over in the Tech section .
http://www.jdcrawlers.com/messageboard/ ... php?t=2471
and
http://www.jdcrawlers.com/messageboard/ ... highlight=
So I will get right down to what I have done in the last week or so . I removed the following from the crawler , radiator , bumper , front end support , engine , left track carrier and the left side final drive . Instead of a long winded dissertation on how and why , I will just add pictures .
Image
Right track removed , this is the side they welded the master pin to the link , welder must have been lazy as he did it on the outside of the link
Image
Radiator removed and working on the bumper
You can see all the photos here

Image
Bumper and front end support removed engine ready to pull .
You can see all the Photos here
http://s236.photobucket.com/albums/ff14 ... 20Crawler/
1956 420C with GSC blade
Tools are to men as shoes are to women , you can never have too many !!
Used diesel engines are an adventure any way you look at them !!

User avatar
Lu47Dan
1010 crawler
1010 crawler
Posts: 401
Joined: Mon Feb 11, 2008 3:17 pm
Location: NWPa

Post by Lu47Dan » Fri Aug 22, 2008 9:04 pm

More on what has been happening on the crawler . I started to remove the final drive , made the tool for lifting it . All went well even the brake band cooperated with me . But when it was about out I discovered that the outer rail of the track carrier was blocking the drive shaft from coming out of the throw bearing sleeve . :? I fiddled around with it for an hour and finally decided to remove the track carrier frame from the crawler . Four and a half hours later the final drive was free of the steering clutch housing .
Image
Testing the fit of the lifting device .
Image
Free and ready to remove . Or so I thought . :(
Image
Hanging free after four and a half hours .
1956 420C with GSC blade
Tools are to men as shoes are to women , you can never have too many !!
Used diesel engines are an adventure any way you look at them !!

User avatar
Lu47Dan
1010 crawler
1010 crawler
Posts: 401
Joined: Mon Feb 11, 2008 3:17 pm
Location: NWPa

Post by Lu47Dan » Fri Aug 22, 2008 9:14 pm

I received the "NEW" complete final drive housing today , it had to be shipped in pieces but at least it has all the right parts on it .
Here are some more photos .
Image
Steering clutch and the shaft that caused all my headaches
Image
Nasty , oily mess in this side .
Image
At least the fiber plates look good , will find out for sure tomorrow .
Image
New final drive housing .
Image
Bull gear .
Image
Pinion Gear .
Image
Axle Shaft . Dan
1956 420C with GSC blade
Tools are to men as shoes are to women , you can never have too many !!
Used diesel engines are an adventure any way you look at them !!

robk
440 crawler
440 crawler
Posts: 137
Joined: Mon Jun 23, 2008 10:39 pm
Location: Ridgefield, CT

Post by robk » Sun Aug 24, 2008 9:16 pm

I love how it gets darker and darker and finally there is a late night shot with a flash of the darn final drive hanging free on a hook. Thanks for your trouble in posting a series of interesting pictures. Much appreciated.
2 1010 loaders
1 Massey Ferguson loader backhoe
3 Dodge Power Wagons
1 Wife
3 Kids

User avatar
Lu47Dan
1010 crawler
1010 crawler
Posts: 401
Joined: Mon Feb 11, 2008 3:17 pm
Location: NWPa

Post by Lu47Dan » Sun Aug 24, 2008 10:52 pm

robk , you are welcome , more pictures to come tomorrow I would post them tonight but it is late and morning is calling too soon . Dan
1956 420C with GSC blade
Tools are to men as shoes are to women , you can never have too many !!
Used diesel engines are an adventure any way you look at them !!

User avatar
Lu47Dan
1010 crawler
1010 crawler
Posts: 401
Joined: Mon Feb 11, 2008 3:17 pm
Location: NWPa

Post by Lu47Dan » Mon Aug 25, 2008 9:26 am

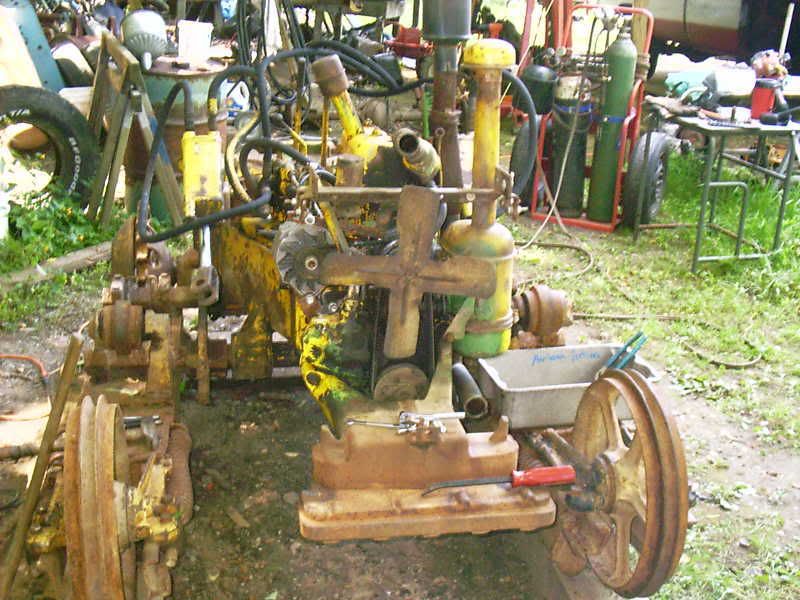
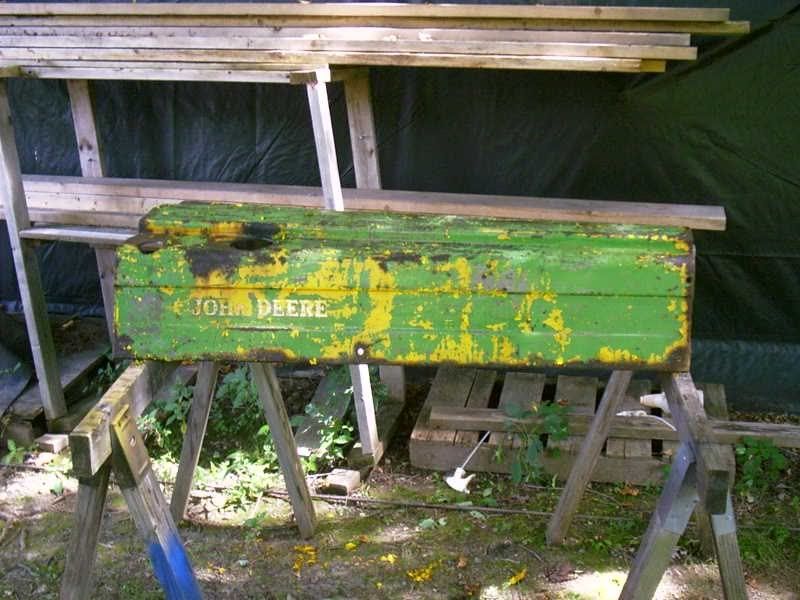
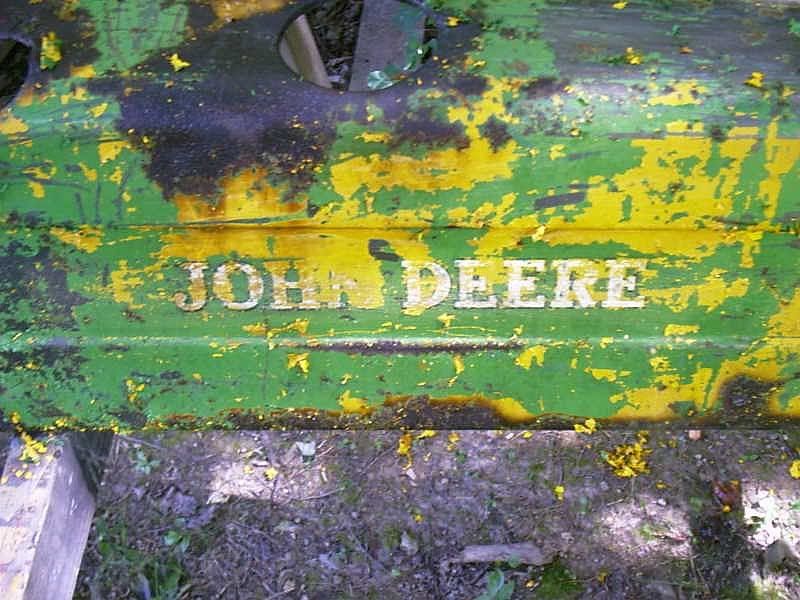
Saturday I started stripping the paint on the hood , and promptly ran out of stripper . I will get a gallon on Wednesday when I go to pick up my parts for the engine in my pickup truck . There is more than enough to do on the crawler until then .
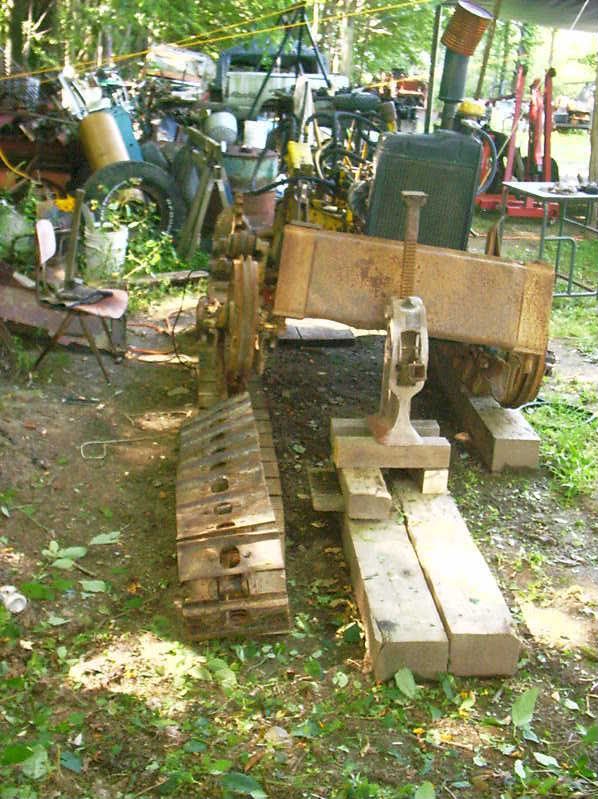
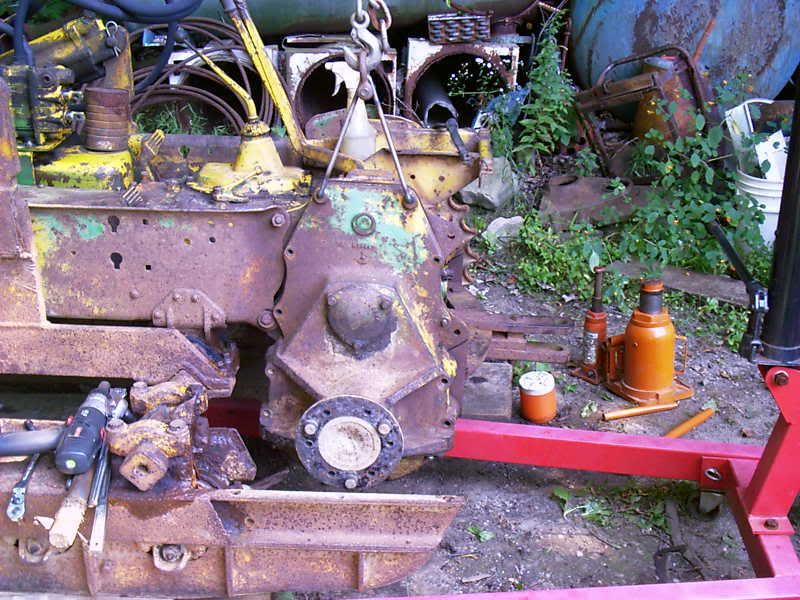
Sunday I removed the right side track carrier as to avoid the fiasco of pulling the left side final drive :wink: . Instead of the heat and impact method of removing the bolts , I decided on the plasma method :twisted: . I cut the shanks of the bolts below the clamps cap , since the bolts will have to be replaced anyway this was the fastest and cheapest method of separating the carrier from the crawlers frame . Once the carrier was on the ground I flopped it on it's side and checked the support rollers . two bad ones on this side .
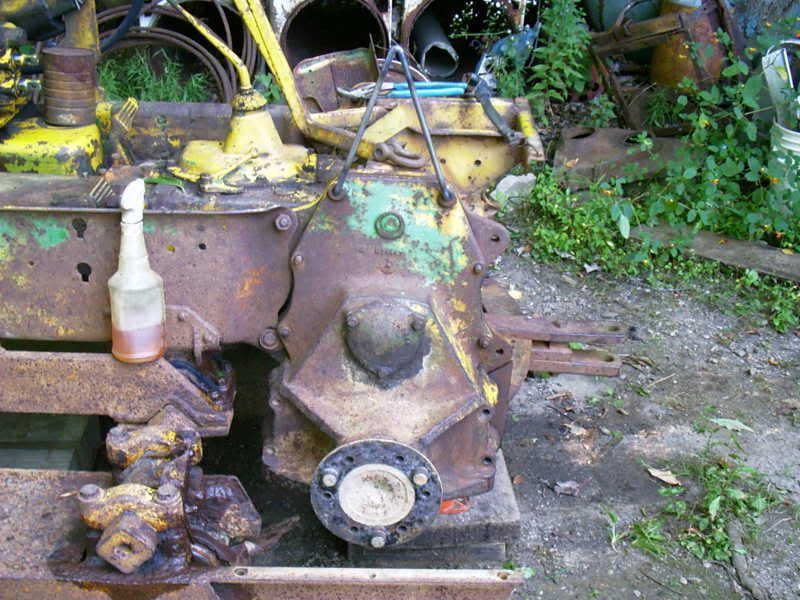
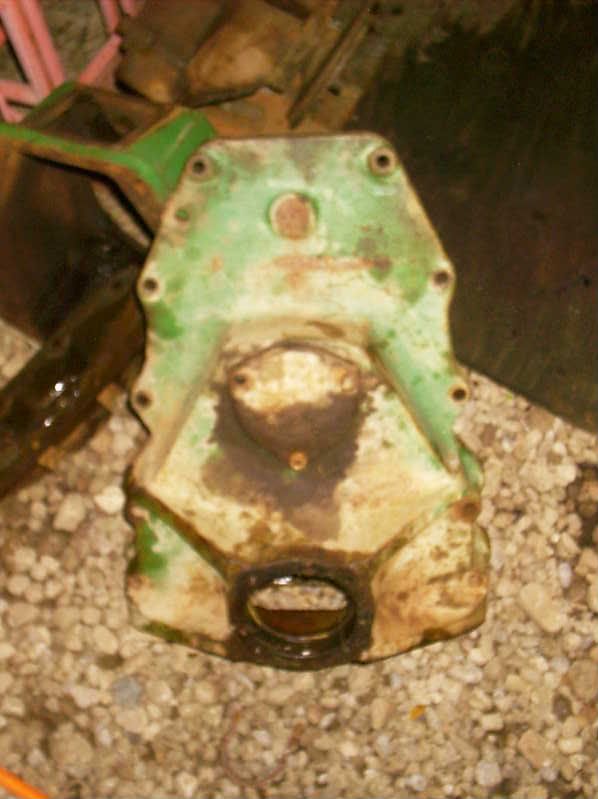
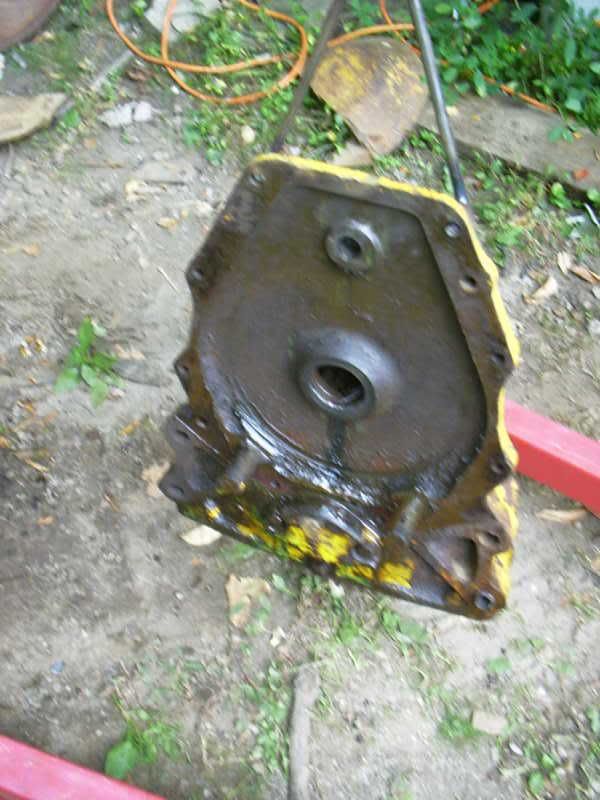
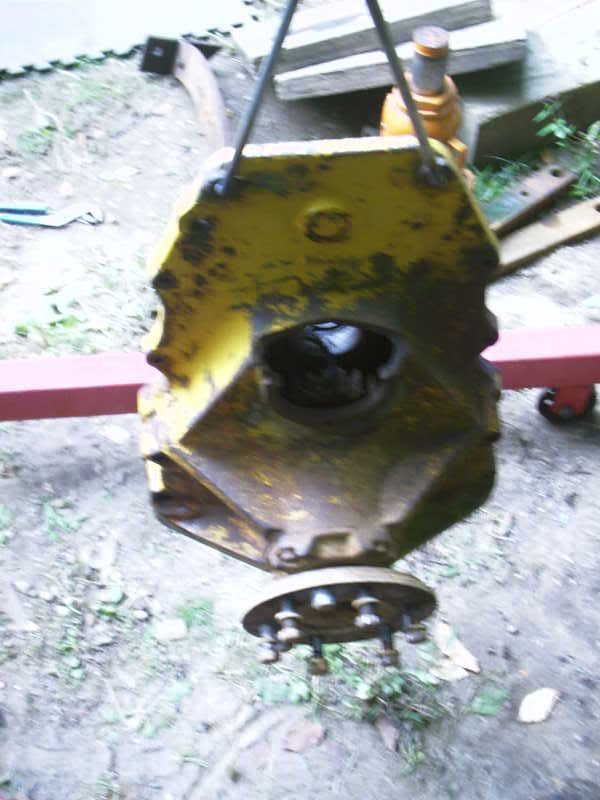
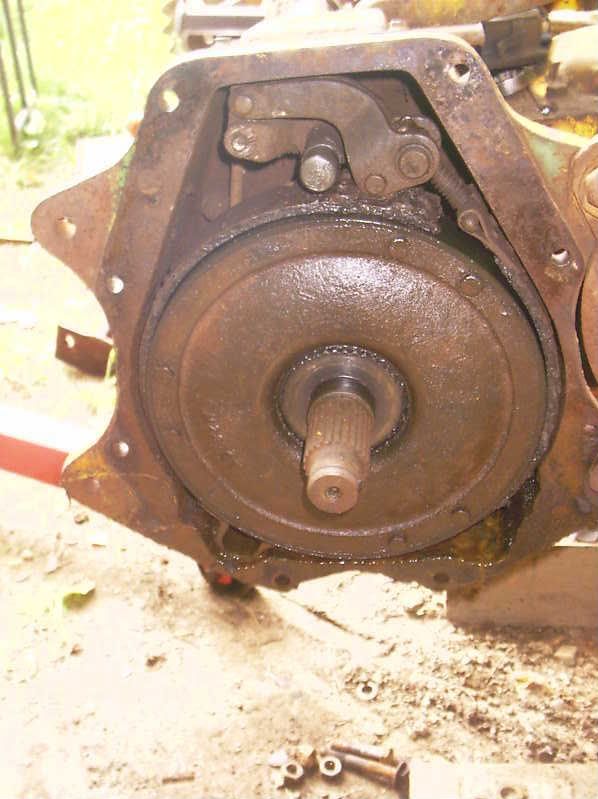
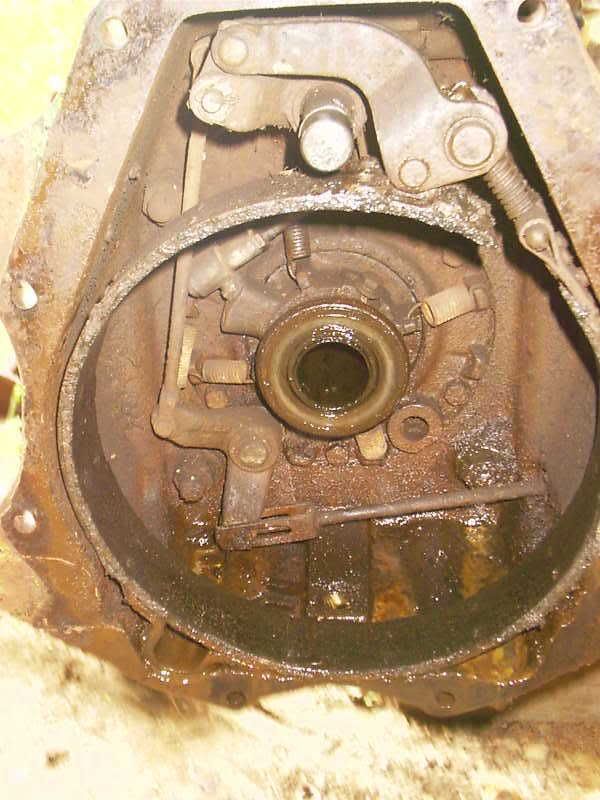
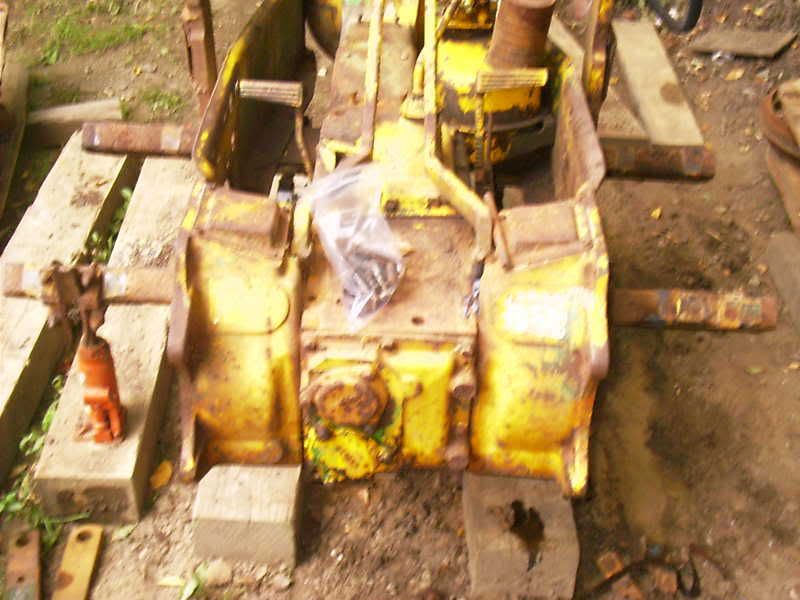
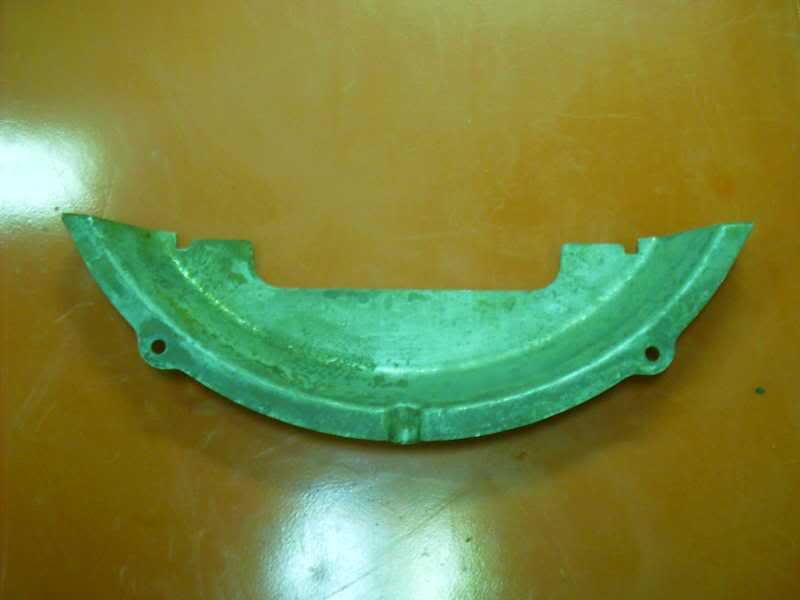
Now it is onto the final drive . I first had to remove the drawbar and quadrant from the crawler . Two of the three bolts came out without much of a fight , the last one fought me for about a half hour before the tool of last resort came out . I heated the top extension , drawbar and bottom extension up and managed to remove the bottom extension with the first heating but the drawbar and top extension need a second heating to break the rust lose . The clevis plate nuts spun off and than with a pry bar the drawbar came out . I do not think that the bolts had ever been loosened since the crawler had been built . Now it was time for the quadrant to be removed , once the two bolts holding it to the final drive were out it fell off . Good thing that this final drive is the bad one because the dowel pins were both shot . Now for the seat mounting bracket , once the drawbar was removed I started bumping into the bracket :x 
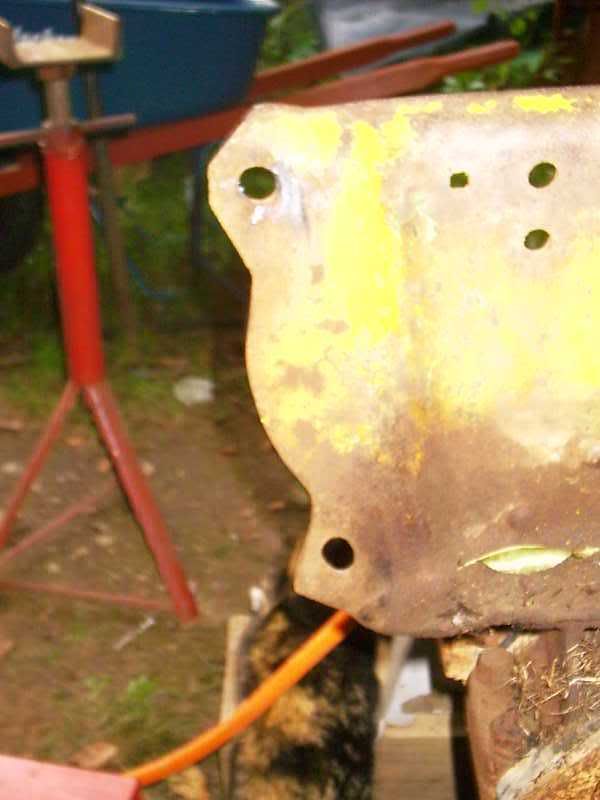
, that sharp corner hurts , I managed to snap two of the four bolts off flush with the casting :oops: 
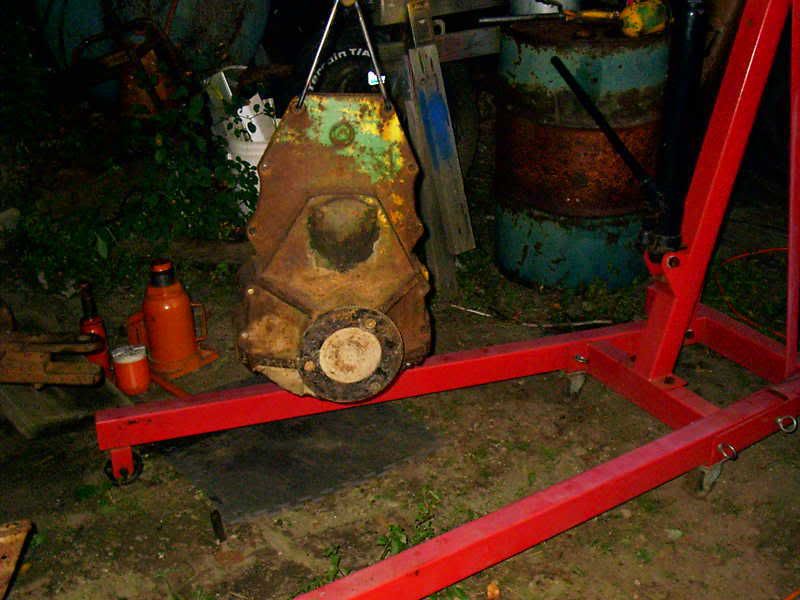
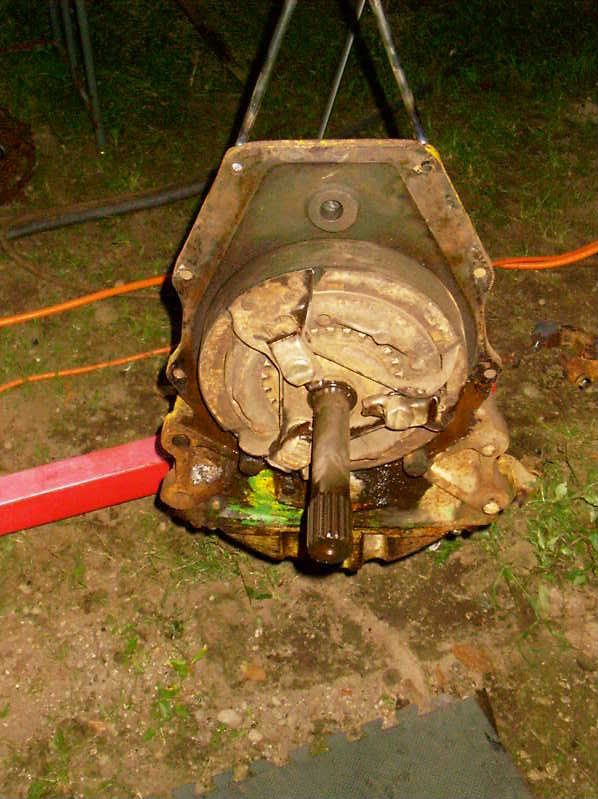
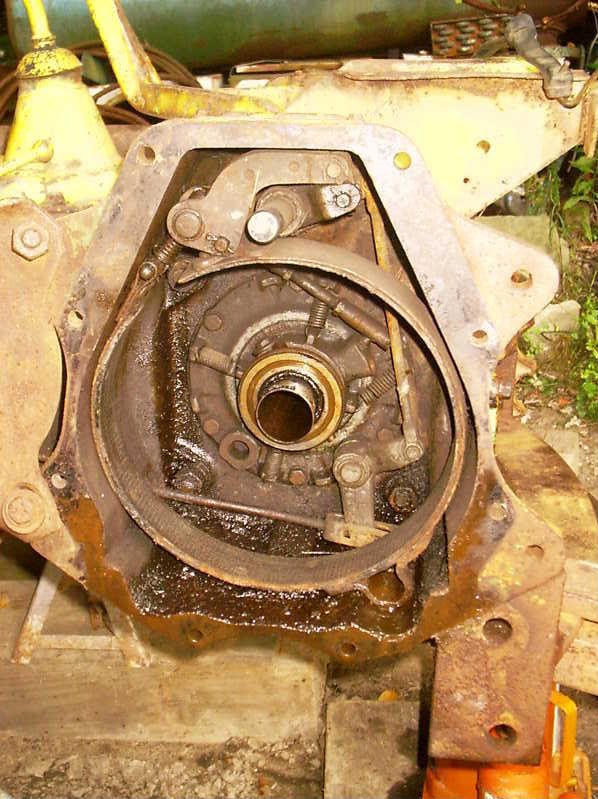
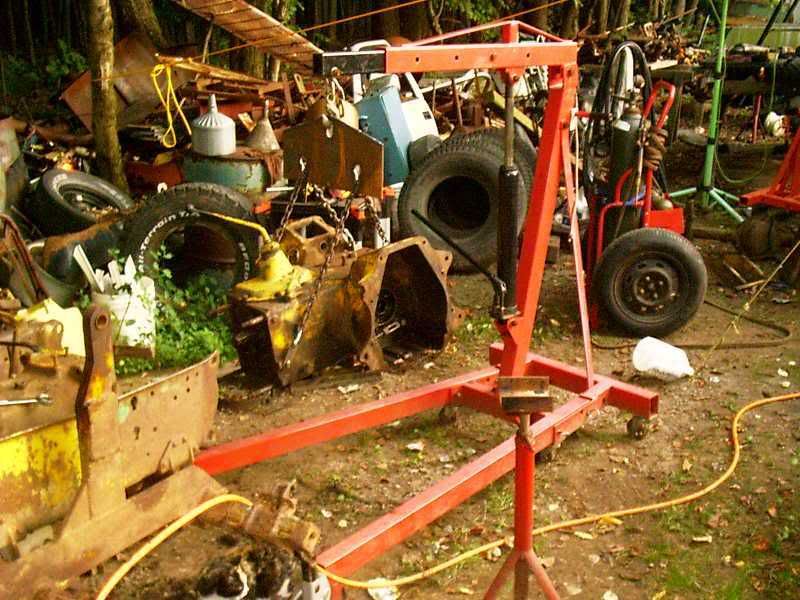
while removing the bracket . That is project number one for today , as I need the back holes to lift the transmission case out with . I then proceed onto removing the final drive housing . I positioned the engine hoist , attached the lifting device to the hoist and put some pressure on the final drive before removing the last bolts . After removing the last bolts the final drive housing swung out away from the steering clutch housing , with one more pump on the ram , leaving the steering clutch in it's housing . I will post the photos later as I am having problems with them right now . Dan
1956 420C with GSC blade
Tools are to men as shoes are to women , you can never have too many !!
Used diesel engines are an adventure any way you look at them !!

Ray III
2010 crawler
2010 crawler
Posts: 609
Joined: Sat Aug 25, 2007 1:39 pm
Location: Troy, NY

Post by Ray III » Thu Aug 28, 2008 8:00 pm

I was able to pull the final drive right off. How much were you missing by?

User avatar
Lu47Dan
1010 crawler
1010 crawler
Posts: 401
Joined: Mon Feb 11, 2008 3:17 pm
Location: NWPa

Post by Lu47Dan » Thu Aug 28, 2008 9:19 pm

Ray , that steering clutch drive shaft's splines were still fully in the throwout bearing sleeve . Knowing what i know now it would not have been a problem to reach in and pull the sleeve out of the throwout bearing :shock: . Here I thought it was a press fit into the ring gear quill . Had I known that both final drives would been off that day .
Image
Here are the pictures from the other day .
Image

Image

Image

Image

Image
There was not much left of the right side final drive :roll: Dan
1956 420C with GSC blade
Tools are to men as shoes are to women , you can never have too many !!
Used diesel engines are an adventure any way you look at them !!

User avatar
Lu47Dan
1010 crawler
1010 crawler
Posts: 401
Joined: Mon Feb 11, 2008 3:17 pm
Location: NWPa

Post by Lu47Dan » Thu Aug 28, 2008 9:29 pm

This is as much as I got done on it last Saturday
Image
Original paint ? With all I have seen it seems to be .
Image
The stripper I was using worked real well on the yellow paint and softened the green paint but I ran out of it before the job was complete . Need to get another gallon .
Image
Another photo of the yellow paint.
Image
The hood has some rust spots that will be fixed before repainting but the dings and dent will have to wait until I do the final restoration on it .
Image
Those decals are tough suckers !! :lol:
I have to go get some body parts for my truck tomorrow so I will pick up a gallon of stripper then to finish the job . Dan
1956 420C with GSC blade
Tools are to men as shoes are to women , you can never have too many !!
Used diesel engines are an adventure any way you look at them !!

Ray III
2010 crawler
2010 crawler
Posts: 609
Joined: Sat Aug 25, 2007 1:39 pm
Location: Troy, NY

Post by Ray III » Sun Aug 31, 2008 8:49 pm

Is it going back to green, or a new coat of yellow?

User avatar
Lu47Dan
1010 crawler
1010 crawler
Posts: 401
Joined: Mon Feb 11, 2008 3:17 pm
Location: NWPa

Post by Lu47Dan » Mon Sep 01, 2008 11:53 am

Ray , most likely back to green at least for the near future . When it gets a full restoration it might be a different color but for now it is going green :lol: . Dan
1956 420C with GSC blade
Tools are to men as shoes are to women , you can never have too many !!
Used diesel engines are an adventure any way you look at them !!

User avatar
Lu47Dan
1010 crawler
1010 crawler
Posts: 401
Joined: Mon Feb 11, 2008 3:17 pm
Location: NWPa

Post by Lu47Dan » Wed Sep 03, 2008 12:52 pm

I started pulling the old final drive apart and realized that there had not been any shims under the bearing quill , so maybe that is what started the bearing failures that lead to the final drive housing to destruct . I am building a puller to remove the axle shaft from the bull gear , I will make it so it can be used for other uses also and it will be powered by my 4 ton port a power . I have prices on the replacement bearing from a local bearing dealer and will be ordering off of them . I am having fun getting everything cleaned up and ready to go back together . Dan
1956 420C with GSC blade
Tools are to men as shoes are to women , you can never have too many !!
Used diesel engines are an adventure any way you look at them !!

User avatar
Lu47Dan
1010 crawler
1010 crawler
Posts: 401
Joined: Mon Feb 11, 2008 3:17 pm
Location: NWPa

Post by Lu47Dan » Mon Sep 08, 2008 9:42 pm

I removed the transmission from what is left of the crawler today , I had to build a lifting jig to be able to balance the transmission with the steering clutch housing still on it . That was made from a piece of 3/16" plate that was left over from some job that I had done years ago . I built a pattern from tempered masonite board and cut it out with my plasma cutter . Once I had it cut out , I used two pieces of my 1/4" grade bulk chain 34 links long and made tabs to bolt onto the transmission . The chain rests in slots that I refer to as keyholes . The jig can be moved forward or back to balance the load . I installed the jig and chains and played with the position some and then lifted the transmission enough to get two pieces of 2 X 4 under the center frame on the brace . then i removed the nut securing the transmission to the center frame and I had to heat the right side bottom center stud hole to get the stud to move . I came out without any real major problems .
Image
This is the best picture of the lifting jig . I need to lengthen one of the chains or the front tabs to get the assembly to hang level .
Image
The balance is not quite right yet but I will figure it out before removing the chains and mark it with a paint pen . My shop cat was hanging around looking for the mouse that belonged to the nest I removed
Image
There was a big mouse nest in here because this was missing .
Image
Outside of the flywheel cover .
Image
Inside of the fly wheel cover . Thanks go out to DiggerLarry for this piece . :D Now maybe the mice will stay out .
Image
THe bolt holes will have to be weld up some and then matched to the steering clutch housings holes .
Tomorrow I should have the crawler apart and ready to start cleaning repairing and painting . I have decided not to sandblast everything but just remove the old paint and rust as I am going to be using this crawler for work around here . More tomorrow . Dan
1956 420C with GSC blade
Tools are to men as shoes are to women , you can never have too many !!
Used diesel engines are an adventure any way you look at them !!

User avatar
Lavoy
Site Admin
Site Admin
Posts: 10943
Joined: Sun Apr 03, 2005 8:32 pm
Location: North Dakota
Contact:

Post by Lavoy » Tue Sep 09, 2008 7:39 am

Keep in mind that those holes in the sideframes were never meant to be a tight fit. They use an acorn nut that sits in a tapered seat of sorts to keep things tight. If you fill the holes in, the taper of the nut can not seat in the sideframe.
Lavoy

User avatar
Tigerhaze
350 crawler
350 crawler
Posts: 2278
Joined: Thu Jul 06, 2006 12:13 pm
Location: West-Central MO

Post by Tigerhaze » Tue Sep 09, 2008 10:26 am

Those field mice get everywhere! I opened the tool box on the back of my 2010 crawler and had one jump out of me. I still haven't figured out how he got in there as the gap in the lid is pretty darn small!
(1) JD Straight 450 crawler dozer with manual outside blade; (2) JD 2010 diesel crawler loaders; (1) JD 2010 diesel dozer with hydraulic 6-way blade; (2) Model 50 backhoe attachments, misc. other construction equipment

Post Reply

Who is online

Users browsing this forum: No registered users and 44 guests