Bret,
I saw a lathe on GovDeals.com this week cheap. You might want to check that csite out if you haven't already, it is where gov agencies sell there surplus and this lathe was from a trade school.
Randy
Adventures in rebuilding the 1956 420-C .
-
Randynscottsboro
- 440 crawler

- Posts: 101
- Joined: Thu Oct 02, 2008 2:36 pm
- Location: Scottsboro, Al
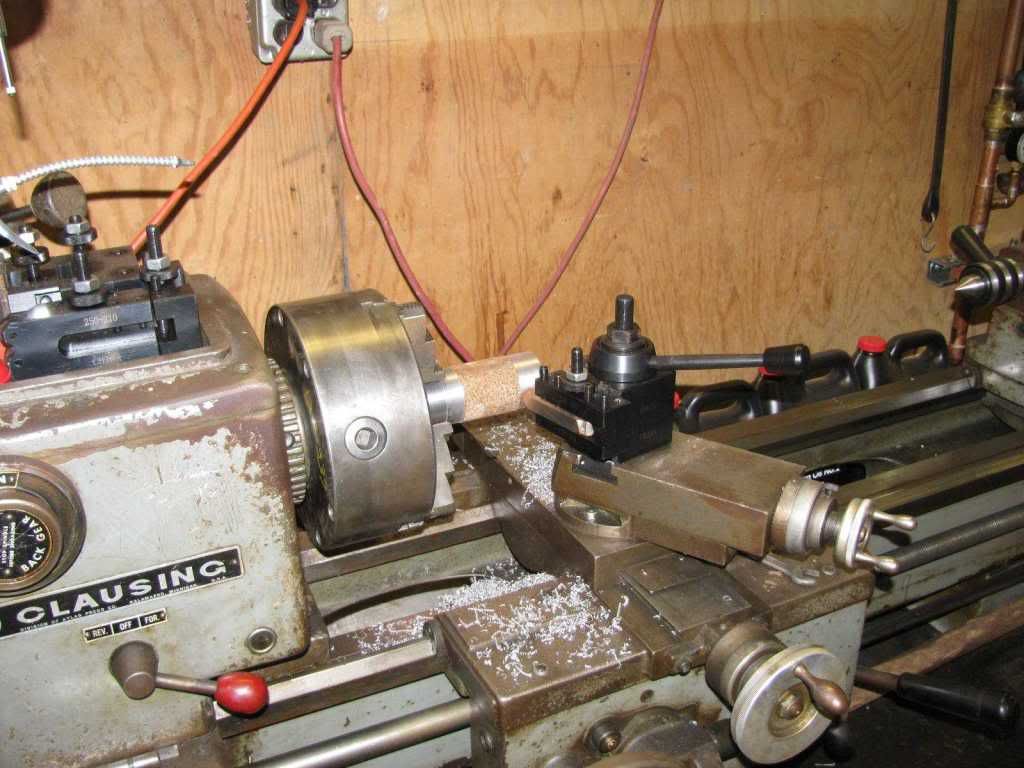
Lathe is up and running
I finished building my rotary phase converter , on Monday evening and ran a few test cuts on the lathe Tuesday afternoon .
This is a 0.100 test cut , about as much as the old girl likes .
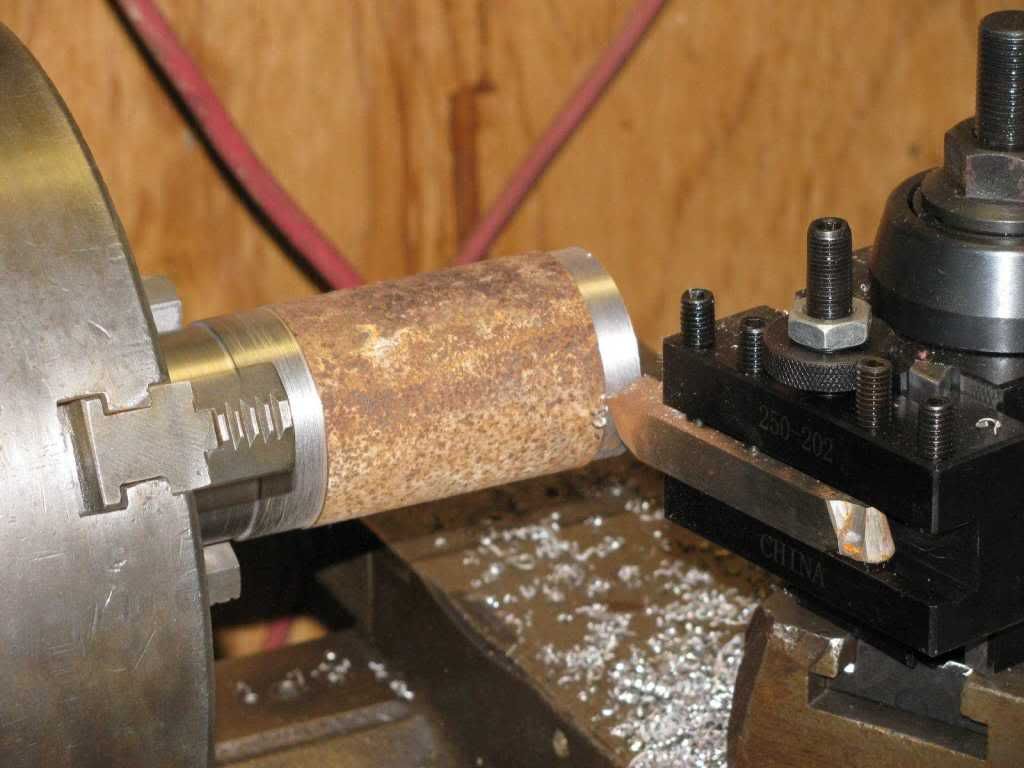
The test bar is just plain old Cold Rolled steel bar that has been in the shop for a long time
The rust was removed all the way around with about a 0.035" cut .
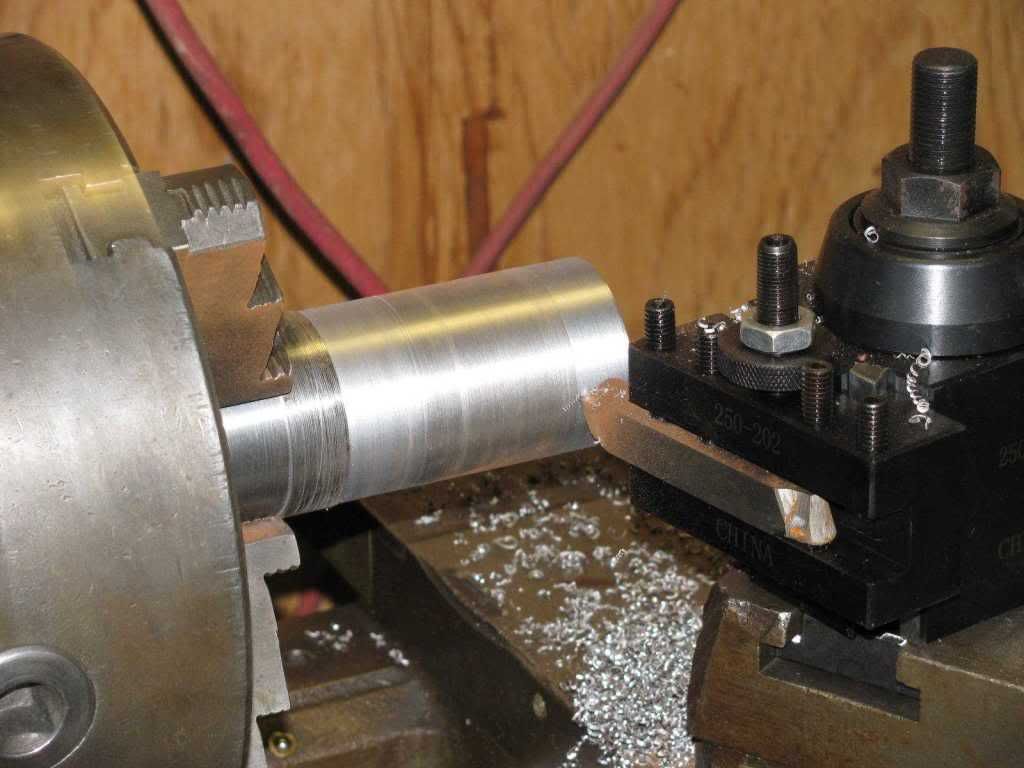
Playing with speeds and feeds .
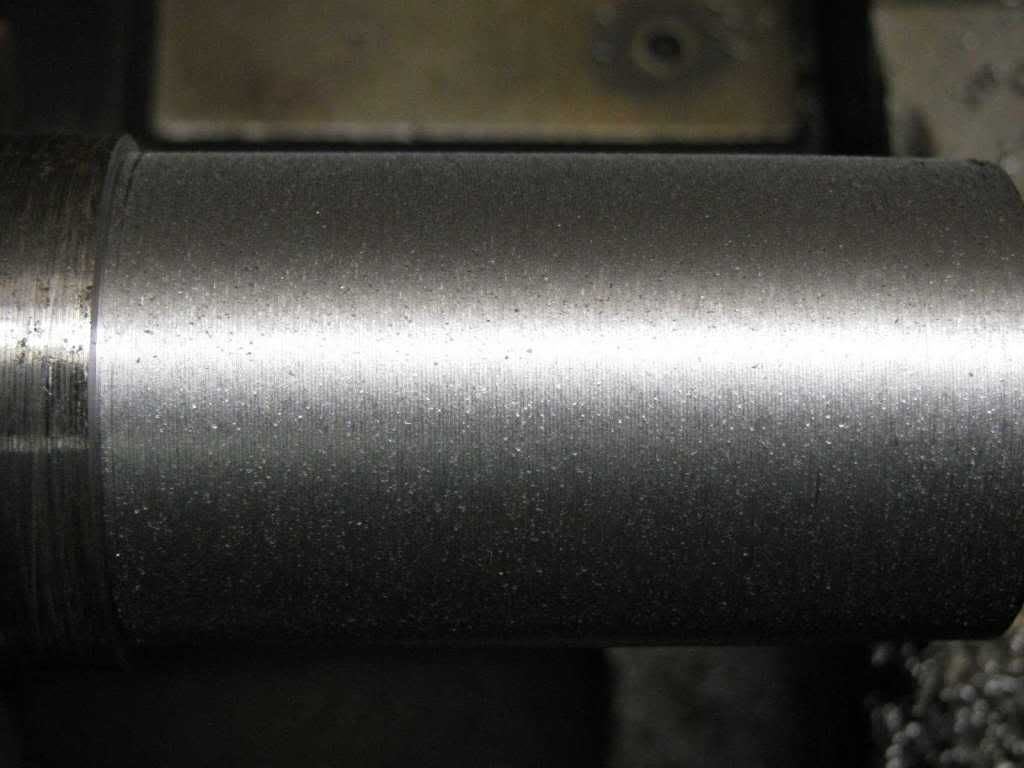
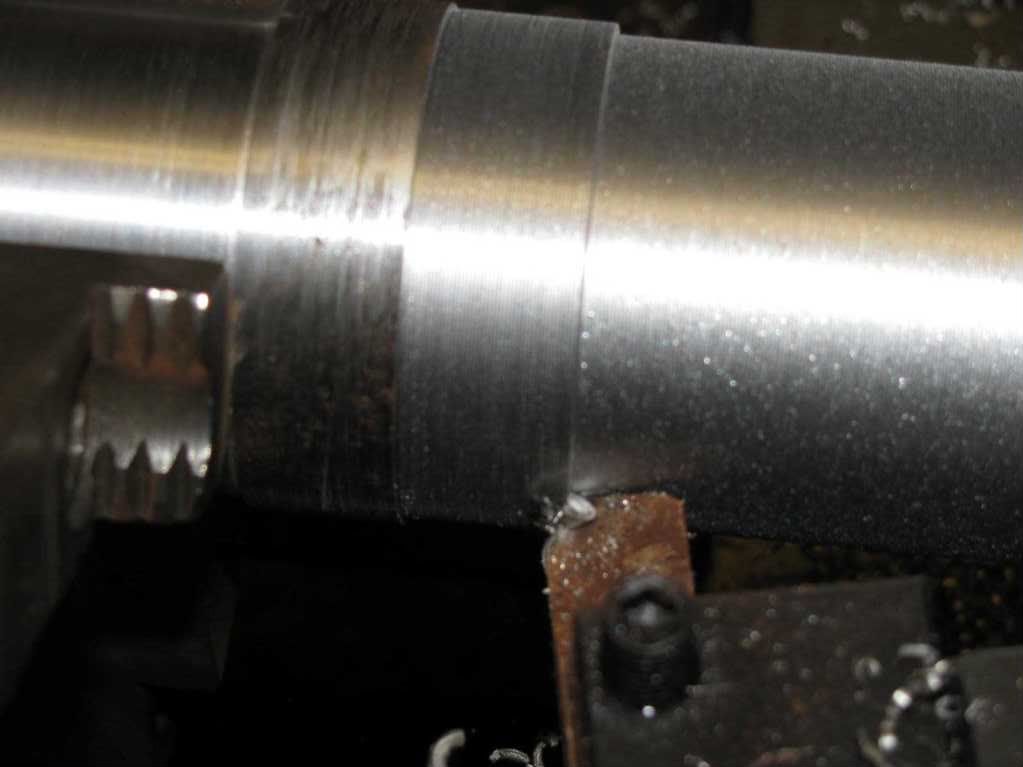
Surface finish at about 200 rpm's and 0.027"/rev feed .
Now I can build up the damaged sealing surface on the axles of my 420C .
These photo's were taken with the lathe running and making a cut , except for the final surface finish photo . I bought a better camera
Dan
This is a 0.100 test cut , about as much as the old girl likes .
The test bar is just plain old Cold Rolled steel bar that has been in the shop for a long time
The rust was removed all the way around with about a 0.035" cut .
Playing with speeds and feeds .
Surface finish at about 200 rpm's and 0.027"/rev feed .
Now I can build up the damaged sealing surface on the axles of my 420C .
These photo's were taken with the lathe running and making a cut , except for the final surface finish photo . I bought a better camera
Dan
1956 420C with GSC blade
Tools are to men as shoes are to women , you can never have too many !!
Used diesel engines are an adventure any way you look at them !!
Tools are to men as shoes are to women , you can never have too many !!
Used diesel engines are an adventure any way you look at them !!
Eletrolytic rust removal
I started the rust removal process yesterday on the instrument panel support by putting it into the ERR tank , it is happy bubbling away slowly removing the rust and some of the old yellow paint . Once the rust is gone then it will be time to remove what paint is left and remove a couple of broken bolts before degreasing it and readying it for paint
I have the plans drawn up for the bushing press to change the bushing in the idlers and the track track support rollers . All that is left to do on that is to build it and make the removal and installation tools for the bushings .
I will be ordering the aluminum for them tonight .
Just a little update on my progress . Dan
1956 420C with GSC blade
Tools are to men as shoes are to women , you can never have too many !!
Used diesel engines are an adventure any way you look at them !!
Tools are to men as shoes are to women , you can never have too many !!
Used diesel engines are an adventure any way you look at them !!
Just about ready to rebuild the Idlers
I finished building the press to rebuild the idlers and the upper support rollers .
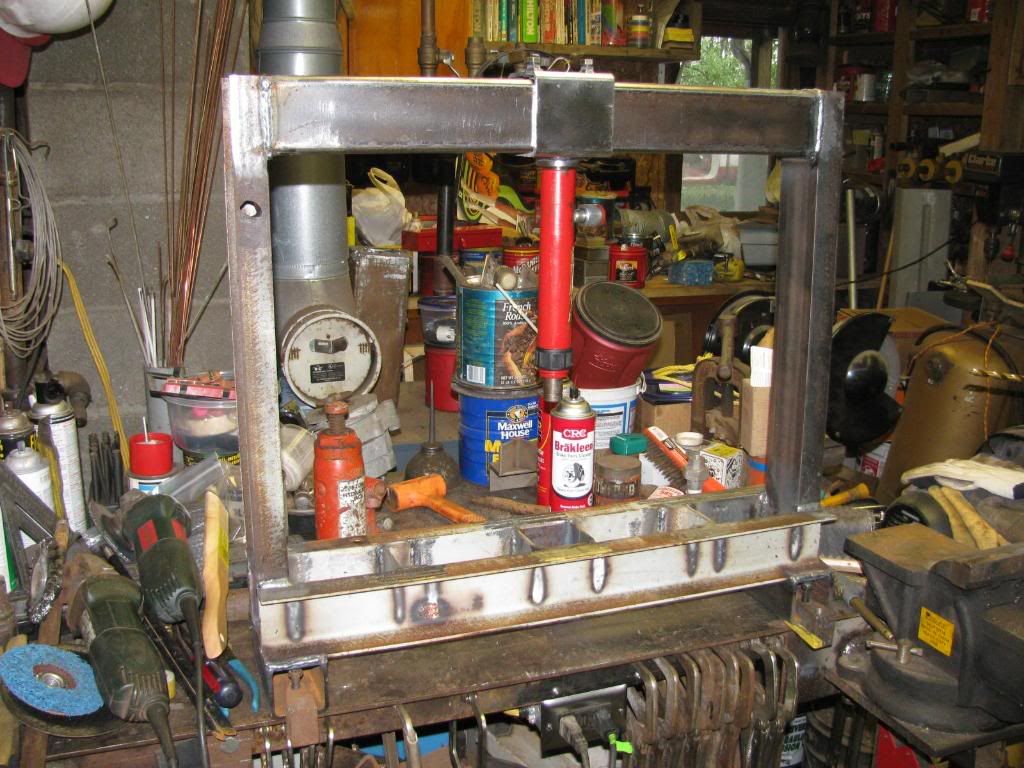
The press was built from drops from other projects and steel I saved from the dumpster on one of the jobsites I was on .
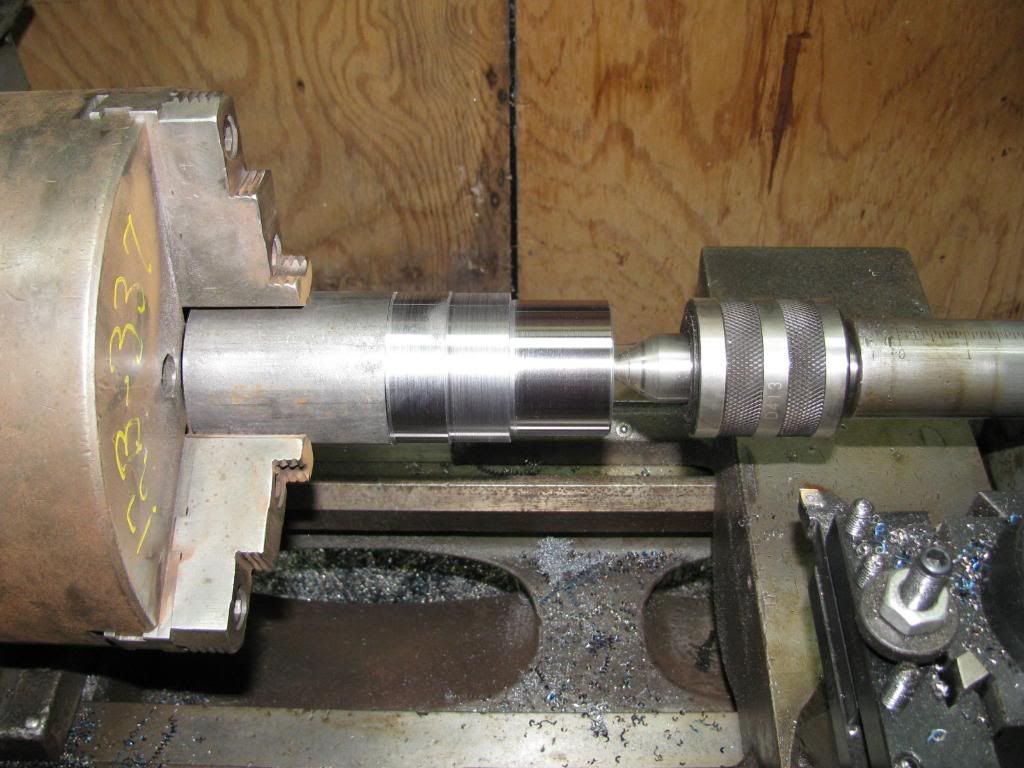
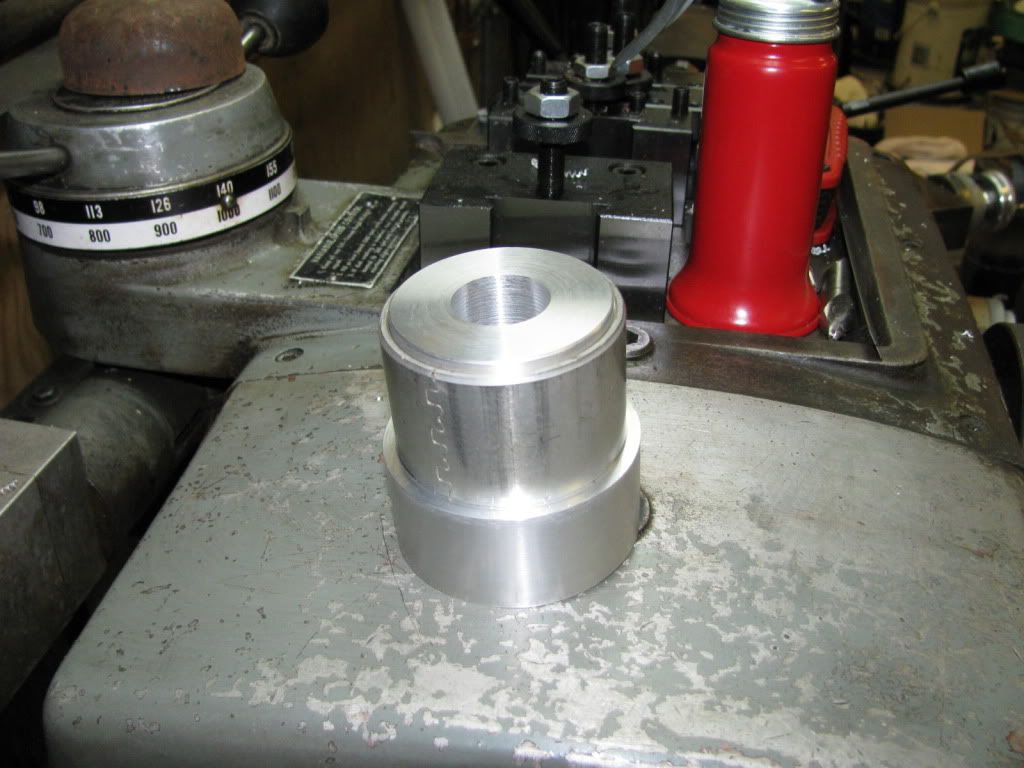
This is the driver to remove the old bushings from the idler . It is turned out of 1018 steel .
This is a 7/8" through bore to allow the driver to be mounted to the ram of my 4 ton port-a-power's cylinder .
It was harder to figure out what to do first then it was to make this driver . I am waiting on a blade for my parting tool to finish it up . I might take it out of the chuck and cut it off in the bandsaw . I am itching to get started on the rebuilding the idlers . Dan
The press was built from drops from other projects and steel I saved from the dumpster on one of the jobsites I was on .
This is the driver to remove the old bushings from the idler . It is turned out of 1018 steel .
This is a 7/8" through bore to allow the driver to be mounted to the ram of my 4 ton port-a-power's cylinder .
It was harder to figure out what to do first then it was to make this driver . I am waiting on a blade for my parting tool to finish it up . I might take it out of the chuck and cut it off in the bandsaw . I am itching to get started on the rebuilding the idlers . Dan
1956 420C with GSC blade
Tools are to men as shoes are to women , you can never have too many !!
Used diesel engines are an adventure any way you look at them !!
Tools are to men as shoes are to women , you can never have too many !!
Used diesel engines are an adventure any way you look at them !!
Bushing driver finished and the test of the press
I recievec the blade for my parting tool yesterday morning and set it up .
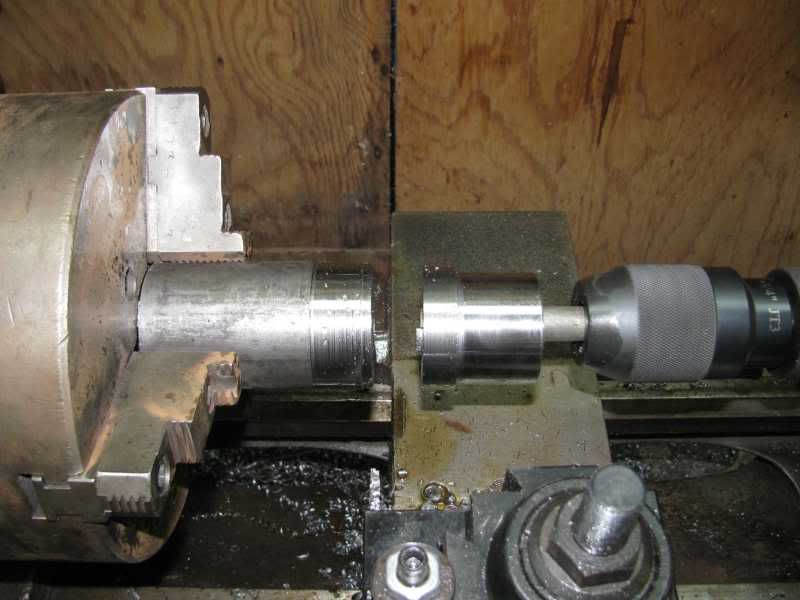
The cut went smoothly , I used a lot dark threading oil while cutting .
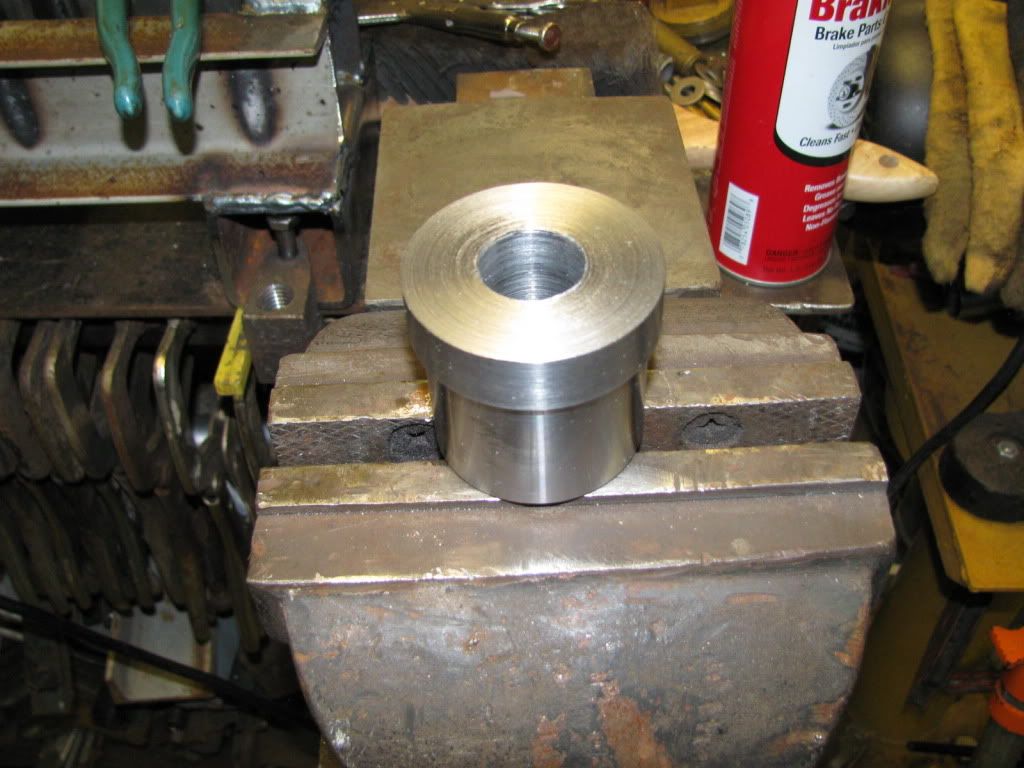
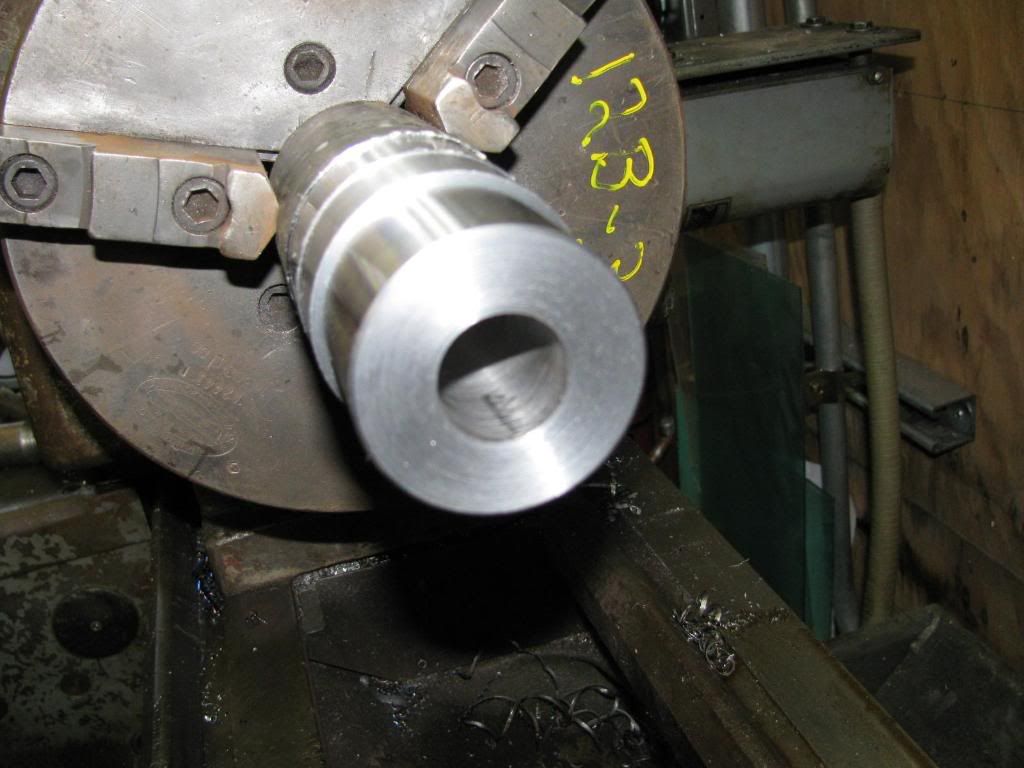
Finish cut , not the prettiest but hey is is just a driver .
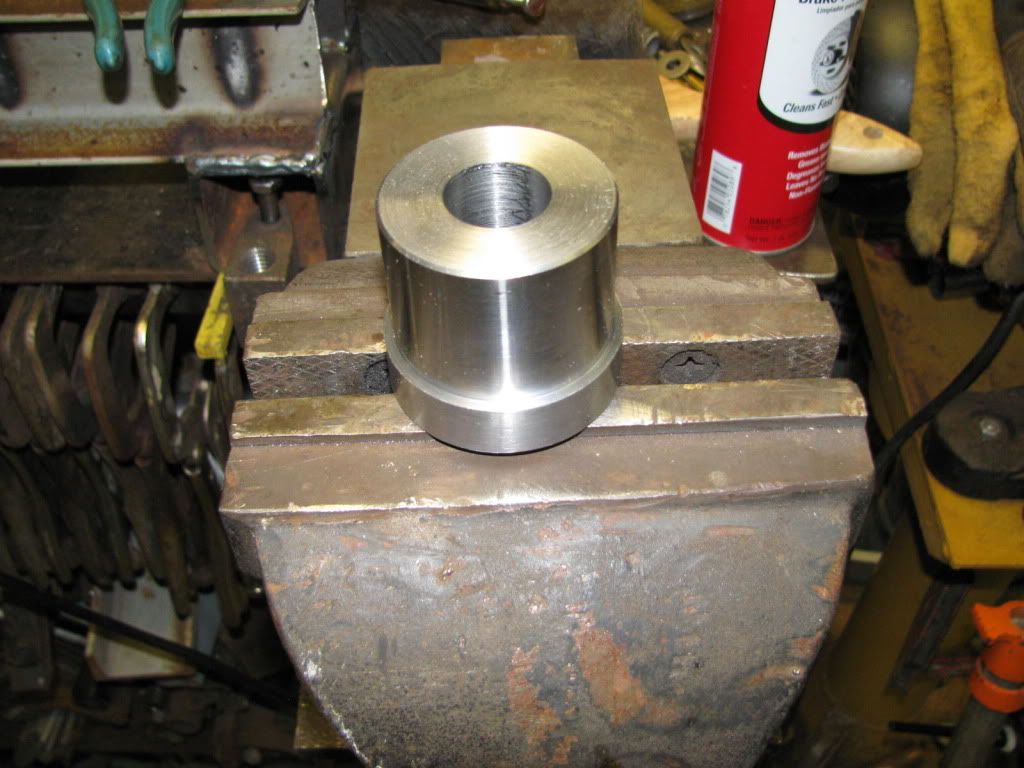
Bushing end .
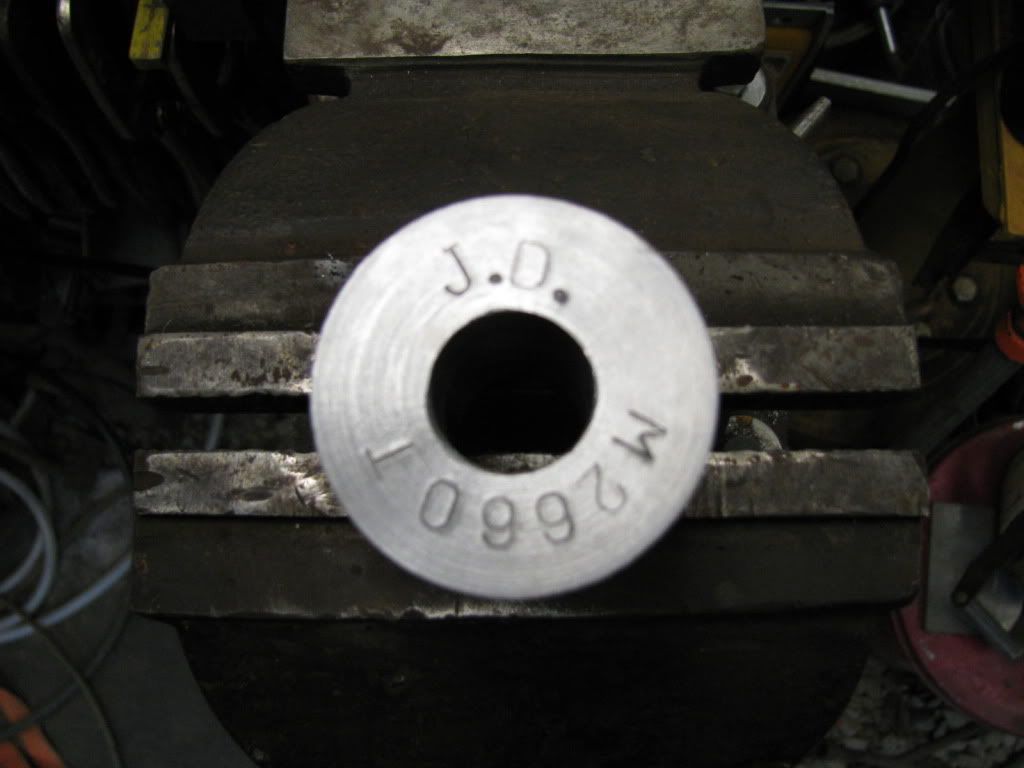
J.D. Tool Number , for future reference
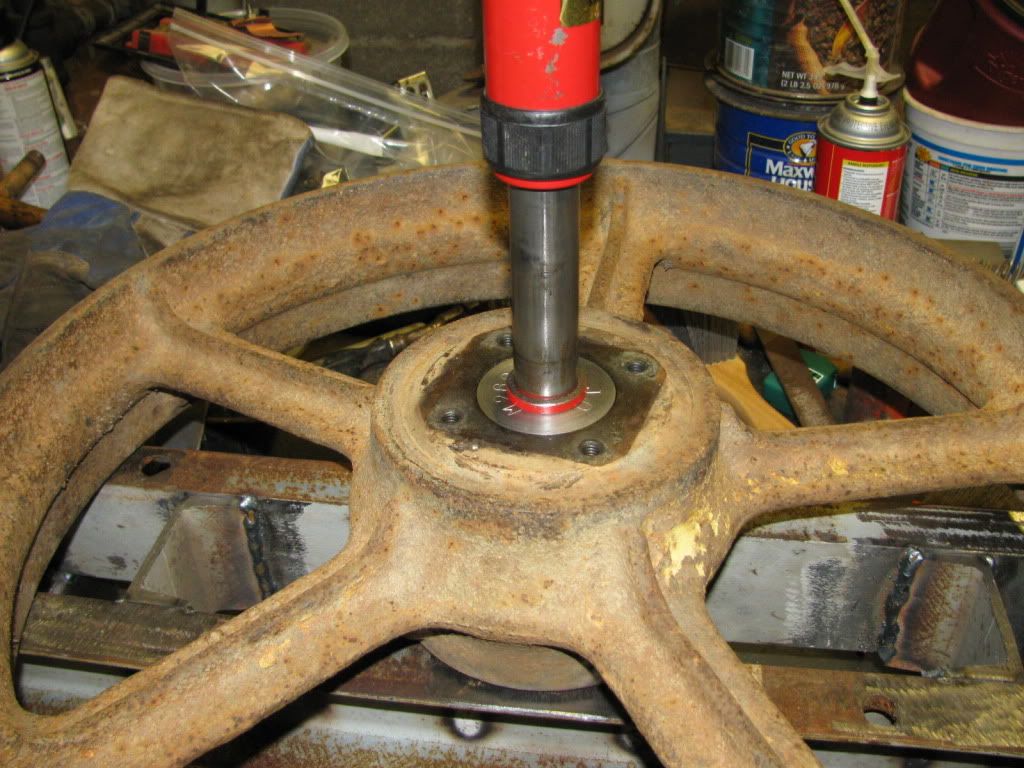
The press works .
Old bushing out , now the idler can be sandblasted .
Dan
The cut went smoothly , I used a lot dark threading oil while cutting .
Finish cut , not the prettiest but hey is is just a driver .
Bushing end .
J.D. Tool Number , for future reference
The press works .
Old bushing out , now the idler can be sandblasted .
Dan
1956 420C with GSC blade
Tools are to men as shoes are to women , you can never have too many !!
Used diesel engines are an adventure any way you look at them !!
Tools are to men as shoes are to women , you can never have too many !!
Used diesel engines are an adventure any way you look at them !!
-
mini kahuna
- 1010 crawler

- Posts: 301
- Joined: Tue Oct 02, 2007 1:08 pm
- Location: rhode island
nice job making that bushing driver,I guess if you have the know-how and a big enough machine shop you can make just about anything.
many years ago an old timer had a machine shop setup to work on indian motorcycles,he could fix or make anything for those bikes.
I watched him repair a hole in a case the size of a coffee can lid,heli arc and a lot skill.
you might be able to start your own antique crawer repair!!!
many years ago an old timer had a machine shop setup to work on indian motorcycles,he could fix or make anything for those bikes.
I watched him repair a hole in a case the size of a coffee can lid,heli arc and a lot skill.
you might be able to start your own antique crawer repair!!!
Thank you , would like to have the room to get a mill and get my surface grinder home .mini kahuna wrote:nice job making that bushing driver,I guess if you have the know-how and a big enough machine shop you can make just about anything.
And compete with Lavoy , no way . I have enough headaches right nowmini kahuna wrote:you might be able to start your own antique crawer repair!!!
Dan
1956 420C with GSC blade
Tools are to men as shoes are to women , you can never have too many !!
Used diesel engines are an adventure any way you look at them !!
Tools are to men as shoes are to women , you can never have too many !!
Used diesel engines are an adventure any way you look at them !!
Installation Driver
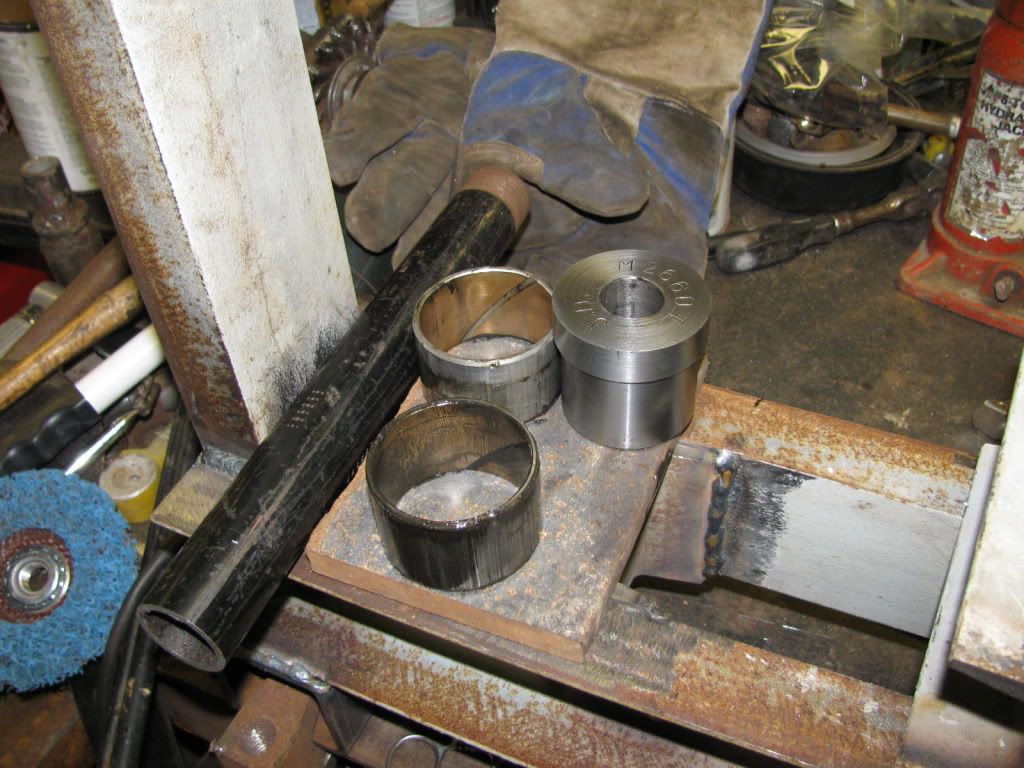
I finished the installation driver and I am now ready to sandblast the idler and mounting parts to get them ready for paint .

Installation Driver and Bushing
Bushing on the driver .
I still need to stamp the John Deere Tool Number on it for future identification .
I am also in the final stages of testing of my hopper for my pressure washer sandblaster attachment , I might get it tested today to see if the orifice I made for it is the right size .
Dan
1956 420C with GSC blade
Tools are to men as shoes are to women , you can never have too many !!
Used diesel engines are an adventure any way you look at them !!
Tools are to men as shoes are to women , you can never have too many !!
Used diesel engines are an adventure any way you look at them !!
Not hard to make if you have access to a lathe . Could make you a set for a reasonable price plus shipping . They would fit into a small flat rate box .Pistonman wrote:I need a set of those.
It has been interesting to say the leastgus wrote:Thanks
I'm about to bring my 420 into the shop and do exactly what you're doing. I think you've saved me a lot of work.....

Gus
I have decided that the transmission will get torn down and rebuilt also , since I am this far into it I might as well do the whole thing . Dan
1956 420C with GSC blade
Tools are to men as shoes are to women , you can never have too many !!
Used diesel engines are an adventure any way you look at them !!
Tools are to men as shoes are to women , you can never have too many !!
Used diesel engines are an adventure any way you look at them !!
Update.
Well with many fits and starts on rebuilding this crawler I am about ready to get it done. I found the last of the big parts for her and I have to build a few projects before I get started. One a hot tank to remove the nasty grease and dust from the center frame. I might get that started tomorrow . The hot tank has to be tall enough to submerge the center frame completely with the bell housing pointing down.  I have a boiler expansion tank here that I picked up off a friend a few years back, I will have to build a set of legs to support the tank above the turkey fryer burner, and stabilize the tank while loading the parts in. I will use a set of chainfalls to load the parts into the tank, the chainfalls will hang off my gantry crane I have here. Once the parts are out of the tank I will pressure wash them and then sand blast them.
I might start on the hot tank tomorrow.
Dan.
I might start on the hot tank tomorrow.
Dan.
1956 420C with GSC blade
Tools are to men as shoes are to women , you can never have too many !!
Used diesel engines are an adventure any way you look at them !!
Tools are to men as shoes are to women , you can never have too many !!
Used diesel engines are an adventure any way you look at them !!
Who is online
Users browsing this forum: No registered users and 26 guests