It's coming together, part II things you'll find....

Show us pictures of your JD crawler and attachments.
gus
2010 crawler
2010 crawler
Posts: 696
Joined: Mon Jul 16, 2007 11:55 am
Location: North West
Contact:

It's coming together, part II things you'll find....

Post by gus » Fri Dec 09, 2011 2:46 pm

I thought I'd throw in things I've found and you might also. One side was full of water in the clutch housing. A small amount in the finals but no damage there.

If you find a roller or front idler that's loose, Might be shaft/bearing wear?? :?
Image

How about the steering clutch quill....rusty, dirty, stuck tube??
Image

Then get inside... the grease is old and drying it needs cleaning and a relube of parts.
Image

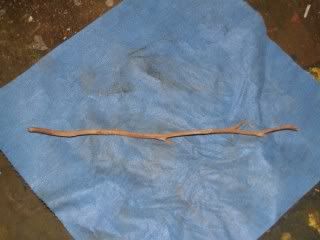
I still hadn't driven the old rusted up tube out yet....this is rebuilt with a new tube and installed. I actually didn't use the one in the photo as I had 2 in much better condition.
Image

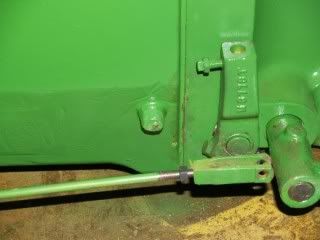
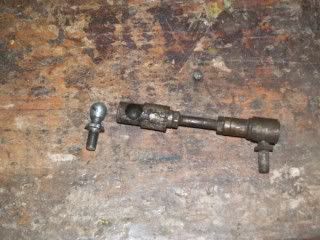
Then there's the steering linkage...needs cleaning and relube..maybe replace worn joint too.. again, I didn't use this one as I had better ones with no wear.
Image

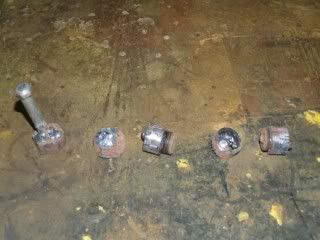
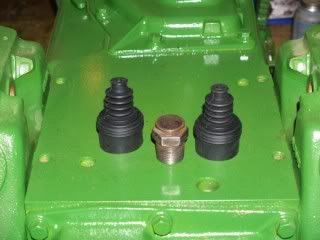
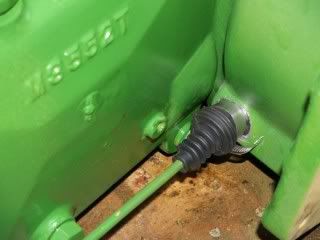
Brake rod boots shot..I found these at the parts house. The nipple is an old one I took in to size a replacement, shown only for reference size. Next photo shows the boot hose clamped on..
Image

Image

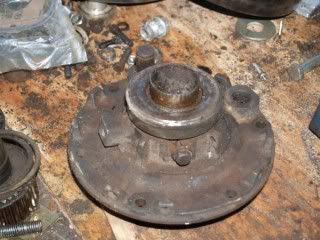
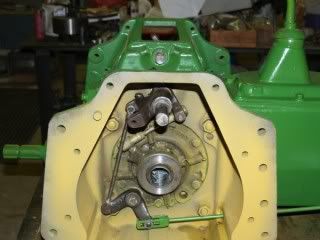
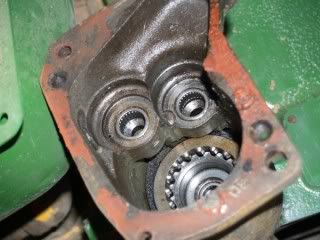
How about the reverser?? There's supposed to be a roll pin that holds a bearing washer just to the left of that bearing. A real SOB to get out!!!

Image

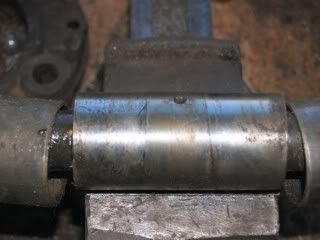
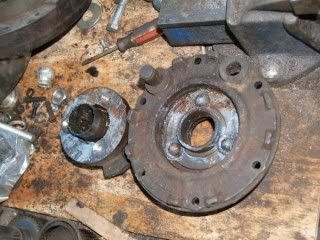
Speaking of that bearing...I put a new seal in the nose of the reverser, this is what was under the housing, after driving in the new seal, when I picked it up... Another SOB to get that small bearing back out.
Image

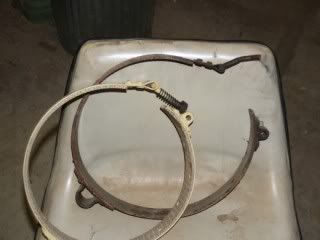
How about the brakes?? One band was rusted in two (water side) and this is the "good" one.. shown with a new one.
Image

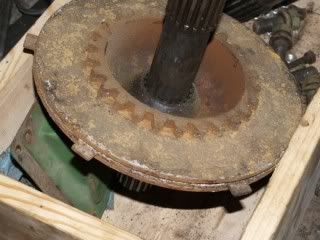
Steering clutches?? this was on the "water side"...
Image

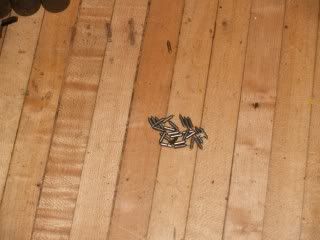
Picture of rear tranny case removed and being washed out...ever hear a clunk?? How about several??? There were 2 bolts still holding the ring gear :shock: :shock: :shock:

Image

gus
2010 crawler
2010 crawler
Posts: 696
Joined: Mon Jul 16, 2007 11:55 am
Location: North West
Contact:

Post by gus » Sat Dec 10, 2011 5:32 pm

There's ooops!! :? And then there's Aw Sh*t :shock: :evil: :evil:

The photo is oops. :lol: I saw it, I knew it was there, I forgot about it. A broken bolt in the foot rest mounting hole. I had to drill it out and retap the hole. There was also one on the other side I really didn't see. A bolt end broken off in the hole several threads deep. Also drill/tap out.

The Aw Sh*t?? It was little piece of junk in a hole. Nothing to worry about, just dirt or small rock , like in the many other places dirt collects and I've stuck a pick into and blown out, get it when I have the air on....NOT...some butt head broke a tap off and left it in there for me to remove!! :roll: :twisted: :twisted:

Image

User avatar
jtrichard
350 crawler
350 crawler
Posts: 1883
Joined: Sun Jan 11, 2009 9:48 pm
Location: Joshua Tree CA

Post by jtrichard » Sat Dec 10, 2011 8:30 pm

what was the brand and part number of the brake rod boots thanks Richard
2010 with 622 dozer with mod. 35 ripper and a 2010 with 622 dozer bought in 1969 and a 2010 loader with drott and mod. 36 ripper

gus
2010 crawler
2010 crawler
Posts: 696
Joined: Mon Jul 16, 2007 11:55 am
Location: North West
Contact:

Post by gus » Sun Dec 11, 2011 1:40 pm

jtrichard wrote:what was the brand and part number of the brake rod boots thanks Richard
I'm sorry, but I have neither brand or part. I asked, but they said just a brake part they keep on hand for master cyl or hyd control repair. It looks like the boot on a joy stick.

I took a nipple from the clutch housing and a brake rod and handed them to the parts guy and told him what I needed. This is what he came up with from his parts bin. It's an independent tractor repair/parts co, not like NAPA or someone who keeps stock numbers. They just order out of a generic catalog of parts.

User avatar
jtrichard
350 crawler
350 crawler
Posts: 1883
Joined: Sun Jan 11, 2009 9:48 pm
Location: Joshua Tree CA

Post by jtrichard » Sun Dec 11, 2011 7:54 pm

can you find out what catalog? thanks
2010 with 622 dozer with mod. 35 ripper and a 2010 with 622 dozer bought in 1969 and a 2010 loader with drott and mod. 36 ripper

gus
2010 crawler
2010 crawler
Posts: 696
Joined: Mon Jul 16, 2007 11:55 am
Location: North West
Contact:

Post by gus » Mon Dec 12, 2011 6:16 pm

jtrichard wrote:can you find out what catalog? thanks
I was just in town and this is what I got.

He brought out a bag and this is what was on it:

REXCO
40MT & 50 MT starter parts
Part# 2A6607

caribcanuck
420 crawler
420 crawler
Posts: 31
Joined: Thu Mar 18, 2010 7:39 pm

Post by caribcanuck » Mon Dec 12, 2011 10:54 pm

thats the rubber that goes between the starter soleniod and front housing shouldnt be hard to find

User avatar
jtrichard
350 crawler
350 crawler
Posts: 1883
Joined: Sun Jan 11, 2009 9:48 pm
Location: Joshua Tree CA

Post by jtrichard » Wed Dec 14, 2011 8:04 pm

thanks that should be easy have a starter shop about 10 miles away
2010 with 622 dozer with mod. 35 ripper and a 2010 with 622 dozer bought in 1969 and a 2010 loader with drott and mod. 36 ripper

gus
2010 crawler
2010 crawler
Posts: 696
Joined: Mon Jul 16, 2007 11:55 am
Location: North West
Contact:

Post by gus » Wed Dec 14, 2011 8:10 pm

jtrichard wrote:thanks that should be easy have a starter shop about 10 miles away
When installing, put the hose clamp adjuster right on top. I found if I didn't it hit the foot rest. I also got hose clamps that you use a wrench on so I can change them again when they wear out.

gus
2010 crawler
2010 crawler
Posts: 696
Joined: Mon Jul 16, 2007 11:55 am
Location: North West
Contact:

Post by gus » Sat Dec 31, 2011 3:20 pm

Never miss a good chance to screw up....

While assembling things, all the pipe plugs I needed to remove were perfect. They came out easily. Well, I did not check the ones I had no need to remove. I should have, as stated in the first line.

I put the first final on and things were going well. I put the second final "almost on" and there was a bind. It seemes the brake band was slightly cocked and would not slide into place even with my biggest hammer, which wouldn't fit in that small hole anyway.

No problem, just pull that bottom plug and slide it over. Riiiiiiight...... Said plug was one I hadn't removed. Murphy just stopped by. :evil: :evil: :evil:

After nearly rounding the hole, I ground the end of a large bolt to fit in the recess and welded it on....twisted the bolt off....welded a very large nut over the stub....twisted it off again.... got a piece of 1" pipe and welded it on over the whole mess. Persistance pays... It held...I had to use a 24" pipe wrench and a 3' cheater but the dirty rusty bugger came out.

One small pry with a screw driver and the brake band went into place :D :D

Quit here?? Not a chance...what about the other plug. Why wait until I really needed it out. Old Murphy had not left the building :roll: :roll: :roll: Since I had all the tools at hand I went at it again but with much quicker sucess. Only twisted one off.

If you're doing something like I'm doing, REMOVE every plug and bolt while it's on the table and easy to get at. Even if it's not needed right now.

Oh yes, it really helps if you're laying on your back under a tractor to have an 7 mo old Lab pup decide you're down there to play or your leg looks like a chew toy... :lol: :lol:

gus
2010 crawler
2010 crawler
Posts: 696
Joined: Mon Jul 16, 2007 11:55 am
Location: North West
Contact:

Post by gus » Sun Jan 01, 2012 12:13 pm

Just a photo of the offending parts and attempted cure :lol: :lol: Pardon the bird shit welds, my first ever attempt at overhead welding with a wire feed and really poor visibility :roll: :roll:

Image

gus
2010 crawler
2010 crawler
Posts: 696
Joined: Mon Jul 16, 2007 11:55 am
Location: North West
Contact:

Post by gus » Thu Jan 12, 2012 10:57 am

As I was handling the gas tank I heard something slide inside. My first thought was, oh no, rust flakes. I put a good light in there and the inside looked like new!! I shook the tank around and slid what ever to the opening....A perfect and very clean, heavy weed branch with arms :roll: :roll: It took 10 minutes to jiggle it around so that I could get it out without breaking it.

I didn't photo it but I still might. Now, I will either have to put it in the tool box or find another gas guage :lol: :lol: :lol:

gus
2010 crawler
2010 crawler
Posts: 696
Joined: Mon Jul 16, 2007 11:55 am
Location: North West
Contact:

Post by gus » Sun Jan 15, 2012 1:13 pm

When you're in the field and want to know how much gas you have, grab one of these :roll: :roll: :roll:

I would suggest you point the branches down so they won't catch when you pull it out to check fuel level... :lol: :lol: :lol:

Image

User avatar
jtrichard
350 crawler
350 crawler
Posts: 1883
Joined: Sun Jan 11, 2009 9:48 pm
Location: Joshua Tree CA

Post by jtrichard » Sun Jan 15, 2012 1:47 pm

i have a 480c skip and cleaned the fuel tank and found 16 (YES) 16 lug bolts
2010 with 622 dozer with mod. 35 ripper and a 2010 with 622 dozer bought in 1969 and a 2010 loader with drott and mod. 36 ripper

gus
2010 crawler
2010 crawler
Posts: 696
Joined: Mon Jul 16, 2007 11:55 am
Location: North West
Contact:

Post by gus » Sun Jan 22, 2012 8:26 pm

The problems that you don't think about when planning the rebuild. :cry:

This was a phase I crawler and it had the 2 bolt side frames. I decided to upgrade to a later 4 bolt side frame and eliminate possible problems. :wink:

This is where "things pop up".

I had perfect pedals, sand blasted and painted and ready to go on. They were different than the phase II center section. I had to get pedals that matched and they were quite worn and I had to do some work on them. Brake pedal return spring, different

I was putting the center section into the side frames..wouldn't go. The foot rests are different. I had to grind out room for the side plate.

I was going to use the 2 good brake rods I had that weren't bent or damaged. I noticed that they were different lengths.

I still have to put the belly pan on....again, different. I will remove some metal and redrill a couple of holes and it will work fine.

Post Reply

Who is online

Users browsing this forum: No registered users and 39 guests