Gus
It's coming together part IV, the details
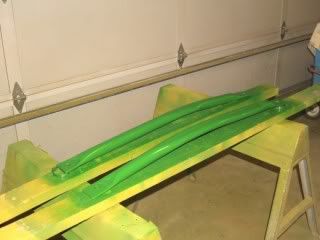
Gus for future reference, you can clean a tank out with a cleaner such as Simple Green, Castrol Super Clean or Marine Clean from Resto-motive Industries, then wash it out with HOT water and drain it. Then blow air through it to dry it out, place a final purge of CO2 in it before you start welding if you are still nervous about it. To make cleaning the welding detritus easier spray some anti-splatter into the tank before you put the final purge in the tank.gus wrote:THINK MAN THINK........gus wrote:The tank is welded and painted. I welded in a drain, the new mounting tabs and also added a large tab on the outside to help carry the extra weight. I have increased the capacity to over 5 gallons from the original 2.5. I'm not quite sure what it was but I think in that range.

After all this I realized the the new pump had more capacity and needed bigger lines!!
Now I have to go back and cut out the holes and weld in bigger fittings.And, the tank was rinsed with a volital fuel to get the welding crud out.
I'm also looking into putting a filter on the return line. I think the system will have a longer life if I do.
Gus

Once you have completed welding clean again with the cleaner and rinse again with HOT water. I then dry the tank on a hot plate and an old frying pan over low heat, until it is completely dry.
Spray a rust inhibitor into the tank or coat the inside of the tank with some light oil. I store small finished tanks in ziplock bags, bigger tanks in garbage bags until they are ready to paint or be installed.
Dan.
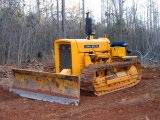
1956 420C with GSC blade
Tools are to men as shoes are to women , you can never have too many !!
Used diesel engines are an adventure any way you look at them !!
Tools are to men as shoes are to women , you can never have too many !!
Used diesel engines are an adventure any way you look at them !!
Once you have completed welding clean again with the cleaner and rinse again with HOT water. I then dry the tank on a hot plate and an old frying pan over low heat, until it is completely dry.
Spray a rust inhibitor into the tank or coat the inside of the tank with some light oil. I store small finished tanks in ziplock bags, bigger tanks in garbage bags until they are ready to paint or be installed.
Dan.[/quote]
What I did was rinse with plain water then I filled it to the top with water which eliminated any fumes. I poured out a couple inches of water then cut and welded in the new parts.
When I was done, I dumped the water. I then rinsed with some paint thinner, which came out clean. I used my wood stove as a heat source and dried it then oiled it with type F trans oil. Swished the oil all around to cover all parts.
One other thing I did just after welding was use a magnet to collect anything loose inside. I banged the tank around a bit then tipped it to a fitting end and put one of those long retriever magnets down in it. I was surprised at how much junk came out. I repeated until the magnet came back out clean. It must have taken 10X to get it all!!
-
MADJACK
- 430 crawler

- Posts: 57
- Joined: Thu Dec 10, 2009 2:58 pm
- Location: www.homegunsmith.com
Scrounged parts.....
I got a front bumper and heavy duty guard but the braces were in poor condition and didn't fit. I made 2 new ones out of 1 1/2" black pipe. It took quite a bit of fitting, bending and making sure they cleared everything (like the oil filter, generator on one side and the air cleaner on the other).
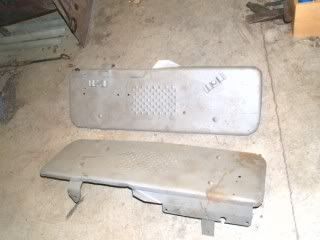
I got some fenders off of a junked crawler. Badly dented, bent and cracked. Some serious pounding with a big hammer on an anvil got most of the dents. Wire feed got the cracks. My JD wheel tractor loader got the big bend out (placed the end of the fender on 2 logs and pushed down with the loader!!). I also had to do a bit of grinding to remove old welds that held????
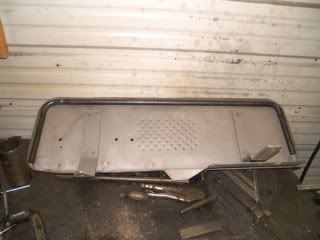
I then bent a piece of 1/2" black pipe to fit under the lip of the fenders and welded them in place to beef them up. You can't see or tell the pipe's there unless you're under, looking up.
I got a front bumper and heavy duty guard but the braces were in poor condition and didn't fit. I made 2 new ones out of 1 1/2" black pipe. It took quite a bit of fitting, bending and making sure they cleared everything (like the oil filter, generator on one side and the air cleaner on the other).
I got some fenders off of a junked crawler. Badly dented, bent and cracked. Some serious pounding with a big hammer on an anvil got most of the dents. Wire feed got the cracks. My JD wheel tractor loader got the big bend out (placed the end of the fender on 2 logs and pushed down with the loader!!). I also had to do a bit of grinding to remove old welds that held????
I then bent a piece of 1/2" black pipe to fit under the lip of the fenders and welded them in place to beef them up. You can't see or tell the pipe's there unless you're under, looking up.
Last edited by gus on Mon Mar 26, 2012 4:48 pm, edited 2 times in total.
-
JD440ICD2006
- 350 crawler

- Posts: 1113
- Joined: Tue Aug 22, 2006 3:57 pm
- Location: South Carolina
-
Paul Buhler

- 350 crawler
- Posts: 991
- Joined: Wed May 21, 2008 6:25 pm
- Location: Killington, VT
Hi: Nice looking repairs. On my 420, the radiator guard supports are made of 3/8" x 2 " rectangular stock heated, bent where needed, and bolted in a similar place as your round supports; it gives a bit more clearance.
When can we see some video of your machine running on YouTube? Paul
When can we see some video of your machine running on YouTube? Paul
Paul Buhler
Killington, VT
420c 5 roll with 62 blade, FOPS, and Gearmatic 8a winch
Killington, VT
420c 5 roll with 62 blade, FOPS, and Gearmatic 8a winch
I'm not sure I even know how to post on YouTube, never have.Paul Buhler wrote:When can we see some video of your machine running on YouTube? Paul
I just put the dozer on and now that I have that done I'm measuring for cylinders. I'm figuring out mounts and cylinder set up for the angle. It is a 6 way blade but it did not have hydr on the angle.
When I get cylinders, it will probably take another week to get all the mounting, fittings and plumbing in place. That's looking like about 2 weeks from now to drive out the door
-
JD440ICD2006
- 350 crawler
- Posts: 1113
- Joined: Tue Aug 22, 2006 3:57 pm
- Location: South Carolina
Pretty easy. Download your video(s) to your computer, upload to YouTube. Then, copy the link on YouTube and paste it in a message on here.
1959 JD 440ICD w/64 Power Angle Tilt Blade
1959 JD 440ICD w/63 Manual Angle Blade
1959 JD 440IC w/602 Manual Angle Blade
1959 JD 730D W SE (many options)
1950 JD M S w/M-20 Mower
1952 JD M W
1955 FORD 640 (burns the most fuel)
1959 JD 440ICD w/63 Manual Angle Blade
1959 JD 440IC w/602 Manual Angle Blade
1959 JD 730D W SE (many options)
1950 JD M S w/M-20 Mower
1952 JD M W
1955 FORD 640 (burns the most fuel)
-
Paul Buhler
- 350 crawler
- Posts: 991
- Joined: Wed May 21, 2008 6:25 pm
- Location: Killington, VT
Or take the video and have a 13 year old do the upload for you - annoying but efficientPretty easy. Download your video(s) to your computer, upload to YouTube. Then, copy the link on YouTube and paste it in a message on here.
Paul Buhler
Killington, VT
420c 5 roll with 62 blade, FOPS, and Gearmatic 8a winch
Killington, VT
420c 5 roll with 62 blade, FOPS, and Gearmatic 8a winch
When I get cylinders, it will probably take another week to get all the mounting, fittings and plumbing in place. That's looking like about 2 weeks from now to drive out the door 
 [/quote]
Well........ it would have if I'd have measured better
And.........then there's all the hydraulic lines
Make that about Ap 12-15 when it drives out the door.
Well........ it would have if I'd have measured better
And.........then there's all the hydraulic lines
Make that about Ap 12-15 when it drives out the door.
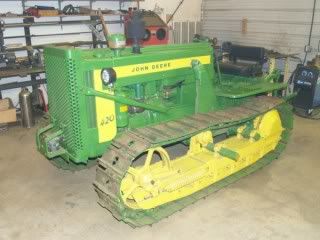
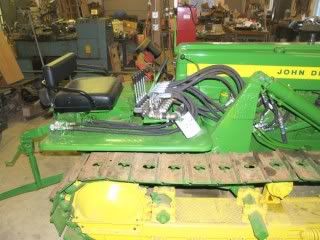
The boars nest. Not what you'd find on a stock 420, but this is a working tractor. Nothing that can't be reversed to stock should I ever want to. No modification was done to the basic tractor other than drill 2 holes in the sheet metal.
Side view
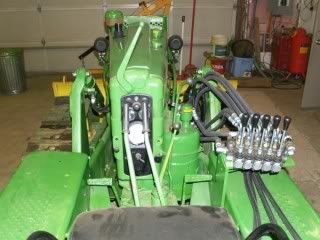
Drivers view
Now I know the question
First three are for the dozer (6 way)
Fourth is the 3 pt.
Fifth is the aux outlets.
Side view
Drivers view
Now I know the question
First three are for the dozer (6 way)
Fourth is the 3 pt.
Fifth is the aux outlets.
Who is online
Users browsing this forum: No registered users and 41 guests