Show us pictures of your JD crawler and attachments.
-
gus
- 2010 crawler

- Posts: 696
- Joined: Mon Jul 16, 2007 11:55 am
- Location: North West
-
Contact:
Post
by gus » Sat Jan 07, 2012 12:41 pm
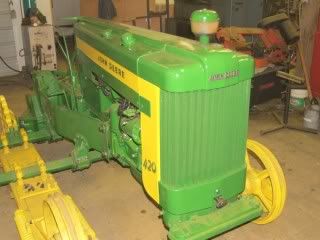
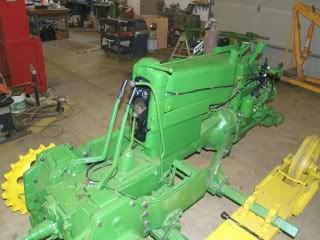
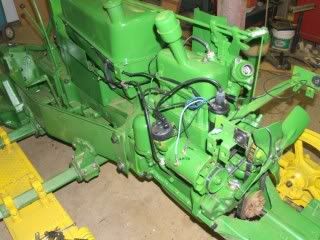
The big iron is all on. Now it's the little things, wiring, instruments, water pump, hyd pump, starter, gen, lights, air cleaner and radiator. Next it will be on to sheet metal.
Some of the photos show parts that are installed temporarly. Mostly checking fit and making sure something isn't going to have to come back off for something I forgot to put on first


The radiator has all new rubber mounts. It fit and was then removed for other work.
Water pump
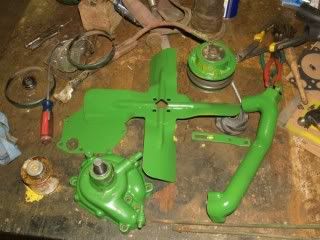
instruments and wiring...very easy with Lavoys new wiring loom!!


-
whiteclipse16
- 2010 crawler
- Posts: 622
- Joined: Tue Mar 30, 2010 8:02 am
- Location: Steubenville, OH
Post
by whiteclipse16 » Sat Jan 07, 2012 2:46 pm
Looking good and moving along fast gus.
Keep the good pics coming.
Wish mine was this far along.
Ben
Great Grandpa's 1960 440ICD 602 blade
Between SN's: 455,633 - 456,801
Currently Rebuilding/Restoring
-
gus
- 2010 crawler
- Posts: 696
- Joined: Mon Jul 16, 2007 11:55 am
- Location: North West
-
Contact:
Post
by gus » Sun Jan 08, 2012 12:57 pm
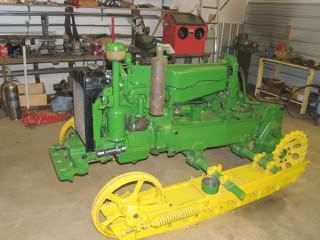
I have the hydraulic pump on but it's very tight and I'm trying to figure out how the plumb it. This tractor did not have a factory pump and I don't have any factory lines.
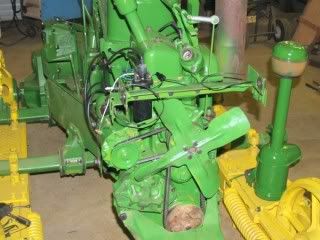
The silver spots just behind the fan on the left side as viewed is duct tape over the fittings.
It's looking a little more complete all the time!!
-
gus
- 2010 crawler
- Posts: 696
- Joined: Mon Jul 16, 2007 11:55 am
- Location: North West
-
Contact:
Post
by gus » Sun Jan 15, 2012 1:16 pm
-
gus
- 2010 crawler
- Posts: 696
- Joined: Mon Jul 16, 2007 11:55 am
- Location: North West
-
Contact:
Post
by gus » Fri Jan 20, 2012 6:05 pm
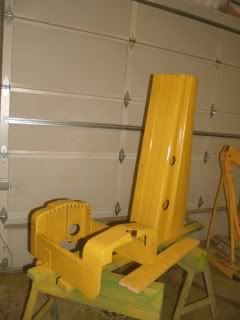
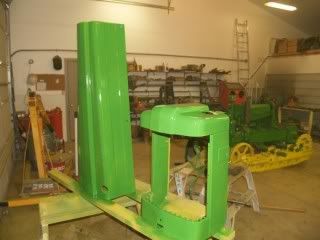
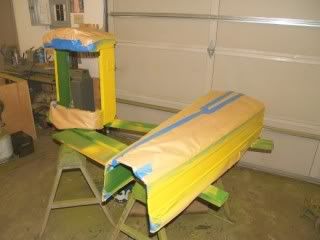
Second color being added and a trial fit. Decals next and put them on permanently.
-
gus
- 2010 crawler
- Posts: 696
- Joined: Mon Jul 16, 2007 11:55 am
- Location: North West
-
Contact:
Post
by gus » Sun Jan 22, 2012 8:12 pm
-
gus
- 2010 crawler
- Posts: 696
- Joined: Mon Jul 16, 2007 11:55 am
- Location: North West
-
Contact:
Post
by gus » Sun Feb 05, 2012 7:00 pm
I'm working on the hydraulics and this is continued from the what you'll find thread.

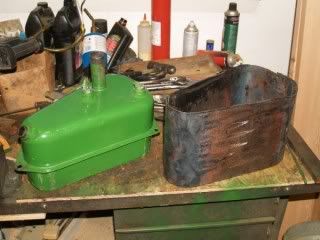
Since the original hydraulic tank I had was rusted out, I decided to repair it and while I was at it, increase the capacity to more match my pump.
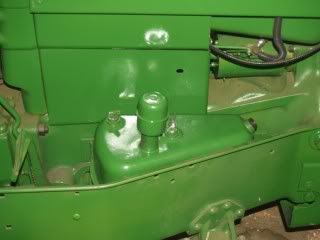
This is the original as it would have sat in the tractor
This is the tank and the extension I fabricated from some 12 ga sheet metal I had
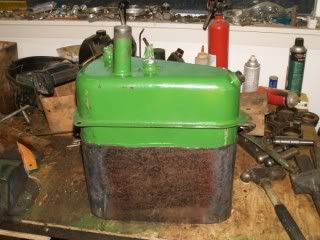
The old tank sitting in the extesion
A trial fit and how it will look sitting in the tractor when it's welded up
Last edited by
gus on Sat Feb 11, 2012 12:43 pm, edited 1 time in total.
-
gus
- 2010 crawler
- Posts: 696
- Joined: Mon Jul 16, 2007 11:55 am
- Location: North West
-
Contact:
Post
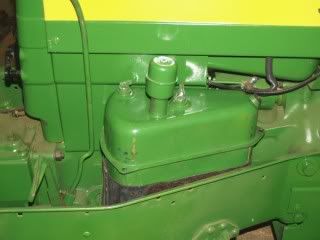
by gus » Fri Feb 10, 2012 8:42 pm
The tank is welded and painted. I welded in a drain, the new mounting tabs and also added a large tab on the outside to help carry the extra weight. I have increased the capacity to over 5 gallons from the original 2.5. I'm not quite sure what it was but I think in that range.

-
gus
- 2010 crawler
- Posts: 696
- Joined: Mon Jul 16, 2007 11:55 am
- Location: North West
-
Contact:
Post
by gus » Sun Feb 12, 2012 12:55 pm
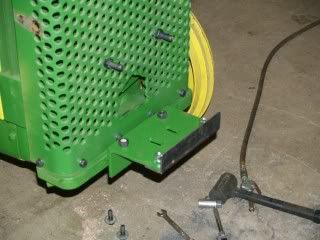
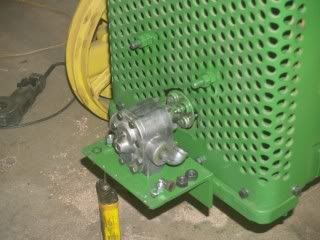
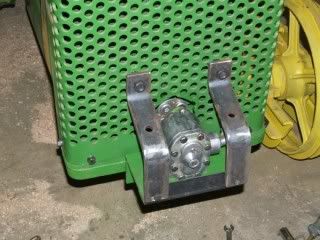
This tractor did have a front mount pump, but it did not have a front bumper and HD grill guard.
I had to make new mounts. I ground the front of the bumper flat where the casting was rough. I drilled and tapped 3 holes for the angle plate. I added heavy straps up to the grill guard to strengthen the mount and also protect the pump. I do not have the cover over the straps in these photos.
-
Paul Buhler
- 350 crawler

- Posts: 991
- Joined: Wed May 21, 2008 6:25 pm
- Location: Killington, VT
Post
by Paul Buhler » Wed Feb 15, 2012 5:56 pm
Thanks for sharing. Your tractor sure looks nice. Best wishes getting it re-plumbed and outside running. Will this be a working machine or a show machine? Paul
EDIT: Saw Message V. answered my question. Good looking 3pt modification. Paul
Paul Buhler
Killington, VT
420c 5 roll with 62 blade, FOPS, and Gearmatic 8a winch
-
gus
- 2010 crawler
- Posts: 696
- Joined: Mon Jul 16, 2007 11:55 am
- Location: North West
-
Contact:
Post
by gus » Thu Feb 16, 2012 11:26 am
Paul Buhler wrote:Thanks for sharing. Your tractor sure looks nice. Best wishes getting it re-plumbed and outside running. Will this be a working machine or a show machine? Paul
EDIT: Saw Message V. answered my question. Good looking 3pt modification. Paul
My goal is a machine that I can go out, start it up and go to work without having to wonder if it'll start or be ready to go plow snow!! I have a newer JD wheel tractor and it's nice to just get on and go without any thought of problems. First time I've had that!!
Gus
-
Paul Buhler
- 350 crawler
- Posts: 991
- Joined: Wed May 21, 2008 6:25 pm
- Location: Killington, VT
Post
by Paul Buhler » Thu Feb 16, 2012 7:22 pm
My goal is a machine that I can go out, start it up and go to work without having to wonder if it'll start or be ready to go plow snow!! I have a newer JD wheel tractor and it's nice to just get on and go without any thought of problems. First time I've had that!!
Yeah, peace of mind and reliability are worthy goals - It's pretty nice having a machine that you can walk up to, unwrap, open the fuel, and it fires right off, purring, ready to go tackle whatever. Mine's still a work in progress too, but it gets better every year as time and money are applied.

Paul Buhler
Killington, VT
420c 5 roll with 62 blade, FOPS, and Gearmatic 8a winch
-
gus
- 2010 crawler
- Posts: 696
- Joined: Mon Jul 16, 2007 11:55 am
- Location: North West
-
Contact:
Post
by gus » Sat Feb 18, 2012 6:26 pm
gus wrote:The tank is welded and painted. I welded in a drain, the new mounting tabs and also added a large tab on the outside to help carry the extra weight. I have increased the capacity to over 5 gallons from the original 2.5. I'm not quite sure what it was but I think in that range.
THINK MAN THINK........
After all this I realized the the new pump had more capacity and needed bigger lines!!

Now I have to go back and cut out the holes and weld in bigger fittings.
And, the tank was rinsed with a volital fuel to get the welding crud out.
Now it needs to be steamed or defumed to cut and weld on it.
I'm also looking into putting a filter on the return line. I think the system will have a longer life if I do.
Gus
-
gus
- 2010 crawler
- Posts: 696
- Joined: Mon Jul 16, 2007 11:55 am
- Location: North West
-
Contact:
Post
by gus » Fri Mar 09, 2012 8:46 pm
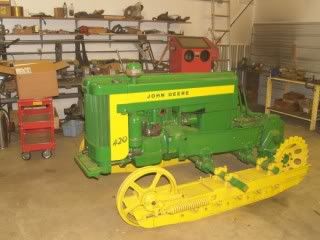
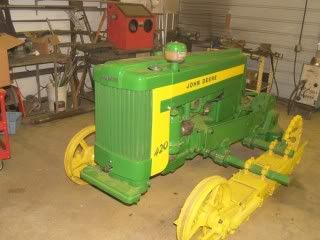
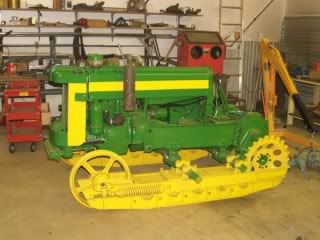
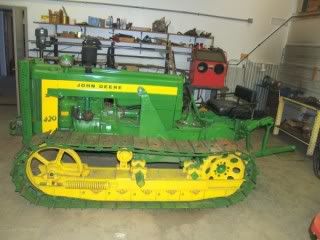
The tracks are on, the 3 pt is on, seats on.
Now to finish...the lights, grill guard braces, sprocket covers, fenders, mount the dozer and the biggie is to put the hydraulics on and plumb them in. Then, were DONE!!!
here's where "Popper's" at now
-
whiteclipse16
- 2010 crawler
- Posts: 622
- Joined: Tue Mar 30, 2010 8:02 am
- Location: Steubenville, OH
Post
by whiteclipse16 » Fri Mar 09, 2012 9:16 pm
Man gus, "popper" looks spectacular.
I sure hope mine turns out this nice when it's done. You did a super nice job. I hope you get to take it to some shows.
Ben
Great Grandpa's 1960 440ICD 602 blade
Between SN's: 455,633 - 456,801
Currently Rebuilding/Restoring
Who is online
Users browsing this forum: No registered users and 37 guests