The upright supports for the loader were sanded down and re-painted over the weekend.
Today I got them mounted back on the crawler.


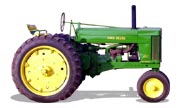
This loader was originally made for the Massey-Harris-Ferguson Company and came off a tractor that was built between 1953 and 1958.
I had to modify these supports a lot to get them to fit on the crawler.
The uprights are rotated 90 degrees from the way they were mounted on the tractor and some of the clearances between the crawler and the upright tubes are tight.
The part of the upright that originally fastened to the frame of the tractor is now pointed up and the loader arms mount to it.
What was originally the "upright" part on the tractor is now the part that mounts to the crawler frame.
All the mounts for this loader support are mounted in rubber and there is no "metal to metal" contact between the loader supports and the crawler frame.
The upright tubes have a 1/4 inch thick support plate welded to each side of them.
The outside support plate on each tube fits over the final drive housing on both sides.

Here you can see the clearance between the support plate and the drive housing.

The upright tube on the left side has about 1/2 inch clearance between it and the flywheel.

There is only about 1/4 inch clearance between the hydraulic valve and the side of the battery box.
The rear bracing bar for the upright tube on this side has about a 1/2 inch clearance between it and the hydraulic valve leavers.

There is an inch or more clearance around the clutch pulley.

And about 3/4 inch clearance between the face of the clutch pulley and the forward bracing bar.

With both of the upright support tubes tucked in tight like this, it leaves about 1 inch clearance between the inside edge of the track and the side of the upright support tubes.