My father and I recently purchased a 72 350BB. This is my first machine. It seems to be in pretty fair condition, I drove it onto the trailer and then pulled it from Florida to my house in Texas. I'm almost certain the left clutch needs to be re-built. Pulling the lever will stop the machine, so I'm guessing that means its not releasing the clutch. After reading a few threads on here I pulled up to a rock pile and worked it for a little while trying to free it up...no success. I pulled it into our shop, and after looking at it for a few minutes began pulling stuff off that looked like it would be in the way. A case of beer later (texas time for 4-5 hours) I had taken essentially the entire left drive assembly off...track, sprocket, track frame, ROPS....I haven't exposed the clutch yet, maybe tonight. I also noticed that the master cylinder looking device for the left lever is leaking pretty bad. I have also taken the front clip off in order to expose a pretty bad leak at the hydro pump. So far have have managed to do all this with just basic tools and a couple pry bars and wood blocks...no injury's yet from all the very heavy pieces. (I graduated college in may and just moved to texas so I'm almost tapped out in the bank and don't have any fancy tools or lifts). At this point my main question is where can I get parts for a good price ?
The parts I know for sure I need at this point are (all on the left side): clutch plates, at least one roller, and track adjuster, maybe a seat but I might just make one.
New JD350B owner---Parts questions
Here are a couple pictures of my first step to addiction. Comment on anything I want to know where I stand.
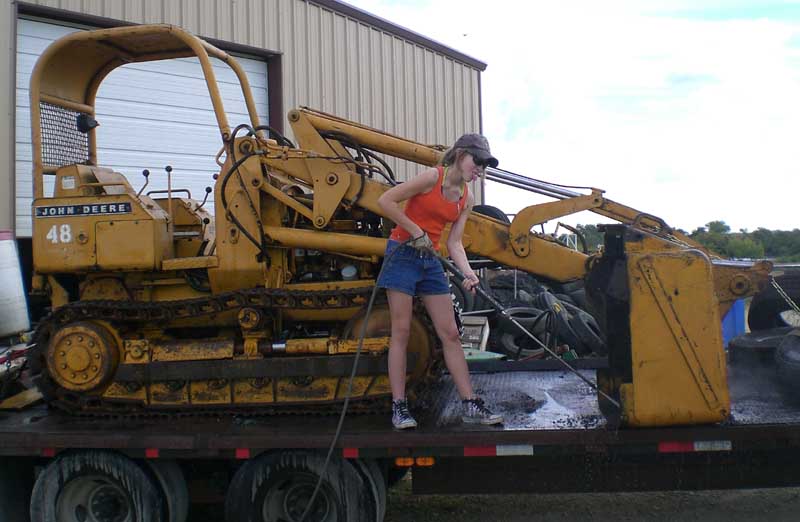
My 12 year old niece steam cleaned it before I started getting into the fun.
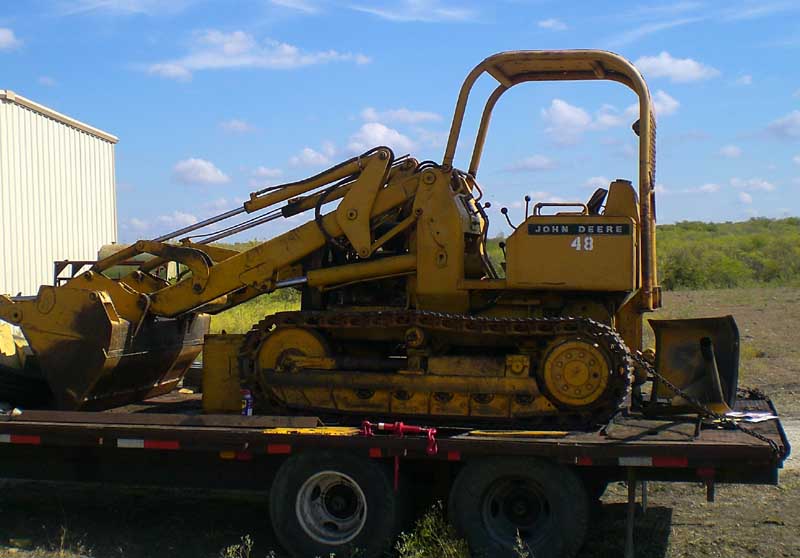
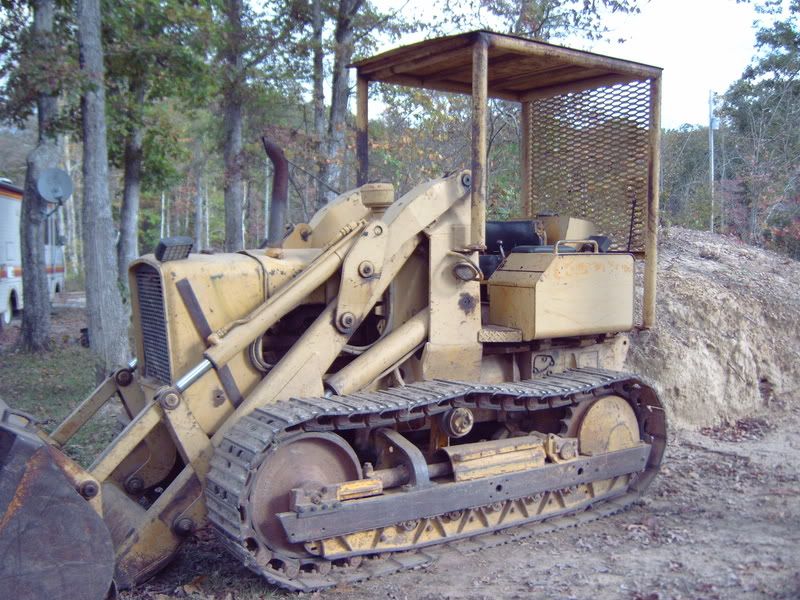
Sitting on the trailer after the 1200 mile trip
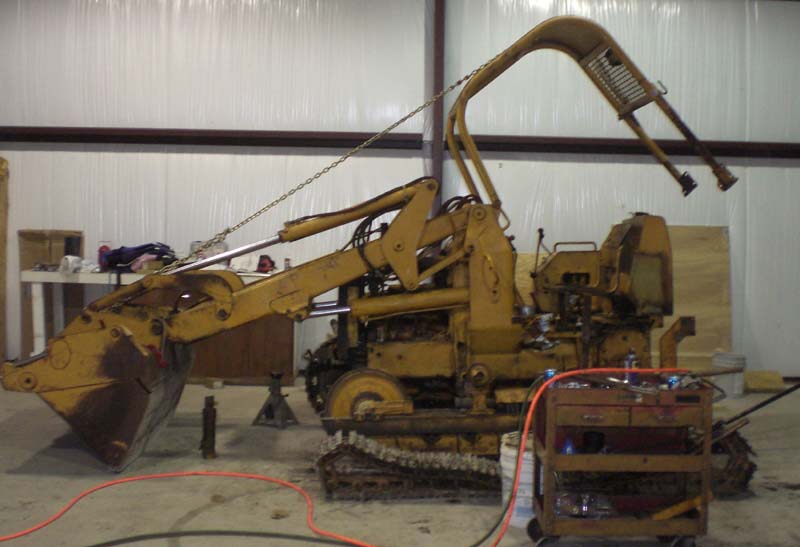
I feel like I might be jumping in the shallow end head first
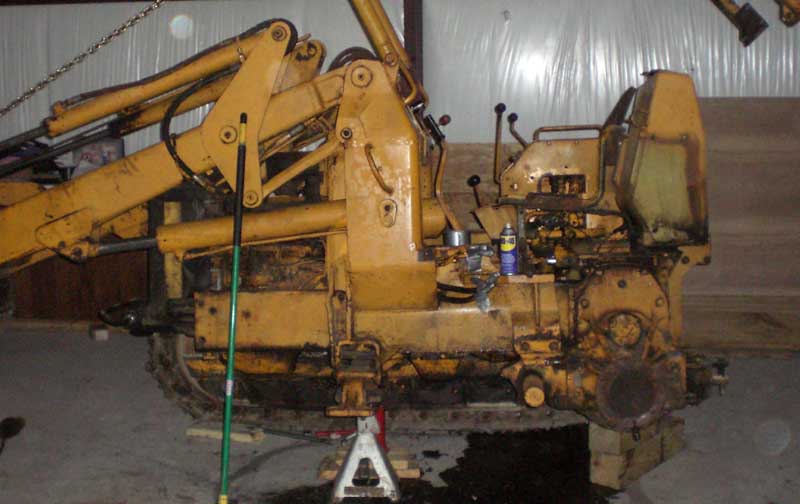
Calling it quits at 11pm....not bad for a rookie and 4-5 ours
My 12 year old niece steam cleaned it before I started getting into the fun.
Sitting on the trailer after the 1200 mile trip
I feel like I might be jumping in the shallow end head first
Calling it quits at 11pm....not bad for a rookie and 4-5 ours
Are you sure about the LEFT clutch?
deleted
Last edited by KenP on Thu May 16, 2013 6:15 am, edited 1 time in total.
Thank you for the advise. I did make the adjustments for the clutch/brake and it made no difference. When I pull the left lever it bogs the machine completely. When I pulled it up against a large tree stump both tracks were braking free and spinning, so I know that the right track is under power. I decided to pull everything off the left side since I knew I had at least one bad roller and a clutch, figured may as well repace the bushings that are at the atachment point for the track frame as well. I worked on her for a couple hours last night, didn't get far though. The counterweight in the back was very dificult to get off and move without help or a lift. I'm guessing the final drive and cover are very heavy so I may wait till tomorrow when my brother will be there to help, so I don't break anything. I'll post more pictures as soon as I get further into it.
KenP is absolutly rite about the steering clutch/brake adjustment. Take your time to adjust properly. There is very little room for error on the adjustment. If it's your 1st time at trying to adjust chances are it will take a few times to get it rite. I've done it so many times & I still find myself readjusting time to time. The repair manuel is very specific as to how to set them up, and the manual is dead on. Unless you're sure your steering clutches are bad, I would have tried to adjust again so your clutch applies just before the brake band. If you have to take the finals off its not too tough, especially with your batterybox removed, with the batterybox out of the way it will be easier to attach a sling to the finals. I made a sling atachment years ago that balanced the final drive nicely & made it easy to attach to the final, I got the idea & a sketch from an retired Deere field mechanic. It's fairly heavy piece so be carefull. I've got the same machine and am very happy with it.
MF40, MF30,350B
Griff- looks like you dove right in on disassembly. Wish I had the time and money to do that to my 2010.
Anyhow, the multipurpose (4in1) bucket should come in really handy for you- wish I had one!
Anyhow, the multipurpose (4in1) bucket should come in really handy for you- wish I had one!
(1) JD Straight 450 crawler dozer with manual outside blade; (2) JD 2010 diesel crawler loaders; (1) JD 2010 diesel dozer with hydraulic 6-way blade; (2) Model 50 backhoe attachments, misc. other construction equipment
Thanks "underdog" nice 450, I can't wait to get this one done and do a couple jobs to pay it off so I can upgrade to a larger one. I see they made some improvements to the track frame on yours, it extends to encumpus the drive sprocket. Great picture though she looks great.
Tigerhaze--Well it doesn't cost anything to take it apart, just what you find while your doing it can hurt sometimes. I think I'll have her going again for under $1000. How do you like that backhoe attachment? I'm going to keep my eyes peeled for one, it shure would come in handy on the ranch.
Tigerhaze--Well it doesn't cost anything to take it apart, just what you find while your doing it can hurt sometimes. I think I'll have her going again for under $1000. How do you like that backhoe attachment? I'm going to keep my eyes peeled for one, it shure would come in handy on the ranch.
Hi Griff-
I have some money but no time and this is my biggest hurdle.
The backhoe can be very handy- I haven't been able to use it a whole lot because my bucket bushings are worn and I was breaking bucket pins. However I have found it handy not only for digging but for lifting items into place and also for getting the crawler out of situations such as being stuck in deep mud or throwing a track. The downside is that the backhoe puts a lot of weight on the sprockets and final drives and is cumbersome when doing typical loading tasks. I have been detaching the backhoe when I do this type of loading work.
If you get a backhoe, you need to make sure you have the right brackets and that your hydraulic pump is loader-capable. I would also suggest getting a newer backhoe that uses tandem telescoping hydraulics for boom swivel rather than the rotary vane swivel. While my rotary swivel has been performing adequately, there are no longer parts available for them.
(1) JD Straight 450 crawler dozer with manual outside blade; (2) JD 2010 diesel crawler loaders; (1) JD 2010 diesel dozer with hydraulic 6-way blade; (2) Model 50 backhoe attachments, misc. other construction equipment
I'll have to keep that in mind. Are they easy to come by? So far I've only got about 6-8 hours invested in this project and I'm almost ready to change the plates (maybe a few seals) and put her back together.
Well after doing a field repair on my hand (should of got a few stiches, but super glue seems to be holding it together well) I was able to make some more progress on the machine. I made a support system with a floor jack and some lumber and had the final drive off in about 15 minutes. Looks like the brake band needs to be re-lined but everything else seems to be fine. Now on to removing the throwout bearing and final drive casing so I can get this thing fixed and put it to work.
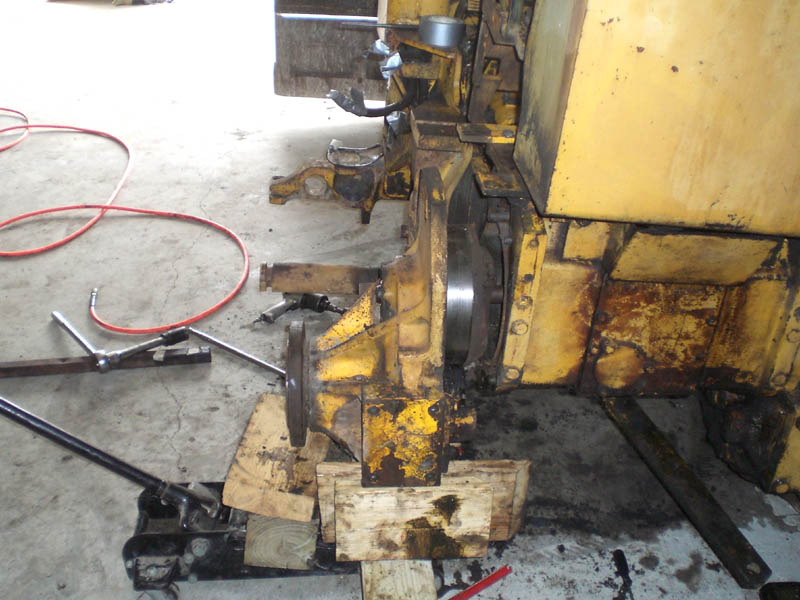
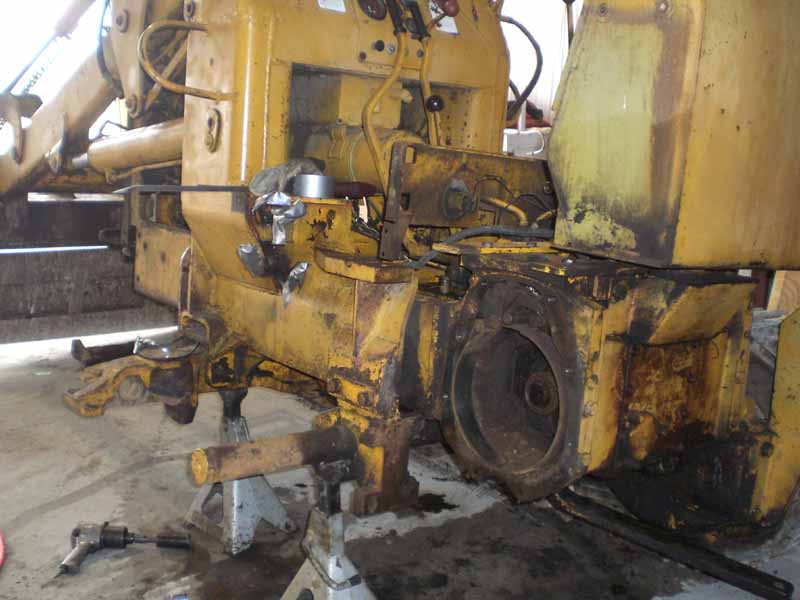
Well after doing a field repair on my hand (should of got a few stiches, but super glue seems to be holding it together well) I was able to make some more progress on the machine. I made a support system with a floor jack and some lumber and had the final drive off in about 15 minutes. Looks like the brake band needs to be re-lined but everything else seems to be fine. Now on to removing the throwout bearing and final drive casing so I can get this thing fixed and put it to work.
I would say, based on my experience, that nothing for a crawler is easy to come by but you do see the backhoe attachments available from time to time on this site, EPay, Craigslist, and elsewhere. They were used for industrial wheel tractors as well as crawlers so they are out there. It will be harder to find one without cracks or welds.Griff wrote:I'll have to keep that in mind. Are they easy to come by?
I would think the hardest thing to find will be the backhoe brackets for the crawler to mount the backhoe if your crawler doesn't already have them. My crawler came with them so I didn't have that problem. Lavoy, Jdemaris, and others may have some ideas for you on that.
(1) JD Straight 450 crawler dozer with manual outside blade; (2) JD 2010 diesel crawler loaders; (1) JD 2010 diesel dozer with hydraulic 6-way blade; (2) Model 50 backhoe attachments, misc. other construction equipment
Well just another update:
I finally got into the clutch today, everything was rusted together pretty bad. I was pretty amazed at how simular it was to the clutch in my motorcycles. I pulled all the plates and used a 4 in wire wheel on an angle grinder to clean them up. It actually worked really well, I put it back together and put the final drive back on. After about 10 minutes I was able to get everything adjusted. I used a 4' long pipe to turn the drive wheel to know exactly when the clutch was disengaging. I was shocked at how easy the job was, and after about 2 hours of work I went from having a rusted together clutch to having it cleaned up (within spec) and the final drive back on the machine. I am considering welding the track frame back to the machine but I am going to see if I can get the 4 bushings from john deere first. Still need to replace 2 of my lower rollers and the track adjuster, it sure is tempting to just put the originals back on now that I'm so close to having her going again. Now that I see how easy this clutch job is I am considering doing the other side as well, think I could have it done in a half day with the replacement parts on hand.
I finally got into the clutch today, everything was rusted together pretty bad. I was pretty amazed at how simular it was to the clutch in my motorcycles. I pulled all the plates and used a 4 in wire wheel on an angle grinder to clean them up. It actually worked really well, I put it back together and put the final drive back on. After about 10 minutes I was able to get everything adjusted. I used a 4' long pipe to turn the drive wheel to know exactly when the clutch was disengaging. I was shocked at how easy the job was, and after about 2 hours of work I went from having a rusted together clutch to having it cleaned up (within spec) and the final drive back on the machine. I am considering welding the track frame back to the machine but I am going to see if I can get the 4 bushings from john deere first. Still need to replace 2 of my lower rollers and the track adjuster, it sure is tempting to just put the originals back on now that I'm so close to having her going again. Now that I see how easy this clutch job is I am considering doing the other side as well, think I could have it done in a half day with the replacement parts on hand.
One thought on rollers is if you have any other bad rollers on the other side, put 5 new rollers on the one side, and use the leftovers to repair the other side. Not really a good idea to mix and match new and used rollers unless the overall diameter is real close.
New sealed lifetime rollers are not that pricey, and then you will likely never have to touch them again.
Lavoy
New sealed lifetime rollers are not that pricey, and then you will likely never have to touch them again.
Lavoy
Who is online
Users browsing this forum: No registered users and 147 guests