I just tried to weld up a hole in my 6-way joy stick and drill it out. I mig welded the hole up then when drilling the hole it work hardened and smoked my drill bit. I was drilling at 600 rpm and feeding by hand on my mill...
What do you guys use to weld up the holes with?
JT
Welding Linkage Holes
I have done brass, and wire, both drill hard. If you have to, get a carbide drill bit, spendy, but that should do it. I think I may have pilot drilled a smaller hole first, and seems to me one of the holes I used a carbide burr from a die grinder in the drill press to finish out the hole.
Lavoy
Lavoy
Parts and restoration for antique and late model John Deere crawlers.
Owner and moderator www.jdcrawlers.com
Owner and moderator www.jdcrawlers.com
Usually right where the bead blends with the base metal you can get some hardening. I have also used a cast wire, that seems to be the best, just real spendy.
Lavoy
Lavoy
Parts and restoration for antique and late model John Deere crawlers.
Owner and moderator www.jdcrawlers.com
Owner and moderator www.jdcrawlers.com
-
Labparamour
- 440 crawler

- Posts: 124
- Joined: Tue Dec 10, 2013 10:38 am
- Location: Duvall, WA
I've noticed that on pieces I've welded and then tried drilling. Was watching a vid yesterday of using TIG to build up broken bolt or tap to remove from a hole. That got me to wondering: I've heard in the past that welding/heating if metal is oily can oil harden the metal. I've since tried to clean thoroughly since.
Not sure if its the best solution but, on my son's TD7, we drilled yoke for blade control slightly oversize then I turned some small bushings from bolts...
Not sure if its the best solution but, on my son's TD7, we drilled yoke for blade control slightly oversize then I turned some small bushings from bolts...
"next time" go to the local hardware store and just get a carbide masonry bit. Resharpen for metal drilling. It's good for several holes and cheap. I've drilled a heavy truck spring with them done that way.jthornton wrote:I ordered a carbide tipped drill, I have lots of carbide end mills and they cut right through. I guess the welding hardens it a bit.
Thanks
JT
Tip was given to me by a local custom machine shop.
I wouldn't think the presence of oil would harden anything. I know there is oil hardening and oil quenching, but that is quite different than just having some oil on the part. You have to be past red hot to really begin to harden something.
Lavoy
Lavoy
Parts and restoration for antique and late model John Deere crawlers.
Owner and moderator www.jdcrawlers.com
Owner and moderator www.jdcrawlers.com
-
jthornton
- 440 crawler
- Posts: 165
- Joined: Thu Jan 23, 2014 5:33 am
- Location: Poplar Bluff MO
- Contact:
It was definitely hard on the hole edge, the center part drilled just fine. Could be the carbon in the oil or something that hardened it like that stuff you put on steel to case harden it.
As for sharpening a masonry bit to cut steel it is cheaper to just get a $20 carbide tipped 135° bit than to fool around trying to grind carbide.
In any case the letter P carbide tipped drill will be here today. I just hope I can remember how to put it back together LOL.
JT
As for sharpening a masonry bit to cut steel it is cheaper to just get a $20 carbide tipped 135° bit than to fool around trying to grind carbide.
In any case the letter P carbide tipped drill will be here today. I just hope I can remember how to put it back together LOL.
JT

Sorry I didn't see this sooner.
As mentioned, filling and redrilling holes is a lot easier if it is brazed in. Or get a brass or steel bushing in there, you can even drill them oversized for the bushing and epoxy it in.
In regards to carbide drill bits, the easiest and cheapest item there is buy a carbide masonry drill bit from the hardware store, it will cut through most anything you need to drill and be cheap in addition to being readily available. Just had to do that the other day, a guy was making a metal handle for a broken scraper head and apparently used a piece of drill rod to connect the head to the handle, he was planning on crossdrilling and pinning it to the aluminum handle but a couple of bits later had only made a divot then he came and got me. Dug a masonry bity out of the coffee can and with plenty of oil it drilled through it in one shot without slowing down.
-
jthornton
- 440 crawler
- Posts: 165
- Joined: Thu Jan 23, 2014 5:33 am
- Location: Poplar Bluff MO
- Contact:
Being an engineer/machinist I can't force myself to use a masonry bit to drill a hole in steel when I want a specific size hole.
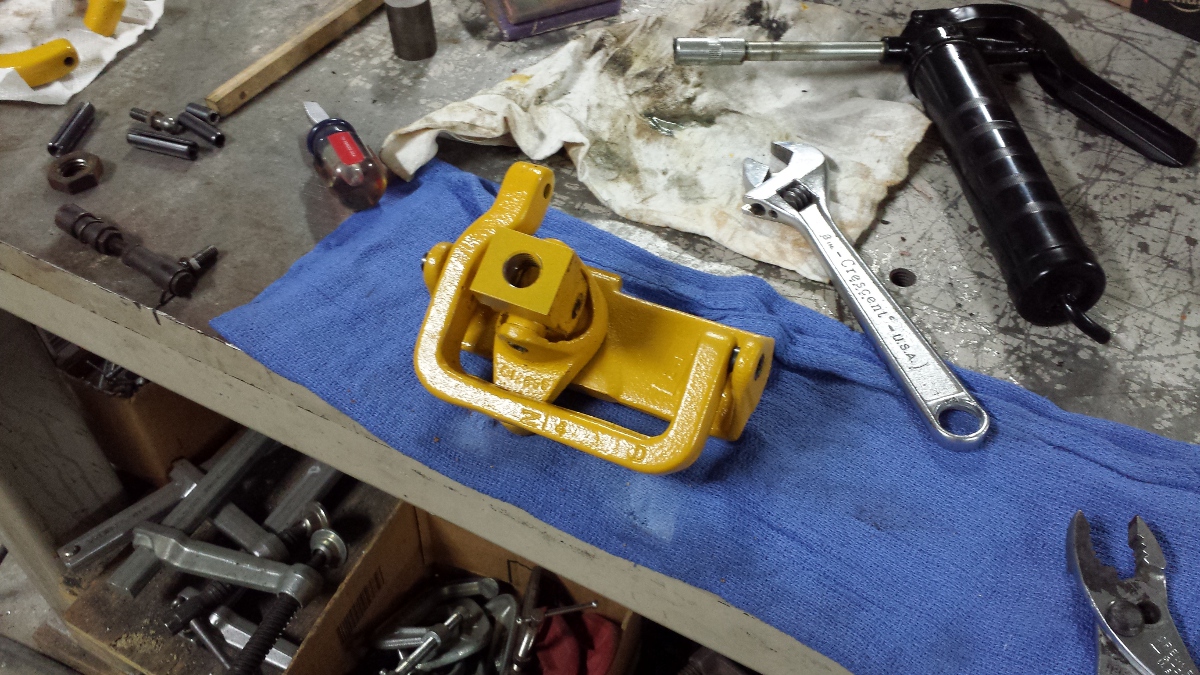
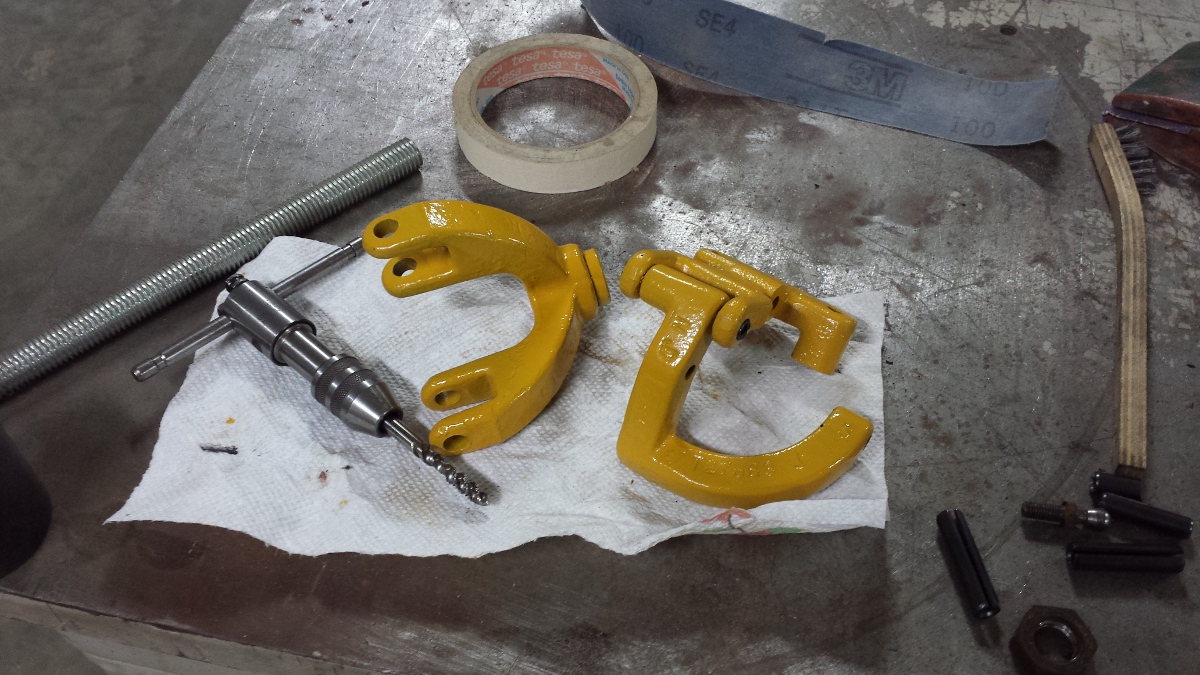
On another note, I welded up one part (the U shaped part) and put it in my kiln and annealed it. I took it up to 1500°F over an hours time then let it soak 15 minutes. Then I shut it down and let it cool overnight, by 6am the kiln was down to 200°F so that told me it was a nice slow cooling which it needed. I just drilled the part with a HSS bit with no problems so I'm a happy guy.
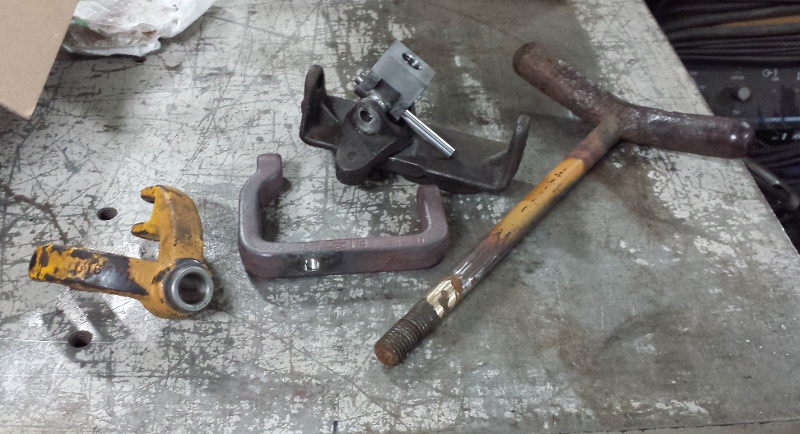
Some parts I made from scratch, some I'm putting bushings in and some I'm drilling and some I'm oversizing the holes... making progress.
JT
On another note, I welded up one part (the U shaped part) and put it in my kiln and annealed it. I took it up to 1500°F over an hours time then let it soak 15 minutes. Then I shut it down and let it cool overnight, by 6am the kiln was down to 200°F so that told me it was a nice slow cooling which it needed. I just drilled the part with a HSS bit with no problems so I'm a happy guy.
Some parts I made from scratch, some I'm putting bushings in and some I'm drilling and some I'm oversizing the holes... making progress.
JT
I have been looking at doing the same thing, putting in bushings, oversizing the worn out pivot holes, new pivot pins, whatever it takes to get the 6 way and the backhoe linkages back to usable state on my machine. After I get the tracks back on and the hoses fixed of course. Keep the pictures coming, inspirational. Is the paint rattlecan, brush on or a 2K?
Who is online
Users browsing this forum: No registered users and 165 guests