The tracks are setting on the floor in front of the crawler so they have to be loaded first.
I loaded them one at a time on the forklift and took them out to the trailer.

Here's the second track being loaded.
I just slid them off the forks and let them drop down onto the trailer.

The tracks are laid out so they can be washed.
They had to be kept back far enough to leave room for the crawler in front of them.
I pulled the end up and chained it to the trailer ramps so I can easily wash the whole track.

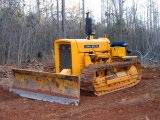
The crawler was then picked up in the front with the forklift and carefully brought outside so I can get the forklift in behind it.

Here she is just ready to slip onto the trailer.

Set the crawler down on the trailer and backed the forklift out from under it.

Then I loaded up the rest of the parts that need to be power washed.

All cleaned up and ready to go back home.


Links to other post
http://www.jdcrawlers.com/messageboard/ ... php?t=7511
-1 http://www.jdcrawlers.com/messageboard/ ... php?t=7554