2010 Repair

General help and support for your Lindeman through 2010 John Deere crawler
MADJACK
430 crawler
430 crawler
Posts: 57
Joined: Thu Dec 10, 2009 2:58 pm
Location: www.homegunsmith.com

Post by MADJACK » Mon Aug 02, 2010 11:30 am

I can't thank you enough for this excellent thread!

I'll be tearing into my 2010 soon to do the motor, and whatever else needs doing. It's really nice to see some of what I'll be getting into ahead of time. :shock:

Awsome pics and explanations!

Jack

User avatar
Pammark
440 crawler
440 crawler
Posts: 195
Joined: Wed Jan 31, 2007 1:04 pm
Location: Marysville, Ohio

Back to it

Post by Pammark » Tue Aug 03, 2010 8:52 pm

Thanks for all the compliments on my post. I hope I do not bore you with too many pictures.

Image

In earlier posts, I mentioned the right clutch pressure plate fingers were stuck in the IN position. After I unbolted the plate, the fingers popped out and appeared OK. I even exercised them several times and they did not stick. I think a previous owner kept adjusting the throw-out bearing IN until to stuck and rusted that way. The left clutch still has the plates in while the right clutch have them removed.

Image

I have the complete set of plates laid out for inspection. The left set look nice and clean while the right set are caked with rust.

Image

This is the internal drive that mounts on the driveshaft side. Note how the right is rusted up and not smooth like the left one. Also note the left has a groove and ring around the outside while the right casting does not even have the groove. Odd, unless that was a later improvement. I think the left clutch is newer than the right.

Image

I started to work on the water pump. Earlier posts mentioned to rebuild the pump, since all the internal parts can be purchased separately. I used a hub puller with 5/16" bolts (grade 5) in the fan bolt holes. The pulley pulled off real easy this way.

Image

I used a gear puller to gently remove the impeller. It came off without cracking. Looks good.

Image

This is the picture pressing out the shaft with a 20 ton shop press. At first I tried this with the impeller still on, but had second thoughts to remove it first. Just imagine this picture with the impeller removed and that is how I pressed the center shaft out. According to the parts book, the bearing was supposed to have a C-clip around to hold the bearing in. The C-clip was missing, but the slot was clean and correct. Small chrome sockets make good narrow punches the diameter of the shaft

Image

SUCCESS! I got the water pump apart without breaking anything. The round rubber peice lying in the pump casting is the seal. The bearing felt slightly wobbly. I can purchase the seal and bearing and assemble the pump. Should be good as new.
JD 2010 Crawler with Loader

User avatar
JD440ICD2006
350 crawler
350 crawler
Posts: 1113
Joined: Tue Aug 22, 2006 3:57 pm
Location: South Carolina

Post by JD440ICD2006 » Tue Aug 03, 2010 9:03 pm

I realize that I have only one opinion, but you cannot post enough pictures especially with the quality of pictures and the narratives that you include.
Thanks for taking the time to do this.
1959 JD 440ICD w/64 Power Angle Tilt Blade
1959 JD 440ICD w/63 Manual Angle Blade
1959 JD 440IC w/602 Manual Angle Blade
1959 JD 730D W SE (many options)
1950 JD M S w/M-20 Mower
1952 JD M W
1955 FORD 640 (burns the most fuel)

hemiracing
40C crawler
40C crawler
Posts: 15
Joined: Fri Oct 09, 2009 10:46 am
Location: Maine

just a thought

Post by hemiracing » Wed Aug 04, 2010 7:19 am

I don't want to tell you what to do, as you seem to have a good plan. I did what you did last year exept I also did a complete rebuild on the engine. I found a blast cabnet to be my best friend. I got a few diffrent types of media (plastic beed, walnut shell, etc). After taking things apart they went into solvent cleaners and were degreased and then blasted. I found I was better able to evaluate the parts I had, and was shocked to find that most were fine and were well within usable limits. I also found it to be great in the reassembley as it all went back together just great. I did this like I said over a year ago, we have put over 600 hrs on the machine and none real easy and it works perfect in every way. I spent a little more time and a lot less money and could not be happier. The one other thing I found was no matter how smart I thought I was when it came to adjustments you have to follow the manual to the letter. Even if it seems odd at the time it IS the only way to do it right..... Just a Thought Paul

User avatar
Pammark
440 crawler
440 crawler
Posts: 195
Joined: Wed Jan 31, 2007 1:04 pm
Location: Marysville, Ohio

Post by Pammark » Wed Aug 04, 2010 9:57 am

I appreciate the comments and advice. Paul, I do not plan to tear into the engine at all. The hour meter says 1,700 hours and even though it was not working at the end, I believe the hours are close. The engine runs well, no smoke and starts OK. Just looking at the pinions and rear sprockets seem to point to low hours. If it ain't broke, don't fix it.


Mark
JD 2010 Crawler with Loader

User avatar
Tigerhaze
350 crawler
350 crawler
Posts: 2278
Joined: Thu Jul 06, 2006 12:13 pm
Location: West-Central MO

Post by Tigerhaze » Wed Aug 04, 2010 10:05 am

Hi Mark-

I have always found that it is beneficial extra time spent to clean the usually inaccesible areas of the engine while you have things apart. It sometimes makes future repairs a little easier the next time around.

I know what you mean about not wanting to tear into an engine that is working properly- once you do that it is inevitable that you will find something worn and then end up doing a partial rebuild or restoration ;)
(1) JD Straight 450 crawler dozer with manual outside blade; (2) JD 2010 diesel crawler loaders; (1) JD 2010 diesel dozer with hydraulic 6-way blade; (2) Model 50 backhoe attachments, misc. other construction equipment

User avatar
Pammark
440 crawler
440 crawler
Posts: 195
Joined: Wed Jan 31, 2007 1:04 pm
Location: Marysville, Ohio

Still Tearing Down

Post by Pammark » Thu Aug 05, 2010 7:23 am

Let me explain the Pammark username. I have a 100 acre organic spread (Pammark Farms) in central Ohio that is my golf game. Between that and several other projects I have going, keeps me out of trouble. My wife is Pam and I am Mark, so the name was easy. Sounded better than Markpam anyway.

So much for the small talk, let's get to the important stuff.

I drained and removed the fuel tank and the tank was clean inside. The sending wire to the fuel gauge was disconnected (that could explain why I used a stick to measure the fuel all the time). I pulled the sediment bowl and it was 1/2 water and gunk and I pulled the two fuel filters and they were well used. If the engine ran well with all this shit in the line, I can imagine how better it will run with a new lease on life.

Image

Image

I removed the starter and voltage regulator and tried to decipher the wiring mess I have to work with. Some of the wires have been replaced and are in good condition. Some have numerous splices and tape jobs per linear foot. I will replace the odd balls and wrap everything in nice sheating when it is all done.

Image

Here is the generator, starter and voltage regulator ready for the repair shop. In the nearby town is Jones Ignition and Terry does a fine job of rebuilding stuff like this. A few years ago I took in a tractor starter for him to fix with the guess that I was spending at least $75 to fix it. He charged me $15. What did you do? He said a set of brushes and sleeve bearings. I doubt if labor was in that expense. Well anyway, Terry can have fun testing the units out and repair what is needed.

While I was following the wiring and testing out circuits with an ohm meter for continuity, I drew a schematic. It all looked correct.


Image

This is the dash panel removed so I can see what surprises lie inside. Looked OK with a healthy coat of dirt. Two years ago I replaced the master ignition switch, so I know it is good to go.

I ended the night with draining the engine oil and removing the oil filter. Other then a few parts off the engine for cleaing purposes, this is as far as I plan to go tearing into the engine.

Mark
JD 2010 Crawler with Loader

User avatar
Pammark
440 crawler
440 crawler
Posts: 195
Joined: Wed Jan 31, 2007 1:04 pm
Location: Marysville, Ohio

Continue on

Post by Pammark » Mon Aug 09, 2010 10:26 am

I was busy over the weekend, but not much to take any pictures of.

I started by trying to remove the fuel sending unit so I could test it. I removed the small screws but the unit was stuck in well. Instead of tearing it out, I decided to let the good seal and test the unit in the tank. A fuel sending unit is nothing more than a variable resistor. The windings are normally exposed, but since fuel is non-polar and not a good conductor, it does not seem to affect the operation of the unit. I hooked up an ohm meter to the sender and tank ground and got a resistance reading. I rolled the tank over to flop the float the other direction, and the ohm meter read a different resistance reading. That seems to work. To verify, I hooked up the dash wire and used a portable 12V power pac to energize the dash. The fuel gauge read empty with the tank upright and full when I flipped the tank over. I think it works OK. One problem with fuel tank sensors is, you need to have a good tank ground. Mine was connected through the mount of the tank, which can become variable with time/corrosion/vibration. To ensure a good tank ground, I added an extra ground wire to one of the small sender screws that will eventually be connected to the chassis ground later.

The water temp gauge in the dash was questionable. I removed the sensor tip from the radiator port and heated it gently with a small propane torch. I saw the temp gauge rising, so that works.

I removed the transmission oil temp gauge sensor from the side of the tranny and heated it with the torch gently too. It did not register anything, so I guess I add that to the parts wish list.

I know the oil pressure gauge worked in the dash, so I did not do any further testing of it.

I removed the two oil pressure sending units from the front of the engine. One is connected to the dash oil idiot light and the other to the hour meter. I plumbed up an air hose quick-disconnect and gently added air pressure from a portable air tank. I connected the ohm meter to the wire connector and base ground and got opposite readings between the two oil units. The idiot light sensor is normally ON with no air pressure and OFF when pressure is added. This makes sense since you want the idiot light ON in the absence of pressure. The hour meter sensor is normally OFF and turned ON when pressure was added. That will turn the hour meter ON when oil pressure is present. The sensors worked OK, so I reinstalled them.

On the other side of the transmission is the gear sensor switch that should be ON when the HLR is in neutral. It is OFF when the HLR is in either forward or reverse position. It did not work very well. Add it to the parts wish list. This switch is connected through the starter circuit as a safety measure from starting the dozer in gear. Think safe, buy the switch and wire it in.

The tach works because I added a new speedometer cable last year.

I still need to address a tranny hyd leak around the filter area. I blasted the area again with a pressure washer to remove more gunk. I removed the oil cooler in the front since I eventually want to replace all rubber hoses. I blaster it with water pressure and it appeared to be partially plugged. That might be what caused the oil leak. That is OK though; I will still remove the filter and associated tubing to check for tightness, cracks, etc.

Mark
JD 2010 Crawler with Loader

User avatar
RedDirt
420 crawler
420 crawler
Posts: 44
Joined: Wed Jan 21, 2009 6:10 pm
Location: California Sierra Nevada Mtns

Post by RedDirt » Mon Aug 09, 2010 11:21 am

Thank you for the pictures and write up. I'll be doing steering clutch work on my 2010 soon and your work here is just fantastic for me.

On the trans temp sender, I gave up on the factory gauges and found at Kragen's a $15 coolant temp gauge that was a perfect fit in the dash and the sender screwed right in and was the right length for the trans. Works like a charm for me. I used the same $15 coolant temp gauge and sender for the coolant. Not original but they work great for me.

I'm having oil leaks from either the pinion shafts or the final drives that are fouling the clutches. Does it look like the seals could be replaced on either or both the pinion and the final easily if needed? If so do you see the path to that solution?

Thanks,
RedDirt - 2010 Diesel Crawler Loader Drott 4in1

User avatar
Pammark
440 crawler
440 crawler
Posts: 195
Joined: Wed Jan 31, 2007 1:04 pm
Location: Marysville, Ohio

Post by Pammark » Mon Aug 09, 2010 11:43 am

Dear RedDirt,

See if you can tell whether the leaking oil is thick or thin. The trans has thinner oil and the finals have 80W gear oil. When the final pinion and clutches are out, the seals to the final are right there on the end. Easy to change. The seal on the drive shaft looks like it is internal in the bull gear assembly, which means you have to open up the top plate rear of the transmission to see what you are doing.

Mark
JD 2010 Crawler with Loader

User avatar
Pammark
440 crawler
440 crawler
Posts: 195
Joined: Wed Jan 31, 2007 1:04 pm
Location: Marysville, Ohio

Post by Pammark » Wed Aug 11, 2010 8:54 pm

My brother Rich in Dallas has been helping me with ideas and suggestions. He has a very nice Model A roadster all restored to original condition. He has given me the following advice. Buy a cheap ahooogha horn at Harbor Freight and install under the vehicle and save the original in parades. Make sure the Zenith Carb has the high performance jets installed. Add the external spin-on oil filter. Send the engine off to get the babbit bearings replaced with modern rod bearings. Honestly, I think he has my dozer confused with his Model A.

He did offer to make a nice CAD drawing of the dozer and exploded view, if I send him a hand-drawn version. Here it is, Rich.

Image

He also sent me a nice gift of a pint of Cast Iron Factory Gray high temperature ceramic paint. It is to paint the exhaust manifold and make it look pretty for a long time. It is used by Model A'ers all around. It is from Eastwood Company, UPC code 607174 001842. You can find it plus other goodies at www.eastwood.com.

Image

I removed the steel hydraulic lines running through the loader. The one has been repaired (brazed) and was cracked. I will either try to find a new one or repair the one I have.

The front belly pan has 5 bolts mounted under the front chunk of iron bumper. Four were snapped off. Instead of standing on my head drilling them out, I found it easier to remove the bumper and flip it over. I did have to pull the front crankshaft pulley too.

Image

I used the handy-dandy rope block n tackle to ease the iron loose and lower it to the ground.

Image

Image

This is the bottom of the front bumper. It might be hard to see, but only one of the five bolts is removed. The others get to be drilled out (oh what fun).

I did get the tracks laid out and pressure washed most of the dirt off.

Image

I did see a hint of yellow paint both on the track links and top plates.

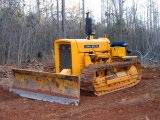
Since I now have over 1,000 visitors to this post, I think it is right to ask for a vote on how I should paint the dozer. I heard School Bus Yellow is very close to the original JD Old Construction Yellow color. I found it at my local Ace Hardware Rust-o-leum equipment paint. Should I paint the tracks Yellow (like the hint I seen) or Black to make them standout? You vote.

I still have to work on the tranny hyd leak, then I am ready to paint and assemble. I have the radiator at the repair shop and the starter and generator at Jones Ignition.

I did note the steering throw-out bearings were different on each side. The one was a sealed bearing and the other had an oil hole in it. I figure the correct bearing should be a sealed bearing since the clutches are dry. The oil hole version must be for the later model wet clutches.

Mark
JD 2010 Crawler with Loader

User avatar
RedDirt
420 crawler
420 crawler
Posts: 44
Joined: Wed Jan 21, 2009 6:10 pm
Location: California Sierra Nevada Mtns

Post by RedDirt » Wed Aug 11, 2010 9:21 pm

I used school bus yellow from kirker with 10 drops of red and 10 drops of black per sprayable gallon in the ultra glo urethane. Been holding up good for a year now . Got it from smartshoppersinc.com

On the tracks I sprayed the inside but just put rust converter on the outside figuring that they would get ground off anyway.

Here is the link to my paint work over in show and tell:
http://www.jdcrawlers.com/messageboard/ ... php?t=4583

I think you are doing great on your project. Thanks for all the pictures. They will help me with future maintenance.

Best,
Reddirt
RedDirt - 2010 Diesel Crawler Loader Drott 4in1

User avatar
Pammark
440 crawler
440 crawler
Posts: 195
Joined: Wed Jan 31, 2007 1:04 pm
Location: Marysville, Ohio

Post by Pammark » Wed Aug 18, 2010 10:17 am

Hang Loose;

I am still working on the project. I already have the radiator back from the shop all clean and painted nice. I have the steering throw-out bearings on order. Lavoy is working on other parts for me. My generator/starter/voltage regulator is still at the shop.

I already heated and removed the broken belly plate studs in the chin. I still need to remove the hyd filter and associated plumbing to check for leaks.

Lavoy says he can not get a new steel hyd line for the loader (model 820). It is the line that operates the bucket tilt cylinders that run along the right side. Does anyone have them for sale? I need the inner steel line for the retract side of the cylinder.

If I can not find one, I'll attempt to repair the one I have. I think it is 3/4 tubing and I'll see if I can fine a tubing fitting with threads that I can silver solder on it. The place above the large lift cylinder got pinched with age and cracked.


Mark
JD 2010 Crawler with Loader

User avatar
Draco
40C crawler
40C crawler
Posts: 16
Joined: Fri Aug 13, 2010 2:54 am
Location: Hatton, Alabama

Post by Draco » Wed Aug 18, 2010 12:16 pm

Great work so far Mark.

I have the same problem with the bumper on my 420....I have one hole and the rest are broken off. How did you get yours out? I see you said "I already heated and removed the broken belly plate studs in the chin" Only thing I know to do is drill and tap....gonna take a while to do it that way. Shed a little light if you don't mind...help the newbie. :D

My vote on the tracks would be BLACK.....I like to have something a little different though. It'll look good IMO.
Quit laughing...I think I broke something.

User avatar
Pammark
440 crawler
440 crawler
Posts: 195
Joined: Wed Jan 31, 2007 1:04 pm
Location: Marysville, Ohio

Post by Pammark » Wed Aug 18, 2010 1:24 pm

Dear Draco

My belly capscrews were 1/2" broke off about flush. I used a centerpunch and made a mark in the center. I drilled through with a 1/4" bit. I heated the drilled hole cherry red with a torch to almost liquifying the top edge. Let cool for a day. This heating will expand the drilled bolt, but with nowhere to expand into the large chin casting, bellied the drilled stud up and down. As it cooled, it shrank to loosen the threads. I added some penetrating oil and used an easy-out for the rest. I did have to repeat the heating 2-3 times. I was a bit afraid to crack-off a part of the chin casting.

Mark
JD 2010 Crawler with Loader

Post Reply

Who is online

Users browsing this forum: Bing [Bot] and 4 guests