2010 Repair
The weahter in Ohio got above 50, so I started into the dozer project again. The other week we had a warm spell and I got most of the carcass sprayed with gray primer.
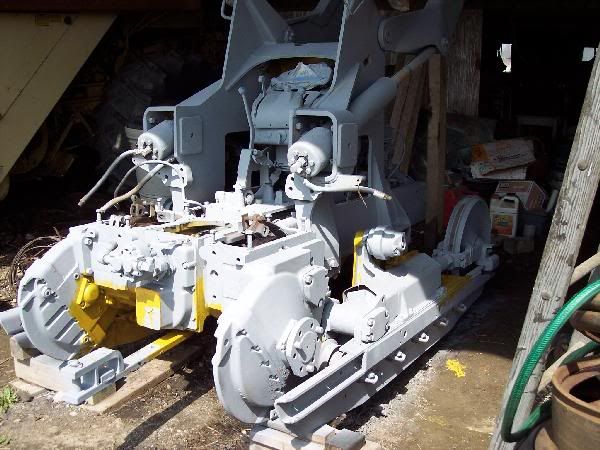
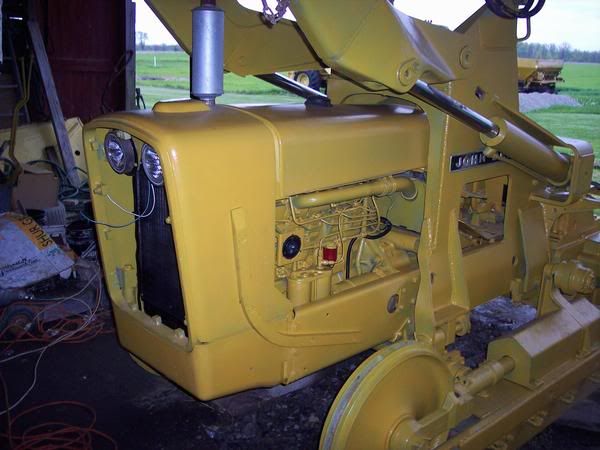
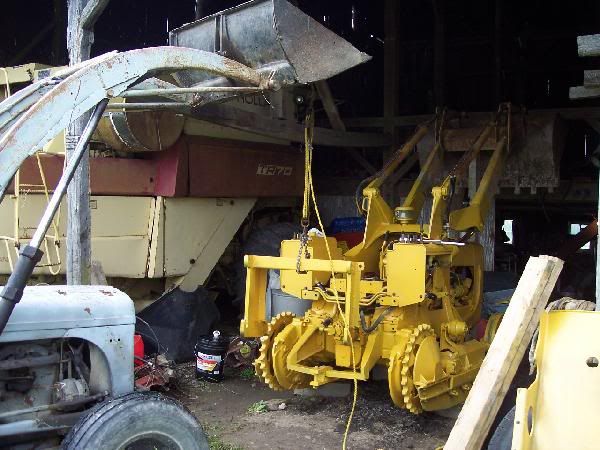
You can see I painted the underside yellow, that was missed with the primer spray. I laid on my back underneath using a brush to cover the underside.

It was kind of close-quarters and I think I got more paint on my face and hair than on the dozer.
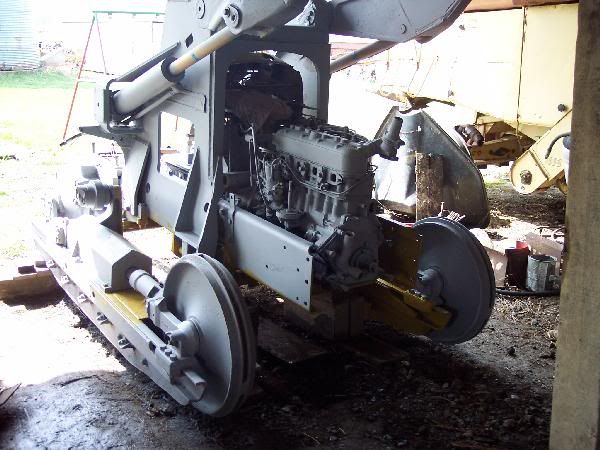
There will be a belly pan under that will cover most of the area. Plus after caked with dirt and mud, most of the yellow will be brown anyway.
I sprayed the rest of the top with a light coat of yellow. By time it has a second coat, it should be done for my specs.
Now you can see the areas where gray peeks through and the light yellow coat. I will do better next time.
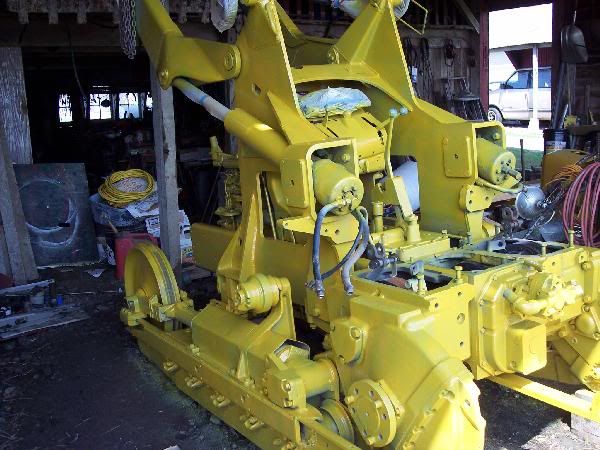
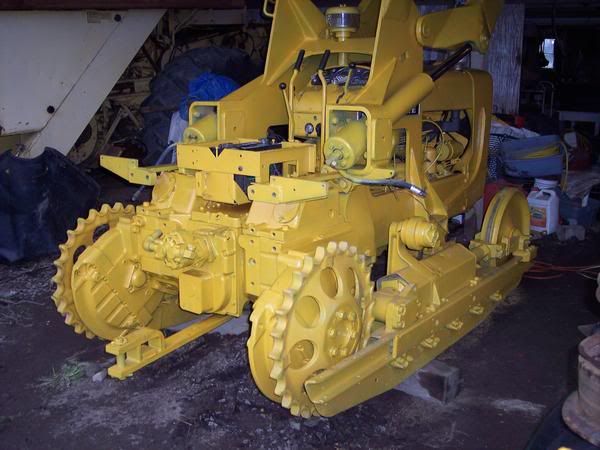
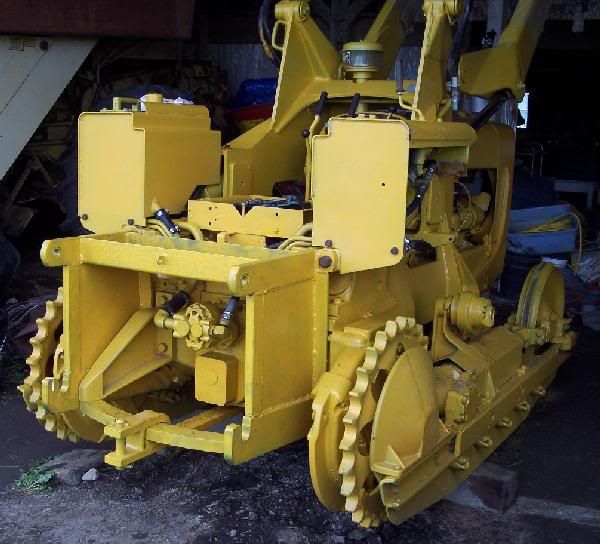
The rest of the dozer parts are already painted and ready to assemble. As I put the cap screws in, I will dab them with yellow as I go.
I was able to find the hydraulic coupler through Fastenal to fix my broken steel hyd line to the loader. The OD of the tubing was 7/8" and I bought a ferrul type fitting to 3/4" female std pipe thread. Now I can add the 3/4" rubber hyd line the last foot to the control valve assembly.
You can see I painted the underside yellow, that was missed with the primer spray. I laid on my back underneath using a brush to cover the underside.
It was kind of close-quarters and I think I got more paint on my face and hair than on the dozer.
There will be a belly pan under that will cover most of the area. Plus after caked with dirt and mud, most of the yellow will be brown anyway.
I sprayed the rest of the top with a light coat of yellow. By time it has a second coat, it should be done for my specs.
Now you can see the areas where gray peeks through and the light yellow coat. I will do better next time.
The rest of the dozer parts are already painted and ready to assemble. As I put the cap screws in, I will dab them with yellow as I go.
I was able to find the hydraulic coupler through Fastenal to fix my broken steel hyd line to the loader. The OD of the tubing was 7/8" and I bought a ferrul type fitting to 3/4" female std pipe thread. Now I can add the 3/4" rubber hyd line the last foot to the control valve assembly.
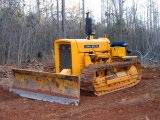
JD 2010 Crawler with Loader
-
JD440ICD2006
- 350 crawler

- Posts: 1113
- Joined: Tue Aug 22, 2006 3:57 pm
- Location: South Carolina
Love the pictures and the progess. You may have yours going before I have my 440ICD going.
1959 JD 440ICD w/64 Power Angle Tilt Blade
1959 JD 440ICD w/63 Manual Angle Blade
1959 JD 440IC w/602 Manual Angle Blade
1959 JD 730D W SE (many options)
1950 JD M S w/M-20 Mower
1952 JD M W
1955 FORD 640 (burns the most fuel)
1959 JD 440ICD w/63 Manual Angle Blade
1959 JD 440IC w/602 Manual Angle Blade
1959 JD 730D W SE (many options)
1950 JD M S w/M-20 Mower
1952 JD M W
1955 FORD 640 (burns the most fuel)
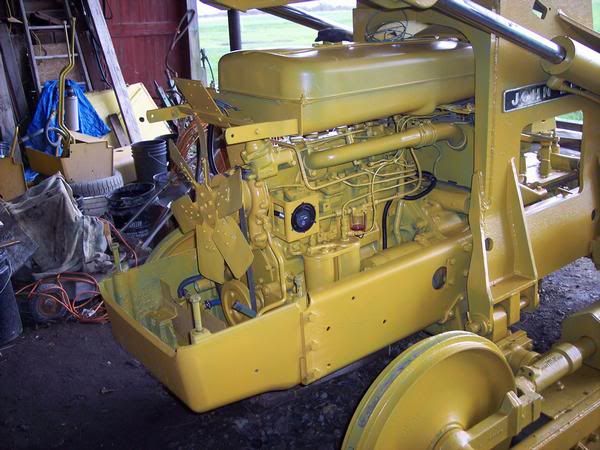
It has been rainy and cold in Ohio, so the dozer assemble project has been a little slow going. I would be nice to have an inside shop to work in, but the open shed will have to do.
I got the hydraulic filter assembly and assorted steel tubing all installed underneath. That was a bitch 1/2 to get all the tubing tight and inplace with little room to work. I also drained the tranmission fluid and some water came out at first. I am not sure if it was old water or new rain water blowing in from the rains we have had. Even though I tarp the ass end, rain still gets in.

Here I am using the rope pulley to lift the chin back in place. It bolted up easy. I also have the water pump installed.
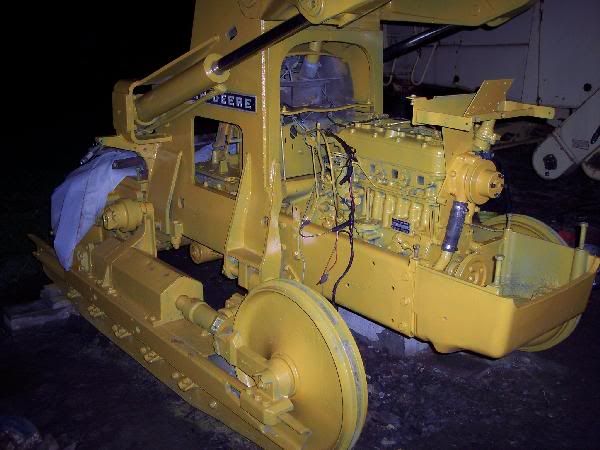
I have been working on the wiring as I go. The wrapped cable harness seems to be ok, but several wires from there on have repairs and bad junctions. I just clip the wire, solder on new with nice heat-shrink. I will eventually bundle the wires together with black plastic wrap.
I have the starter installed and wired up. I installed the fuel filters after filling them with fresh fuel. The brake rods in the rear are inserted with the nice new rubber boots too.
I hope to have the dozer running soon because I need to load compost in the spreader for the farm. Planting season will come as soon as the rains stop.
I got the hydraulic filter assembly and assorted steel tubing all installed underneath. That was a bitch 1/2 to get all the tubing tight and inplace with little room to work. I also drained the tranmission fluid and some water came out at first. I am not sure if it was old water or new rain water blowing in from the rains we have had. Even though I tarp the ass end, rain still gets in.
Here I am using the rope pulley to lift the chin back in place. It bolted up easy. I also have the water pump installed.
I have been working on the wiring as I go. The wrapped cable harness seems to be ok, but several wires from there on have repairs and bad junctions. I just clip the wire, solder on new with nice heat-shrink. I will eventually bundle the wires together with black plastic wrap.
I have the starter installed and wired up. I installed the fuel filters after filling them with fresh fuel. The brake rods in the rear are inserted with the nice new rubber boots too.
I hope to have the dozer running soon because I need to load compost in the spreader for the farm. Planting season will come as soon as the rains stop.
JD 2010 Crawler with Loader
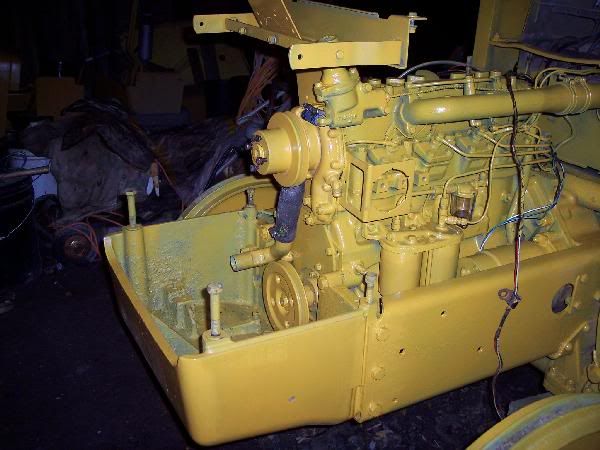
I have the hour meter installed, the fuel tank mounted with about 3 gallon of fresh fuel inside. No leaks.
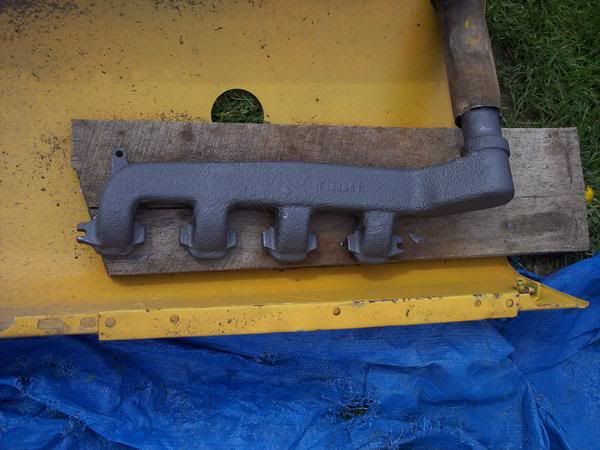
I painted the exhaust manifold with the Eastwood high temperature paint my brother donated for the cause. It is good for 1,500' and bakes on better when heated up. This is a common paint used by the avid Model A'ers. Ain't it pretty?
This is the tranmission oil cooler installed with new rubber hose connections.
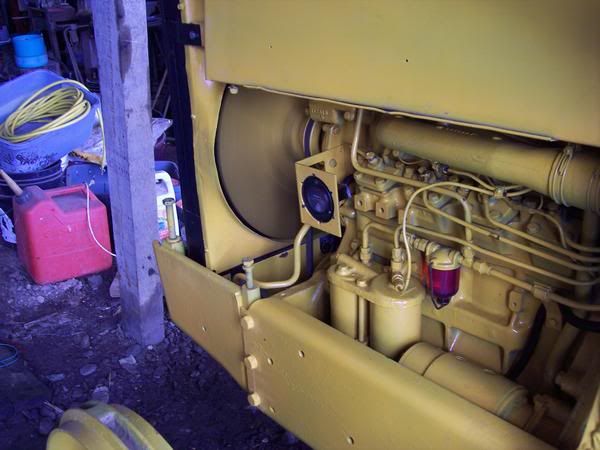
This is the other side of the engine with the voltage regulator installed. See the nice neat black plastic wiring harness wrap? It keeps all the stringey wires together.
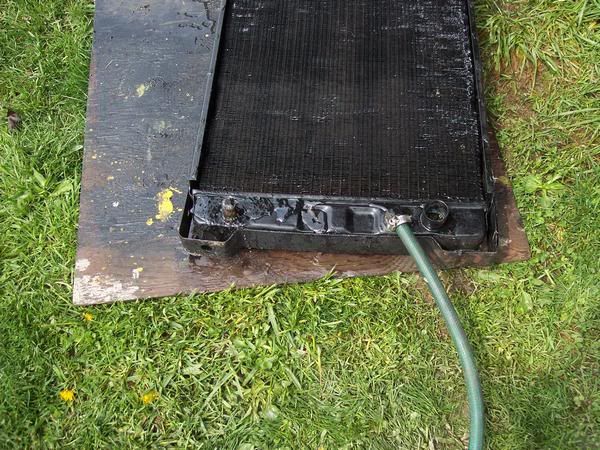
I had the radiator boiled out and painted black. But I tested the bottom oil cooler line and it was partially plugged with sludge. I hooked up a garden hose and ran water for an hour to flush out the goo. It ran a lot better than before. I am glad I tested that out. It is connected in series with the external oil cooler pictured above. If either is plugged, the cooling is reduced.
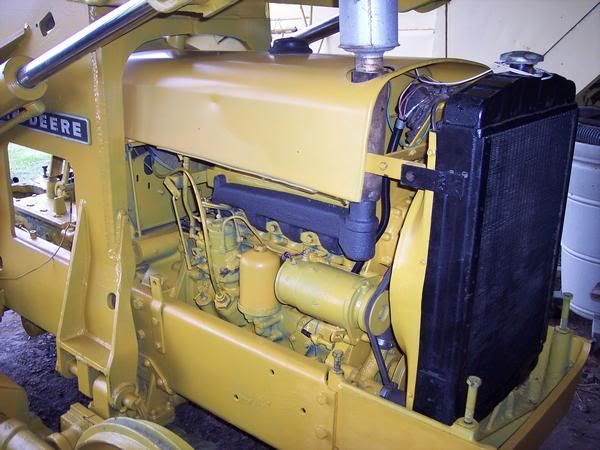
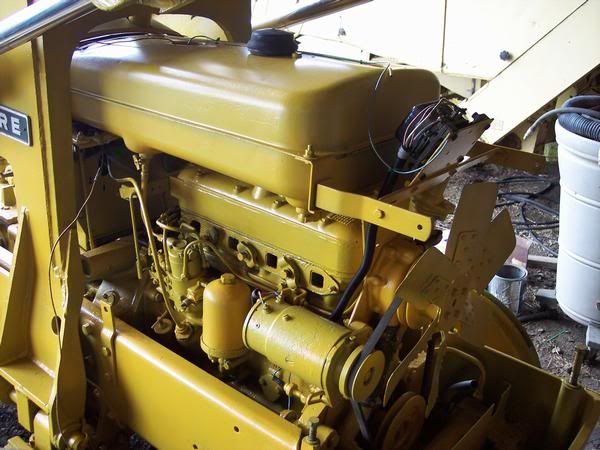
I got the hood on and the exhaust manifold with the muffler connected. I added 6 quarts of new Rotella engine oil, 5 gallon of hydraulic oil to the rear end and two gallon of 50:50 antifreeze. Looks good, but does she run?
There she goes!! It ran well. Actually, it was a chore getting it to start. I primed the system, cracked the fuel line ahead of the injector looking for fuel dribbles. I cracked open each injector line at the injector and cranked the engine looking for fuel squirts. It still took my pickup truck on some jumper cables to get it going. I called my brother in Texas so he could enjoy the purr of the engine too.
I had good tranmission oil pressure, engine temperature, and tach reading. The hour meter ran as well. I ran it about an hour to fully cook in the manifold paint. I had to jumper the generator field coils to get it to work. A few sparks and the generator light went off. I topped off the antifreeze too.
I shut the engine off and started on the rear end. The rear axles turned over slowly, even though the HLR was in neutral.
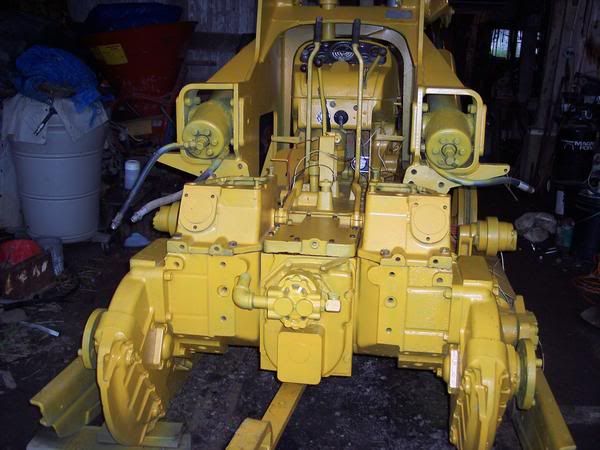
I installed the bull gear cap (center) casting and the two steering clutch castings. Now I get to reach in and hook up the brakes and steering linkage and adjust in. I hope to test it out before I continue to install the rear drive sprockets and track.
JD 2010 Crawler with Loader
I can't thank you enough for doing a photo blog of this restoration. If I ever restore my 2010s, I'll defintely be looking to these posts!
(1) JD Straight 450 crawler dozer with manual outside blade; (2) JD 2010 diesel crawler loaders; (1) JD 2010 diesel dozer with hydraulic 6-way blade; (2) Model 50 backhoe attachments, misc. other construction equipment
-
Paul Buhler

- 350 crawler
- Posts: 994
- Joined: Wed May 21, 2008 6:25 pm
- Location: Killington, VT
Could you share how you prepped the miscellaneous items for primer? You said you sand blasted and/or pressure washer some of the items, but I was wondering what solvents /cleaners/sanding you might have used for the rusty or oily parts. Thanks.
I admire your skills, patience, and persistence in resurrecting your machine; nicely done.
Paul
I admire your skills, patience, and persistence in resurrecting your machine; nicely done.
Paul
Paul Buhler
Killington, VT
420c 5 roll with 62 blade, FOPS, and Gearmatic 8a winch
Killington, VT
420c 5 roll with 62 blade, FOPS, and Gearmatic 8a winch
Thanks for the painting compliments. I am far from a professional painter. My idea is; if it looks good from 100 feet away, it is a success.
The pictures make my paint job look good and sometimes the shadows make my job look bad. It is what it is. Close inspection will see deep scratches and chipped off areas still visible. I may not win any trophies but your compliments in this forum is enough.
I tried a small sand blaster but I really was afraid to get the sand in places you wished it didn't, like seals and bearings. The major area was chipped off with a puddy knife, sanded with a 1/2" drill sanding disk and hand paper. If gunk was hardened in the corners for the last 40 years, I left it and painted right over the top. It can stay on for another 40 years under a layer of paint.
I did buy a half-full 5 gallon can of solvent thinner at an auction sale for a dollar. I am a chemist and it smelling mostly like Methyl Ethyl Ketone (MEK). That is a good degreaser. I did splash some of it on in places to pull off grease and stuff. With any solvent, wear gloves because it is absorbed through the skin and will effect your liver. Be safe. Too much elbow grease and solvent pulled off the old paint too.
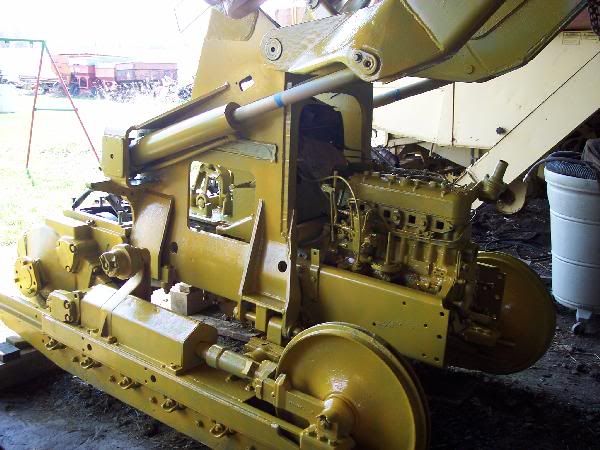
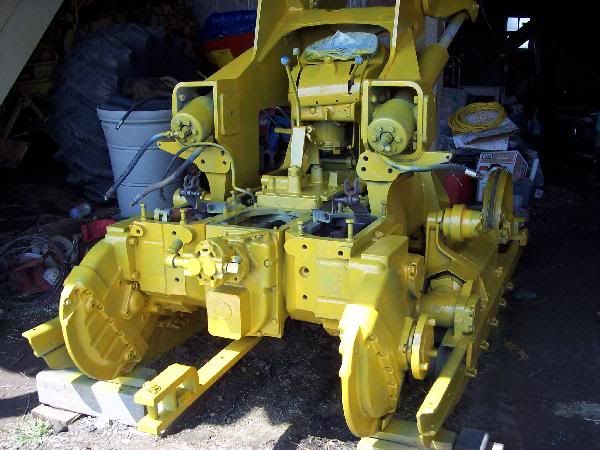
I taped off the large areas, bagged the electrical harness and rubber hyd hoses and sprayed with Ace Hardware primer gray. I shot a thin coat of Ace Rustoleum School Bus Yellow followed by another coat days later. Each cap-screw and bolt I clean with a brush-wheel and benchgrinder, assemble and dab with yellow paint by brush. I also dab any scratches I ding while assembling. That is it. No secret, just a watchfull eye for the chips and dings.
Mark
The pictures make my paint job look good and sometimes the shadows make my job look bad. It is what it is. Close inspection will see deep scratches and chipped off areas still visible. I may not win any trophies but your compliments in this forum is enough.
I tried a small sand blaster but I really was afraid to get the sand in places you wished it didn't, like seals and bearings. The major area was chipped off with a puddy knife, sanded with a 1/2" drill sanding disk and hand paper. If gunk was hardened in the corners for the last 40 years, I left it and painted right over the top. It can stay on for another 40 years under a layer of paint.
I did buy a half-full 5 gallon can of solvent thinner at an auction sale for a dollar. I am a chemist and it smelling mostly like Methyl Ethyl Ketone (MEK). That is a good degreaser. I did splash some of it on in places to pull off grease and stuff. With any solvent, wear gloves because it is absorbed through the skin and will effect your liver. Be safe. Too much elbow grease and solvent pulled off the old paint too.
I taped off the large areas, bagged the electrical harness and rubber hyd hoses and sprayed with Ace Hardware primer gray. I shot a thin coat of Ace Rustoleum School Bus Yellow followed by another coat days later. Each cap-screw and bolt I clean with a brush-wheel and benchgrinder, assemble and dab with yellow paint by brush. I also dab any scratches I ding while assembling. That is it. No secret, just a watchfull eye for the chips and dings.
Mark
JD 2010 Crawler with Loader
-
Paul Buhler
- 350 crawler
- Posts: 994
- Joined: Wed May 21, 2008 6:25 pm
- Location: Killington, VT
Continuation assembly of the yellow beast.
Two of the 3 light bulbs were blown, so I bought two new ones for the front. The old one will be used in the rear. I painted the light fixtures black and assemebled the fronts. I have the front radiator case installed and the side protector slide guards. I painted the grill black and it is installed now (since the picture). I dabbed yellow over the scratches and she looks good.
I got all the clutch/brake linkage together. My owners manual had a nice simple explanation of adjusting in the clutches and brakes. Loosten the brake set screws and open the brake shoes.
Set a 1 inch block of wood under the steering control arms at the base over the arm stop. Adjust the clutch adjuster until the throughout bearing just touches the clutch fingers. Remove the block and exercise the steering arm several times. Adjust again if needed. You should have a 1 inch play until the spring pressure of the clutches can be felt. Adjust both sides the same.
Put the 1 inch spacer under the steering handle again. Now tighten the brake shoes tight against the brake drum. Adjust the brake set screw until it touches the clutch cam. Remove the spacer and you should see the small rotation until the brakes are activated. Do both sides the same.
Now loosten the brake adjuster until you have about a 7-9 inch steering arm pull. You will see the clutch will release first, followed by the brake shoe tightened.
We started the dozer engine and ran the rear end. For the first time in several years (3 since I had it) both sides worked. Harray, success! We adjusted the brakes again so both sides felt the same.
Make sure you tighten the set screw on the brake drum through the peep hole to the finals.
I bolted on the rear sprockets, dabbed paint on the cap screws and started the engine to try it out again. Everything worked well, even in reverse.
I bolted on the seat base and battery box. Also started to install the brackets for the loader reservoir and control box.
The rear counterweight bracket connects to the loader. I need to get it painted and installed before I continue on with the loader assembly.
JD 2010 Crawler with Loader
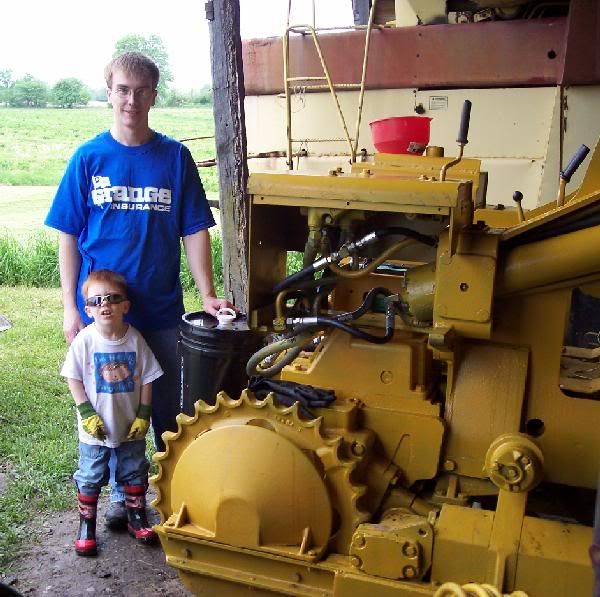
My trusty helpers. Aaron (son-in-law) helped me put more of the dozer together. Cameron (grandson 4 yrs old) helped scatter the tools across the barn. I can use all the help I can get.
I am still wating on the steel hydraulic tubing repair, but in the meantime, I just hooked up the rubber hose I had as a quick repair done in the past. I replaced the three main hoses, the 3/4" main from the pump and the two 1/2" lines to the lifting cylinders. The old ones looked 50 years old. That way I can at least lift the loader and move the dozer out of the barn.
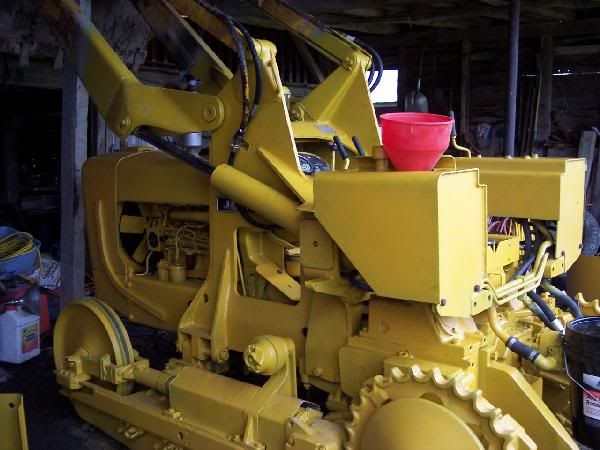
Before I installed the loader filter assembly, it made a nice large hole to add the two buckets of hyd fluid. Note the red funnel.
With the rear end so light, I was afraid to lift the bucket for teatering the machine. Here I am lifting the rear weight bracket into place. Note how I used a rope block n tackle to make the final up and down adjustment easy and smooth. The tractor is my 1948 Ferguson TO-20.
She is ready for the acid test. I fired up the beast and the bucket moved up and down, a little spongy with all the air in the system. No leaks either. Success!
I installed the rest of the loader shields and side panels and that is done.
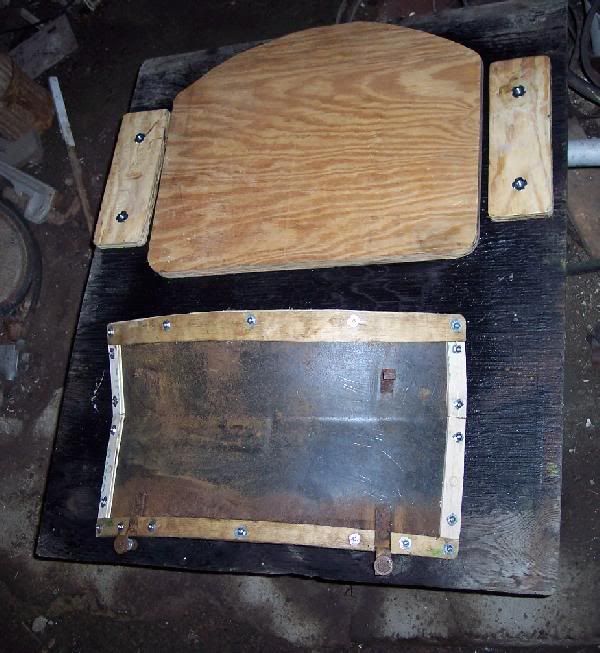
Now for the seat. The old seat base was pretty bad, rotten plywood, coil springs that seen their day, mouse infested padding and ripped up covering. I just cut out a new plywood base (top center).
The arm rests were gone so I made up the plywood base for them too (left and right side).
The backrest (bottom) needed new plywood tack strips around the edges, so I used 1/4" plywood underlayment for that. I had to soak the top and bottom pieces in water so they could be bent around the curved back.
I plan to paint the metal backrest black and cover everything with 2" foam rubber pad and seat fabric.
If the rains will ever stop in Ohio, I will paint the underside of the track and rear weights. Then put the tracks on and drive the machine again, this time with operational steering clutches.
JD 2010 Crawler with Loader
Nice job!
You mentioned that you were going to use two inches of foam rubber. That maybe OK on the arm rests but on the seat bottom I would recommend four inch or more quality seat foam. It is expensive but a worthwhile investment since you are doing such a nice job.
Gil
You mentioned that you were going to use two inches of foam rubber. That maybe OK on the arm rests but on the seat bottom I would recommend four inch or more quality seat foam. It is expensive but a worthwhile investment since you are doing such a nice job.
Gil
JD440-ICD loader; JD440-IC bulldozer; JD440-ICD backhoe; JD440-I backhoe; JD440-I tractor; + five recumbent JD440-ICs
Incredible thread.
Pammark
It's hard enough doing a restore like yours. Then add the time of taking all the pictures and all the text in your posts. Thanks so much for your willingness to share all this info with us.
I just joined this forum and will be picking up my 2010 track loader this week. It's nice and straight and everything works, but it has been out in the weather for most of it's life by the looks of it. It runs good too, smokes white at start up and then clears up after 3 or 4 minutes. I'm thinking maybe the head might be cracked. Doesn't antifreeze make white smoke?
Will be referring back to this thread and many others at this JD crawler site as I get to know my 2010. I hope you guys like questions cuz I'll be asking a lot of them! Al Z. Brownton, Minnesota
Afzimm,
Antifreeze burns with clouds of white smoke.
Pammark,
Back in April you said you needed to get the crawler running so you could use it as soon as the rain stops. I figure you still have another month or so to work on it.
Gil
Antifreeze burns with clouds of white smoke.
Pammark,
Back in April you said you needed to get the crawler running so you could use it as soon as the rain stops. I figure you still have another month or so to work on it.
Gil
JD440-ICD loader; JD440-IC bulldozer; JD440-ICD backhoe; JD440-I backhoe; JD440-I tractor; + five recumbent JD440-ICs
Who is online
Users browsing this forum: No registered users and 61 guests